Acorns are a quintessential Michigan local food. A few barrels of acorns (Quercus spp.) gathered before winter will bring you an abundance of nuts that are nutrient-dense, filled with complex carbohydrates, and are packed with plant proteins.
It takes effort to process the unpalatable, bitter nuts into a flavor-state that can be used in the kitchen, but that effort is well-worth it. Prepared acorn nutmeats have a flavor similar to the chestnut, and can be used in soups and pulverized into nut butter, as well as ground into flour for baking. The acorn has a special place in my home.
My father instilled in me the love for the oak tree and its acorns. My family gathers them in our yard, on walks, and friends drop them off by the bag-full. We shell acorns while watching Sunday college football games, or outside together in the park.
I am known also to host cocktail parties and haul out buckets of acorns to shell while friends catch up and mingle over drinks and cheese platters. I process enough nuts to make about 10-15 pounds of flour each fall. It is a nut that not only nourishes our bodies, but nourishes relationships and connectedness to the community around us.
Acorns start to fall in August, and can be readily be gathered off the ground well into the winter. Gather only those with firm, clean, and fresh-looking discs (the spot on top of the acorn where the cap was once affixed). Also discard any who’s cap appears dislodged, moldy, or simply “off.”
Make sure nuts with obvious insect infestation are discarded. Shelling acorns is done tediously by hand, with a hammer or pair of pliers, or by a hand-cranked nutcracker to process large batches.
Nutmeats will need to be soaked in water to remove the bitterness. Simmer the nutmeats in water at a 1:5 ratio and replace the water until the nutmeats are palatable and nutty-flavored.. To make flour from the acorns, dehydrate the nutmeats and then the dried nuts will need to be ground into flour. This can be done easily in a coffee grinder – simply toss a handful of dried nutmeats into the grinder and process it into a fine powder. Use immediately or freeze the remainder of the flour to extend its freshness.
Acorn Banana Bread
Ingredients ● 1 cup all-purpose (or gluten free) flour ● 1 cup processed acorn flour
● 1 TSP baking soda ● 1/4 TSP salt ● 1/2 cup butter ● 3/4 cup brown sugar ● 2 eggs, beaten ● 2 1/3 cups mashed overripe bananas ● 1-2 TBSP cocoa powder, if desired
Directions
Preheat oven to 350 degrees F (175 degrees C). Lightly grease a 9×5 inch loaf pan.
In a large bowl, combine the flours, baking soda and salt.
In a separate bowl, cream together butter and brown sugar. Stir in eggs and mashed bananas until well blended. Stir banana mixture into flour mixture, add a TBSP or two of cocoa powder, if desired.
Pour batter into prepared loaf pan.
Bake in preheated oven for 60 to 65 minutes, until a toothpick inserted into center of the loaf comes out clean.
Let bread cool in pan for 10 minutes, then turn out onto a wire rack.
It’s that witchy time of year when the leaves blow from the trees and the winds howl through the misty October darkness. Apple cider, pumpkin carving and costume decorating is underway for the fun celebrations that fall across the last days of October. As a forager and herbalist, here’s my own Scary {but Edible!} list of Boo-tanical Horrors:
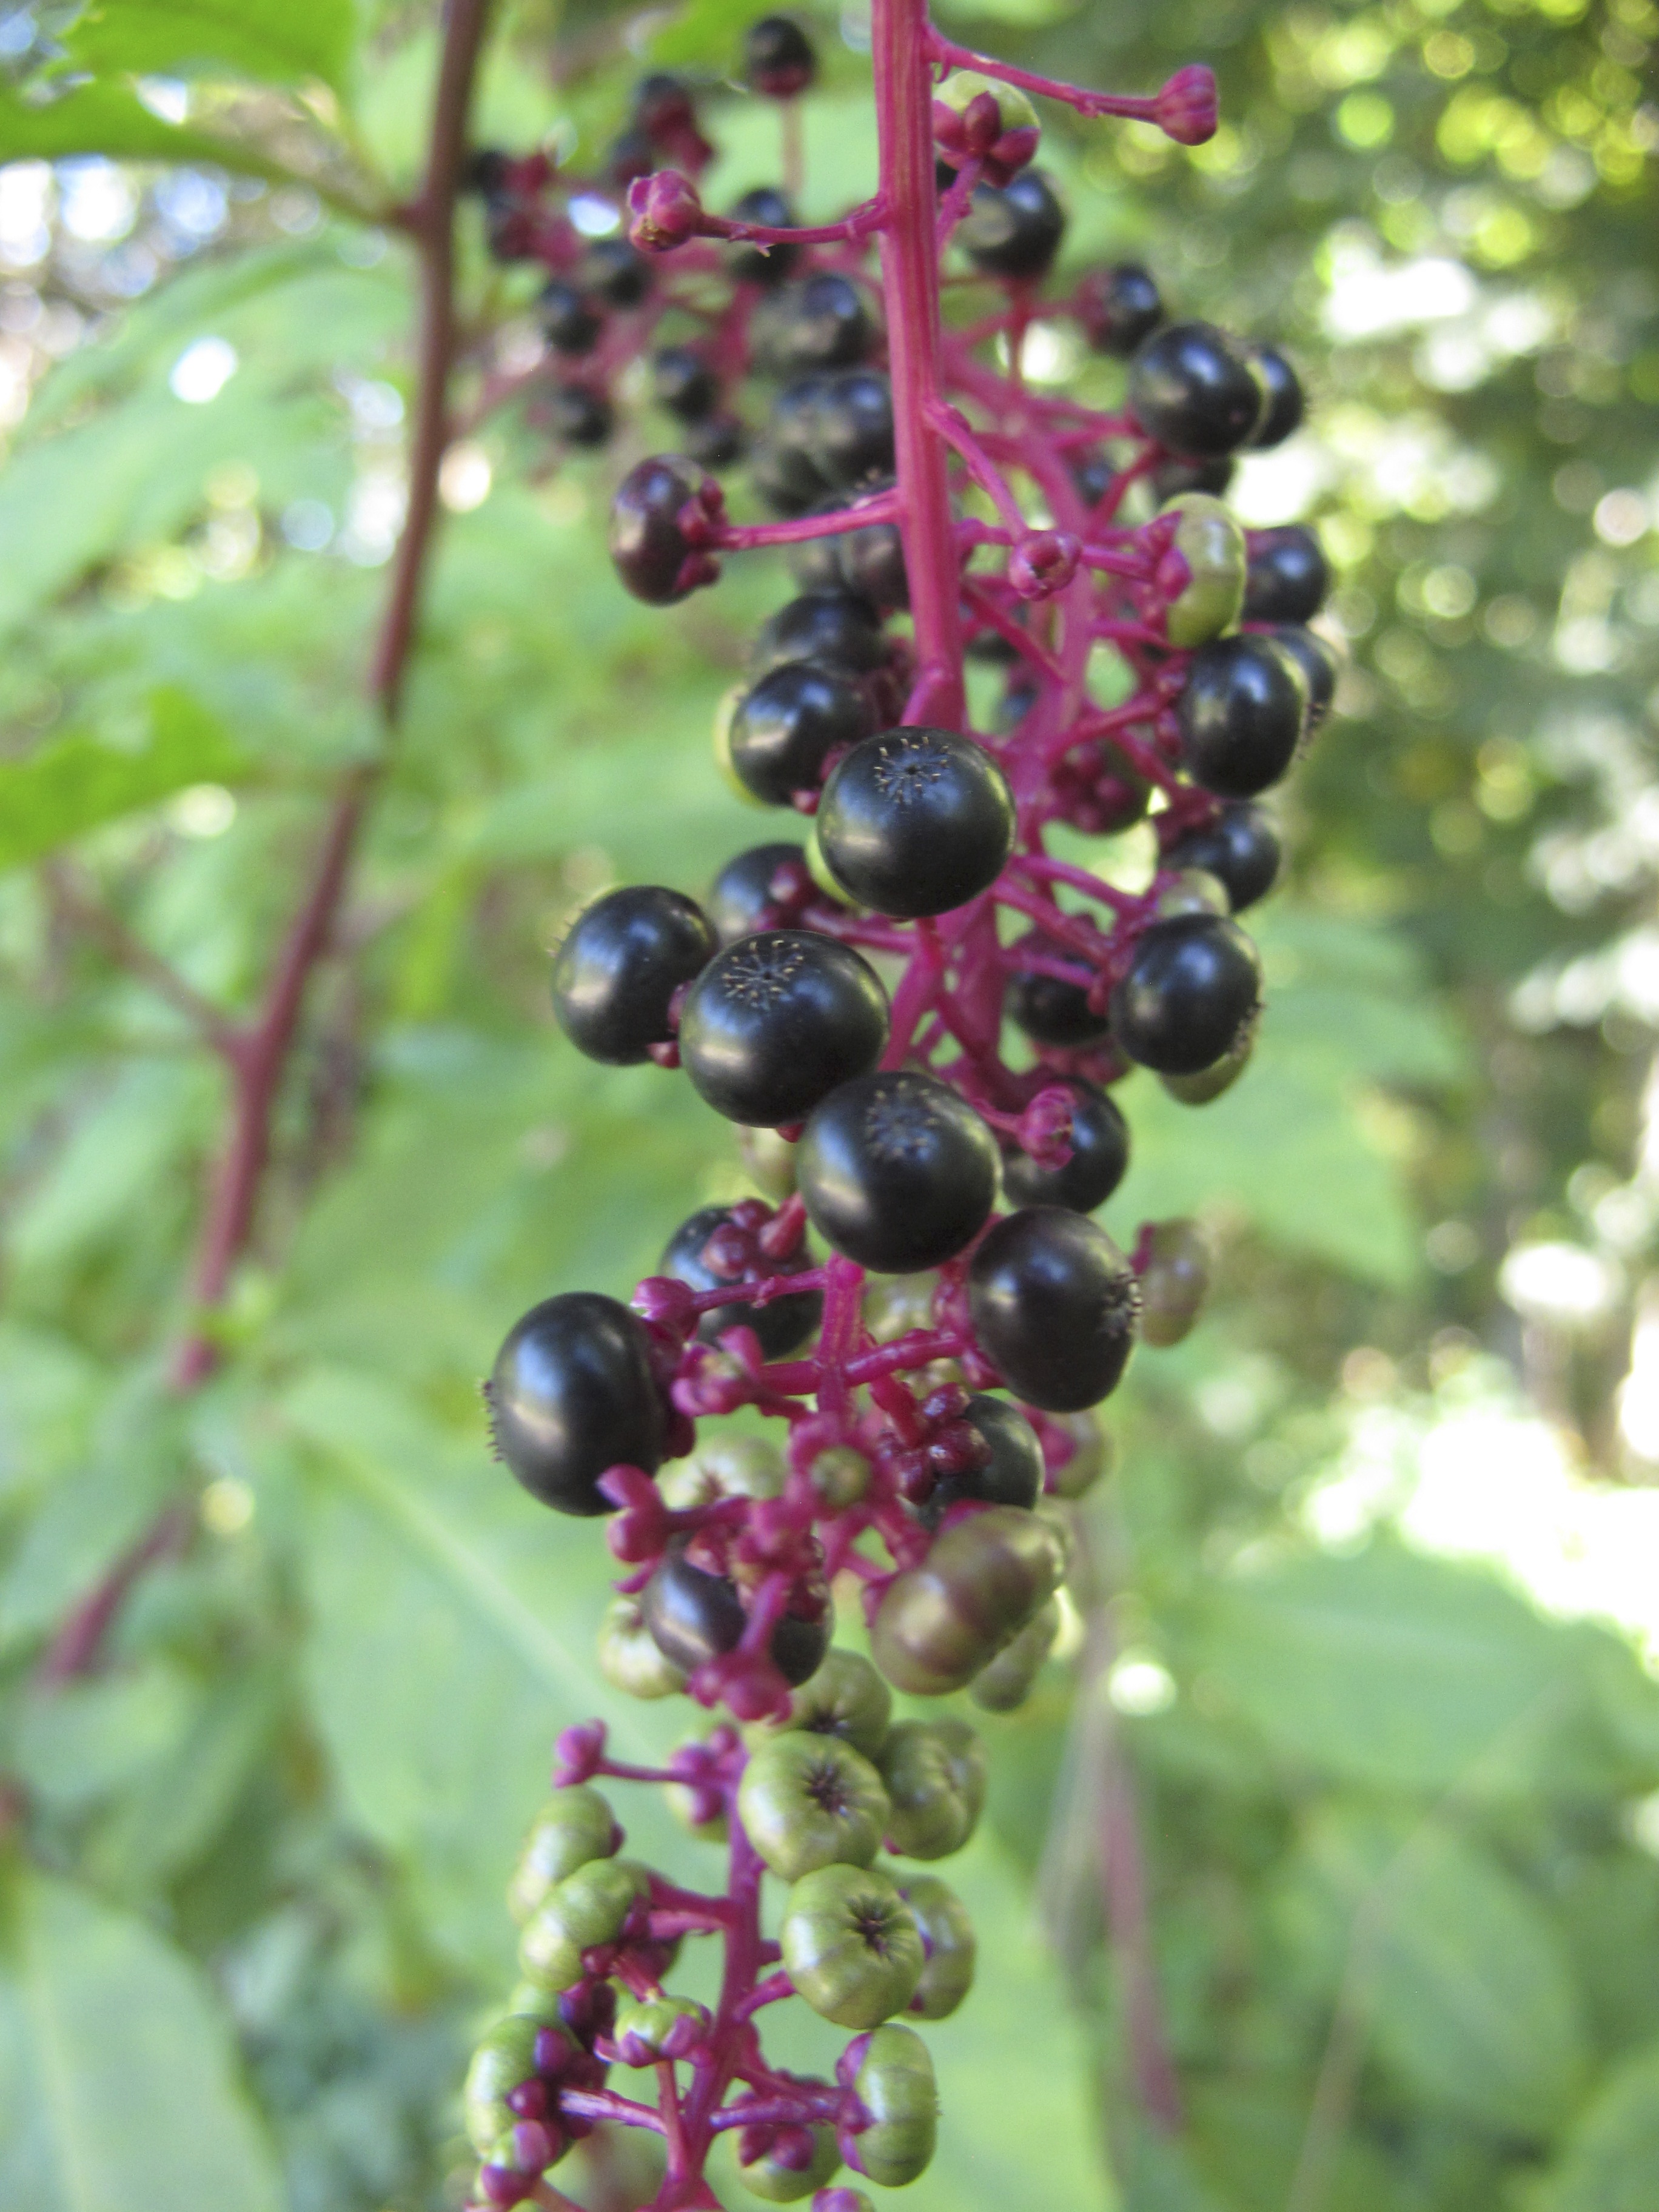
Poke (Phytolacca americana)
The pokeweed plant is very alien-looking with its bright purple clusters of berries and branching vibrant green stalks stretching across areas of disturbed ground and in waste places in urban lots and weedy garden plots.
Many think this plant is poisonous – and if eaten incorrectly, it can be. But the pokeweed, despite all the warnings, can be made edible by eating the early, tiny spring shoots to make the traditional Southern dish of poke salt and the root and berries are used in herbal plant medicine. The berries make a beautiful purple plant dye to color fabrics and decor projects.
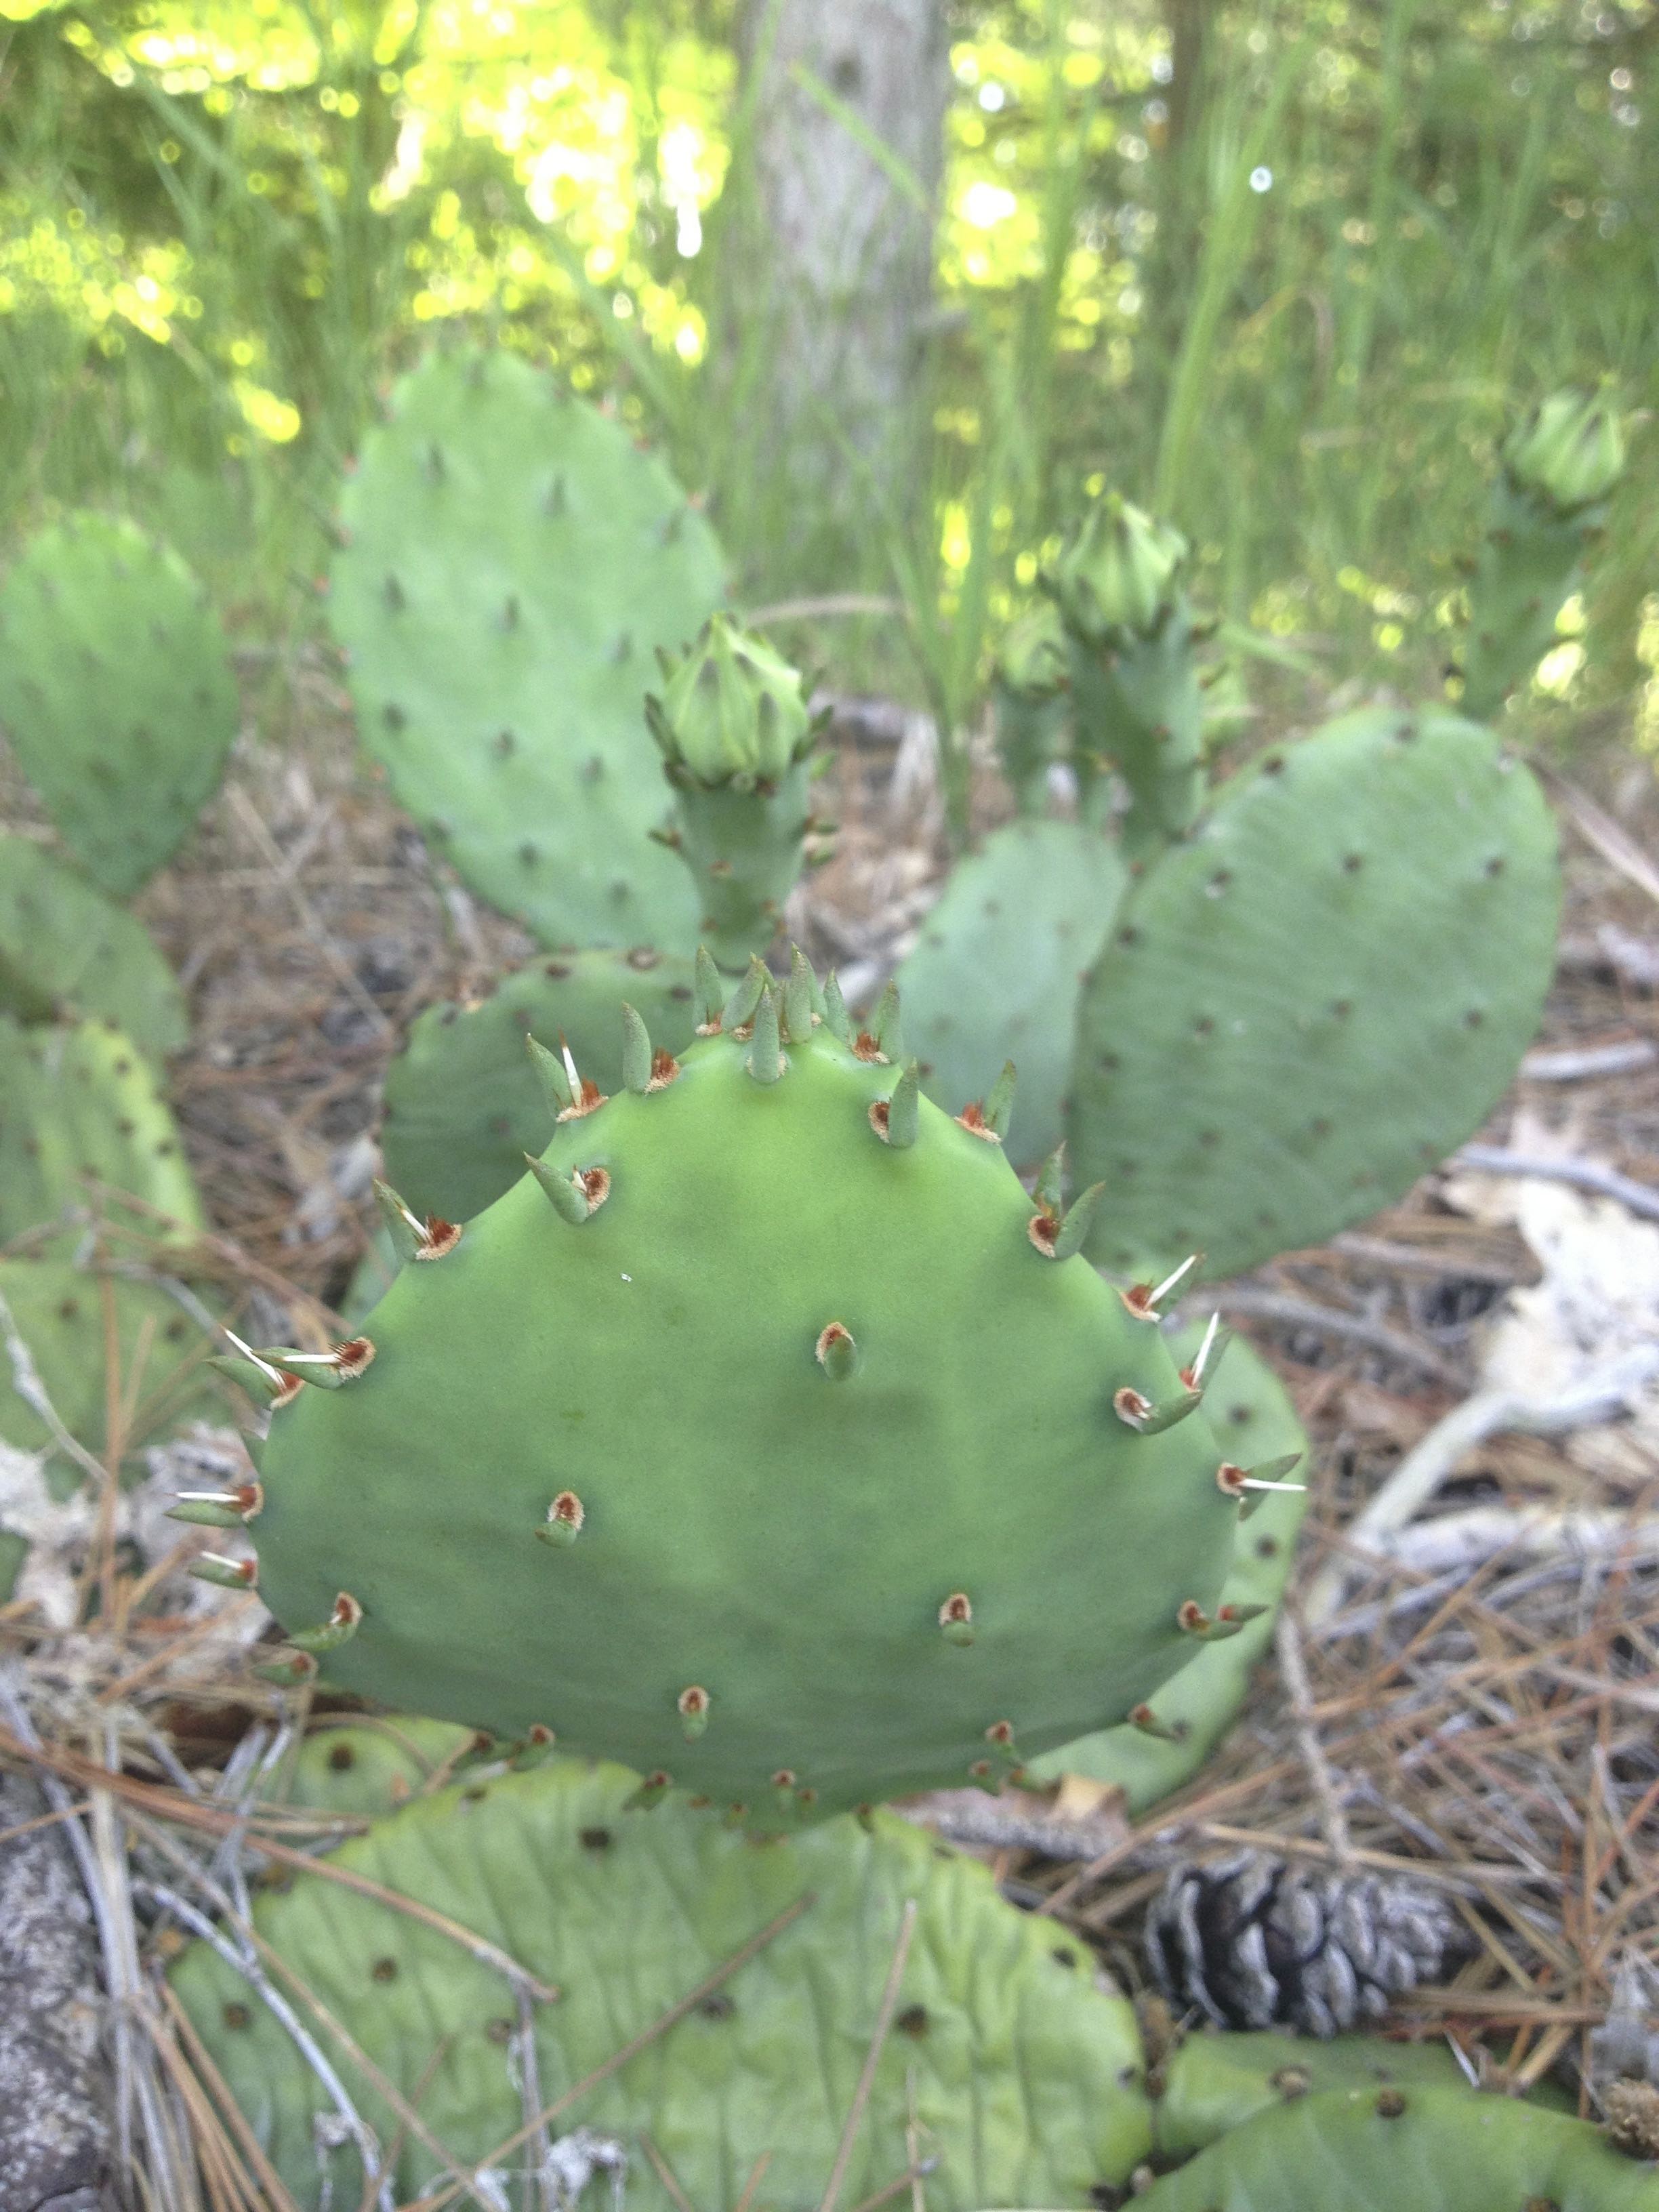
Prickly Pear (Optunia species)
Creeping along the ground with its red fruits dotting the landscape, the prickly pear cactus is the Midwest’s only wild cactus. The prickly pear grows in colonies, spreading across disturbed sandy and rocky soils, in south-facing locations.
Its spines ward off predators, but for those brave enough to handle the plant with leather gloves and remove it’s thorny glochids, the fruits can be used to make a delicious and fruity simple syrup for cocktails or sodas. It’s fruit can also be pureed to produce a fun and edible pink slime – perfect for Halloween tricks and treats.
Hawthorn (Crataegus species)
The hawthorn is a tree with a history of magic and folklore. The hawthorn grows as a rambling, hedgerow shrub with long and pointy spines lining its bark and branches warning everyone to hone their senses, lest they fall into the shrub’s spiny clutches while gathering the tree’s delicious fruits. Its berries are edible and can be used to make vinegar shrubs, cocktail syrups, and can be used similarly to that of the crabapple in cooking and hard cider-making.
And as the hawthorn is known to be a plant of the faery realm, it’s worth remembering to take a gift of butter for the plant faeries and to sing songs while harvesting the berries. At the very least – and if you don’t believe in the plant faeries – signing songs or whistling is a good way to express thanks and gratitude for the tree’s fruits as you harvest and protect you from their potential tricks.
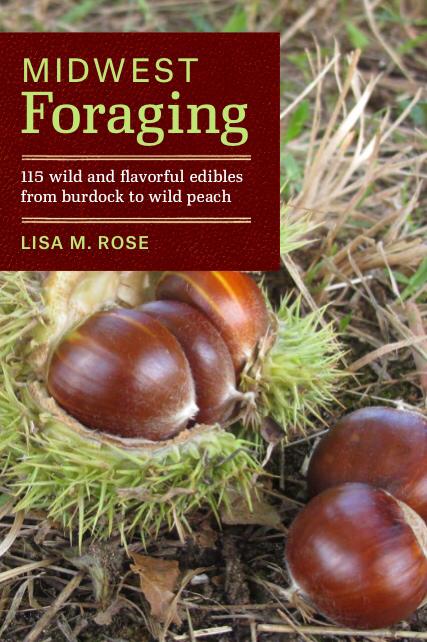
For more about these plants, how to harvest and how to prepare, check out my book, “Midwest Foraging”and have a safe and fun Halloween season!
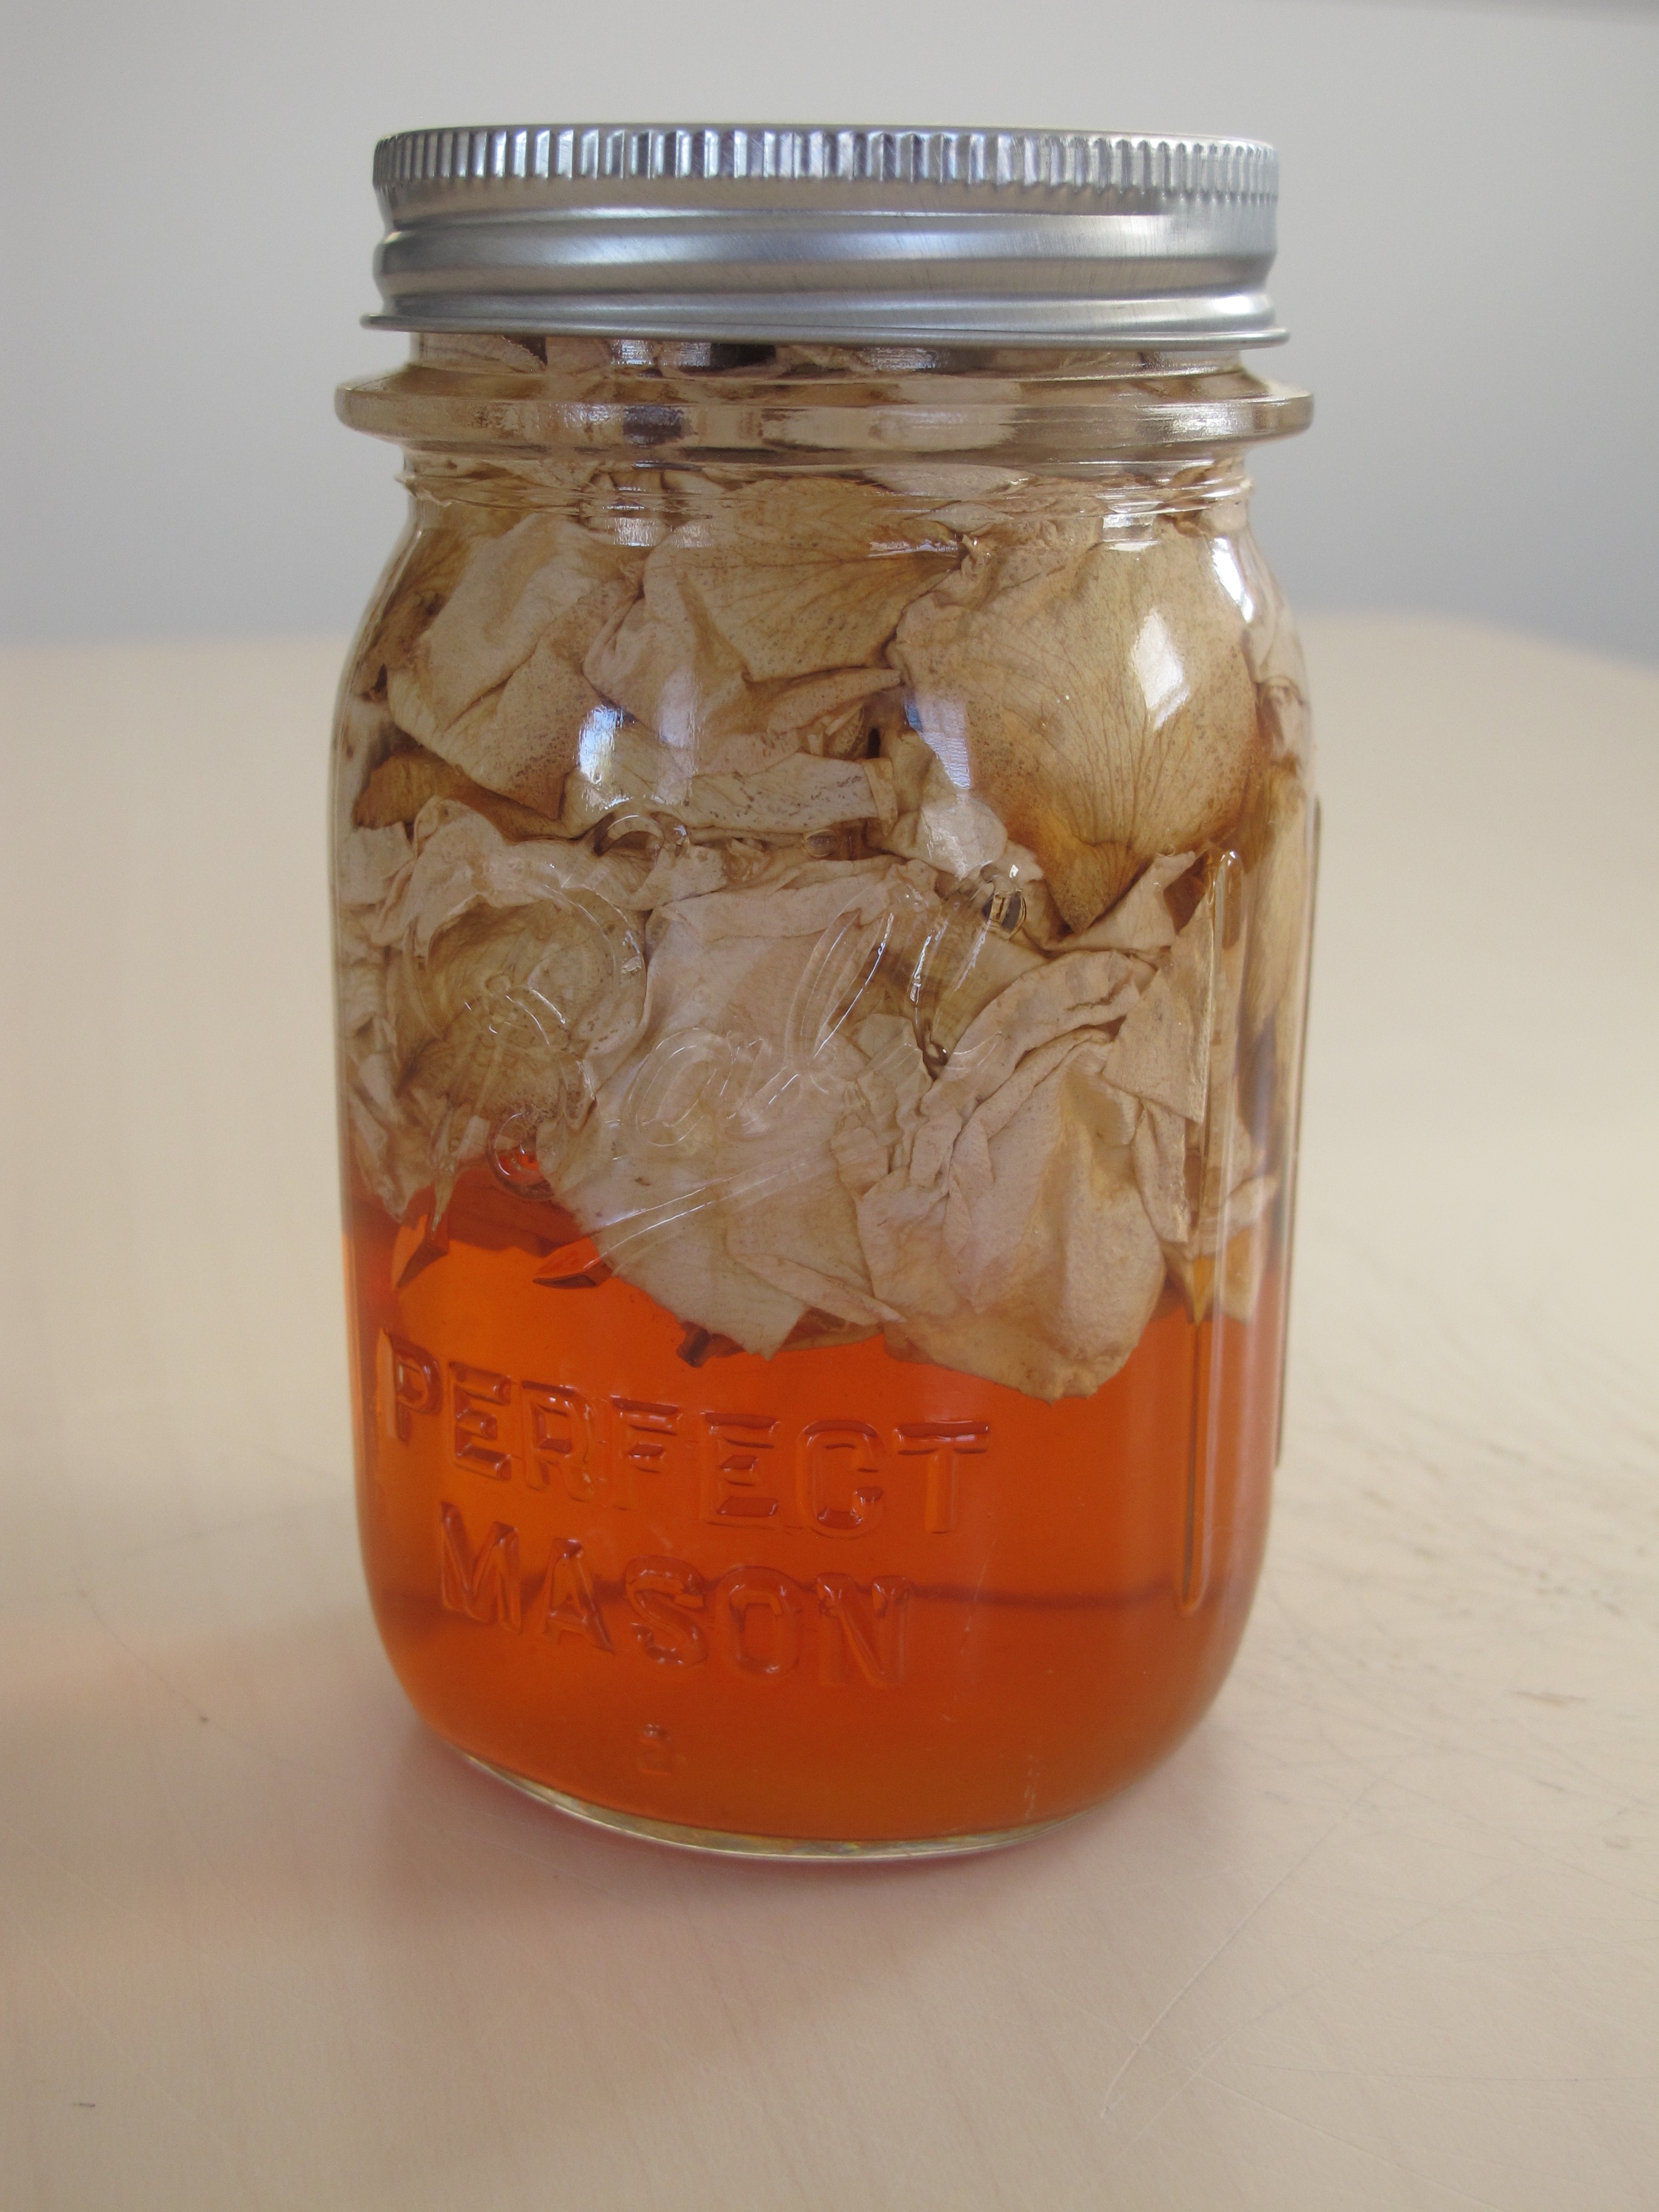
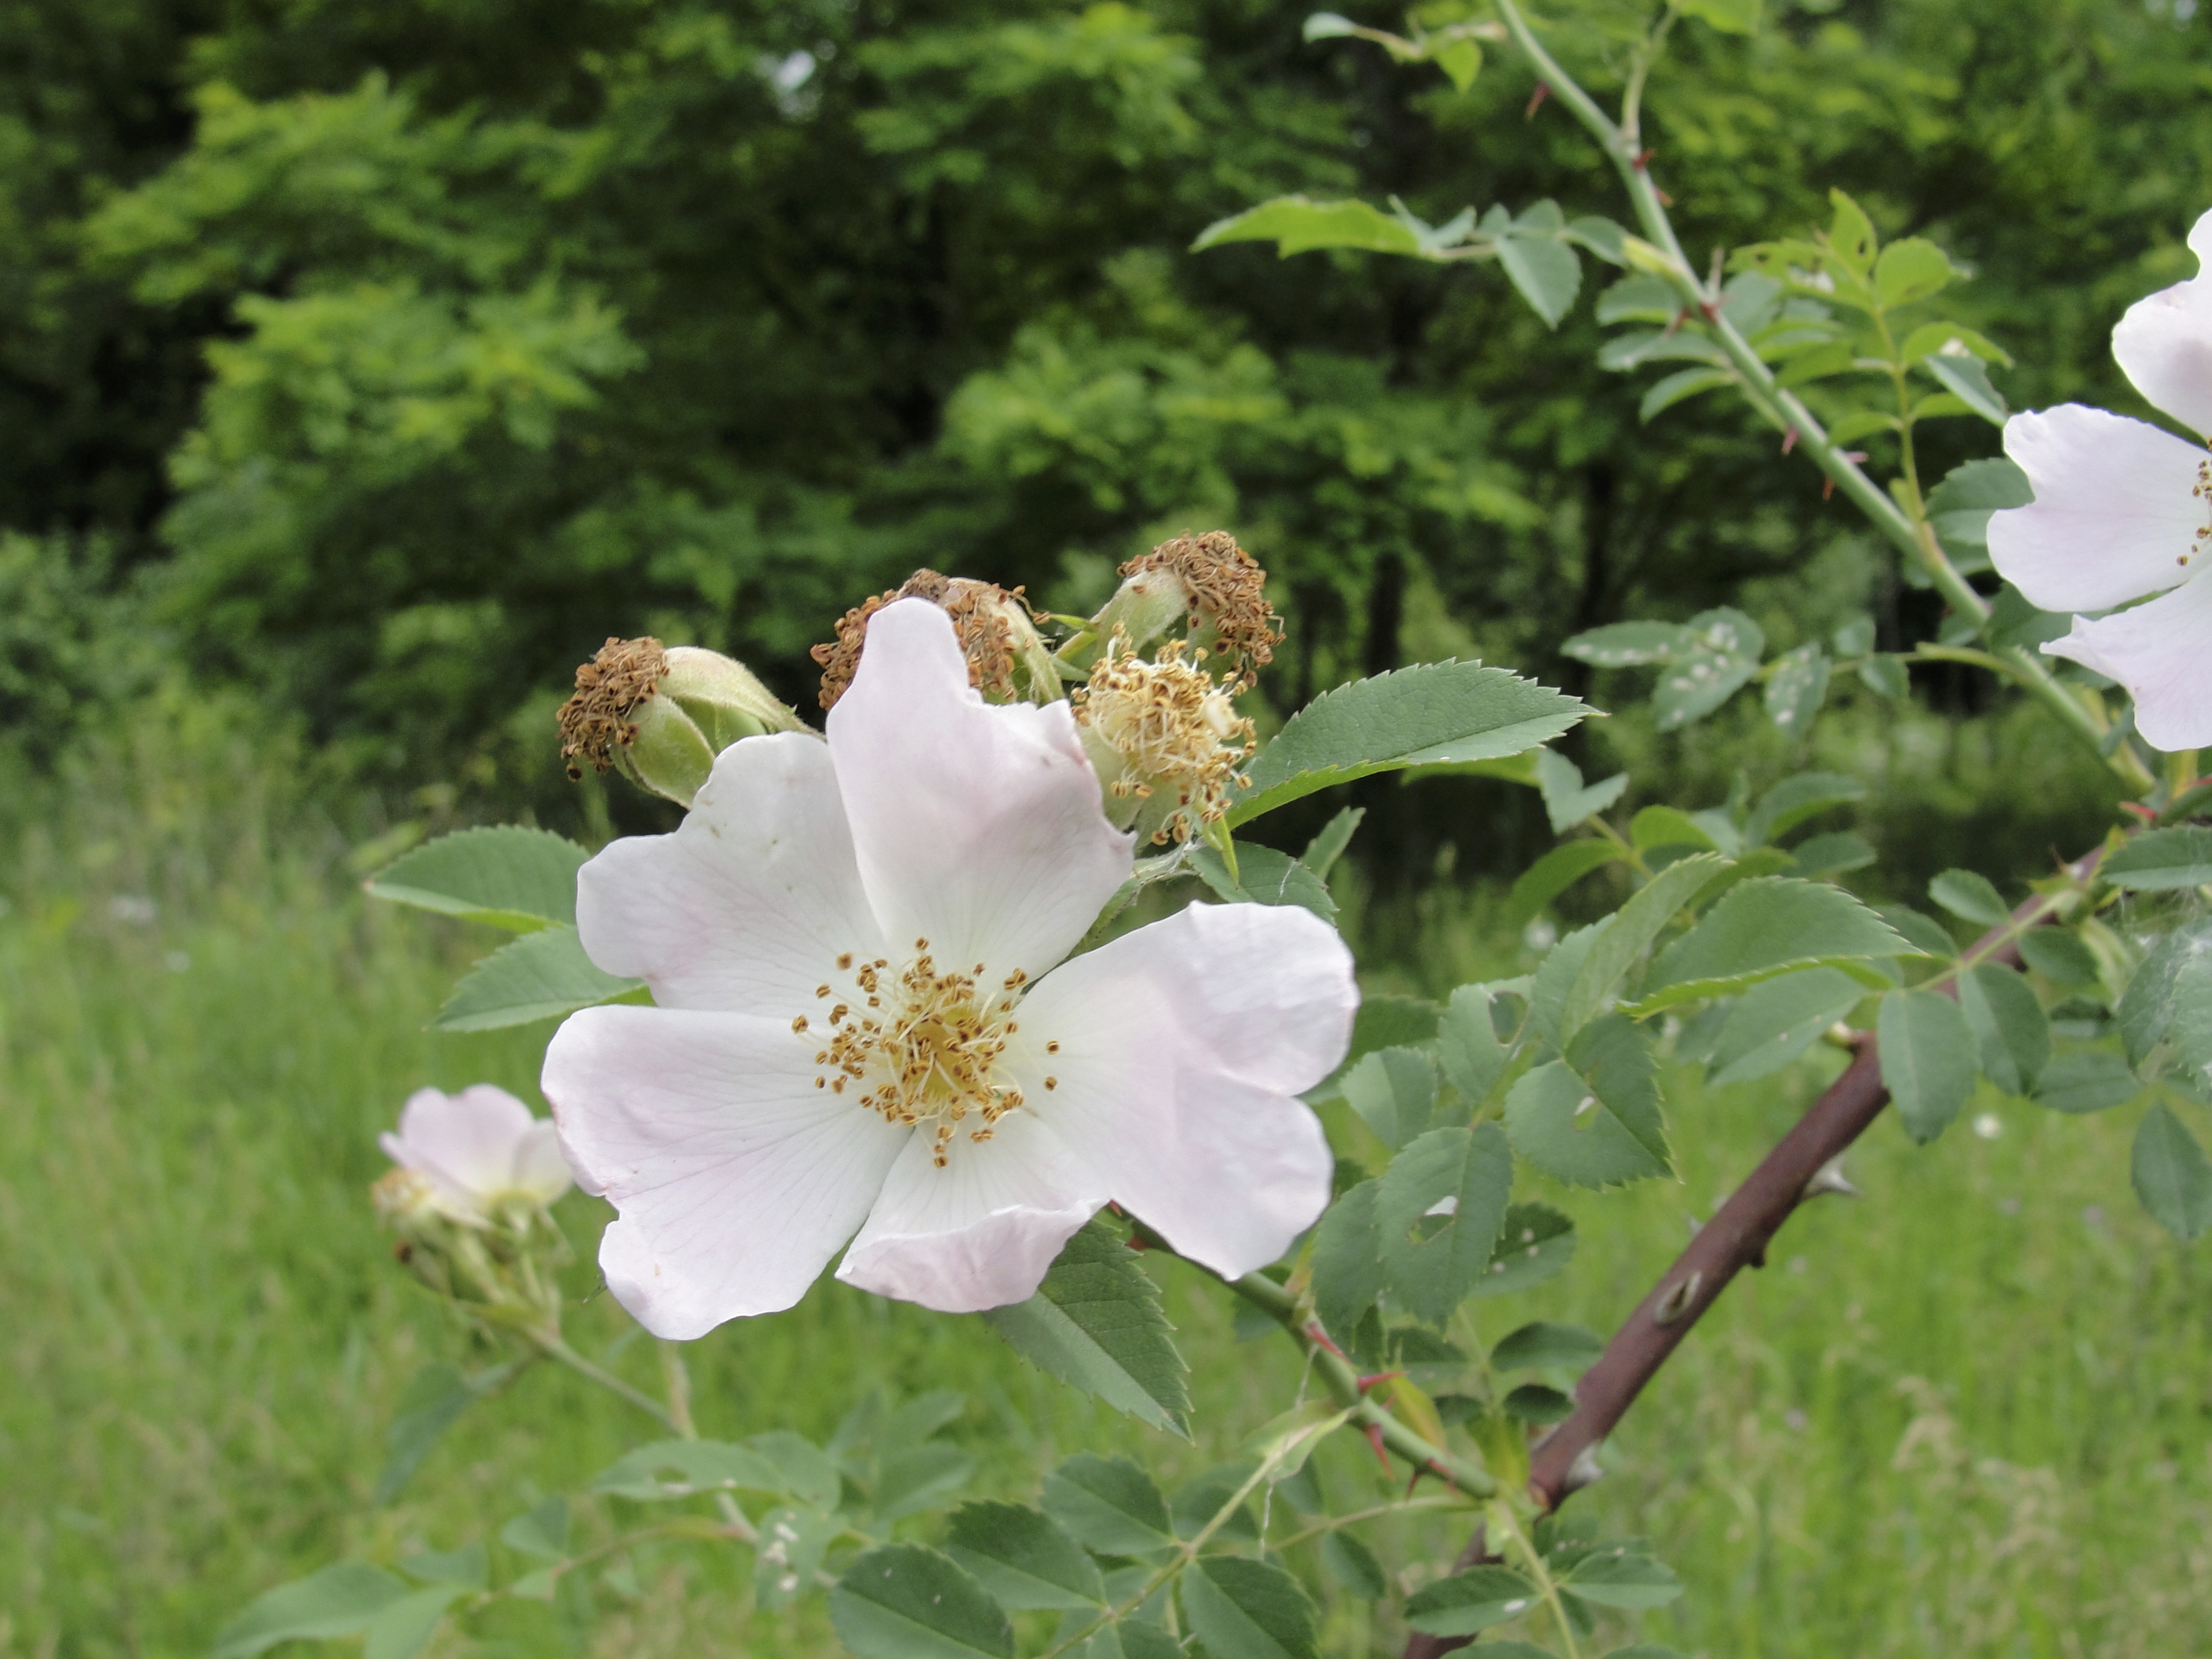
One of my first aid kit must-haves is a rose-infused vinegar in a spray bottle – which is great for sun burns and even poison ivy rashes. A rose-infused vinegar is useful in the herbal apothecary for topical skin infections, abrasions, burns and rashes. The astringent nature of both the rose and the vinegar can help quell the redness and inflammation of affected skin.
To prepare this astringent first aid spray you will need:
2 cups apple cider vinegar
4 TBSP fresh or dry rose petals
Small canning jar
Small spray bottle
1) Combine the vinegar and rose petals and let extract for two weeks in the refrigerator.
2) Strain off the mixture and store in a jar in the refrigerator to use as needed for a wash or skin soak on burns.
3) The rose petal vinegar can be put into a spray bottle to easily mist sunburned skin or poison ivy rash for those hard to reach places.
In a pinch? No time to gather roses? Steep chamomile tea bags in vinegar for a few hours, then strain and add to a spray bottle. There are times the ingredients don’t need to be top shelf for top relief (but having top shelf for cocktails, that’s another matter).
Order my newest book, “Midwest Medicinal Plants” to learn how to wildcraft this and other wild plants?
Who said foraging and eating wild edibles was all about tree barks in tea and wild and bitter leaves in salads?? Us foragers also love a really yummy PIE! {which that’s not to discount the barks or bitters, btw}.
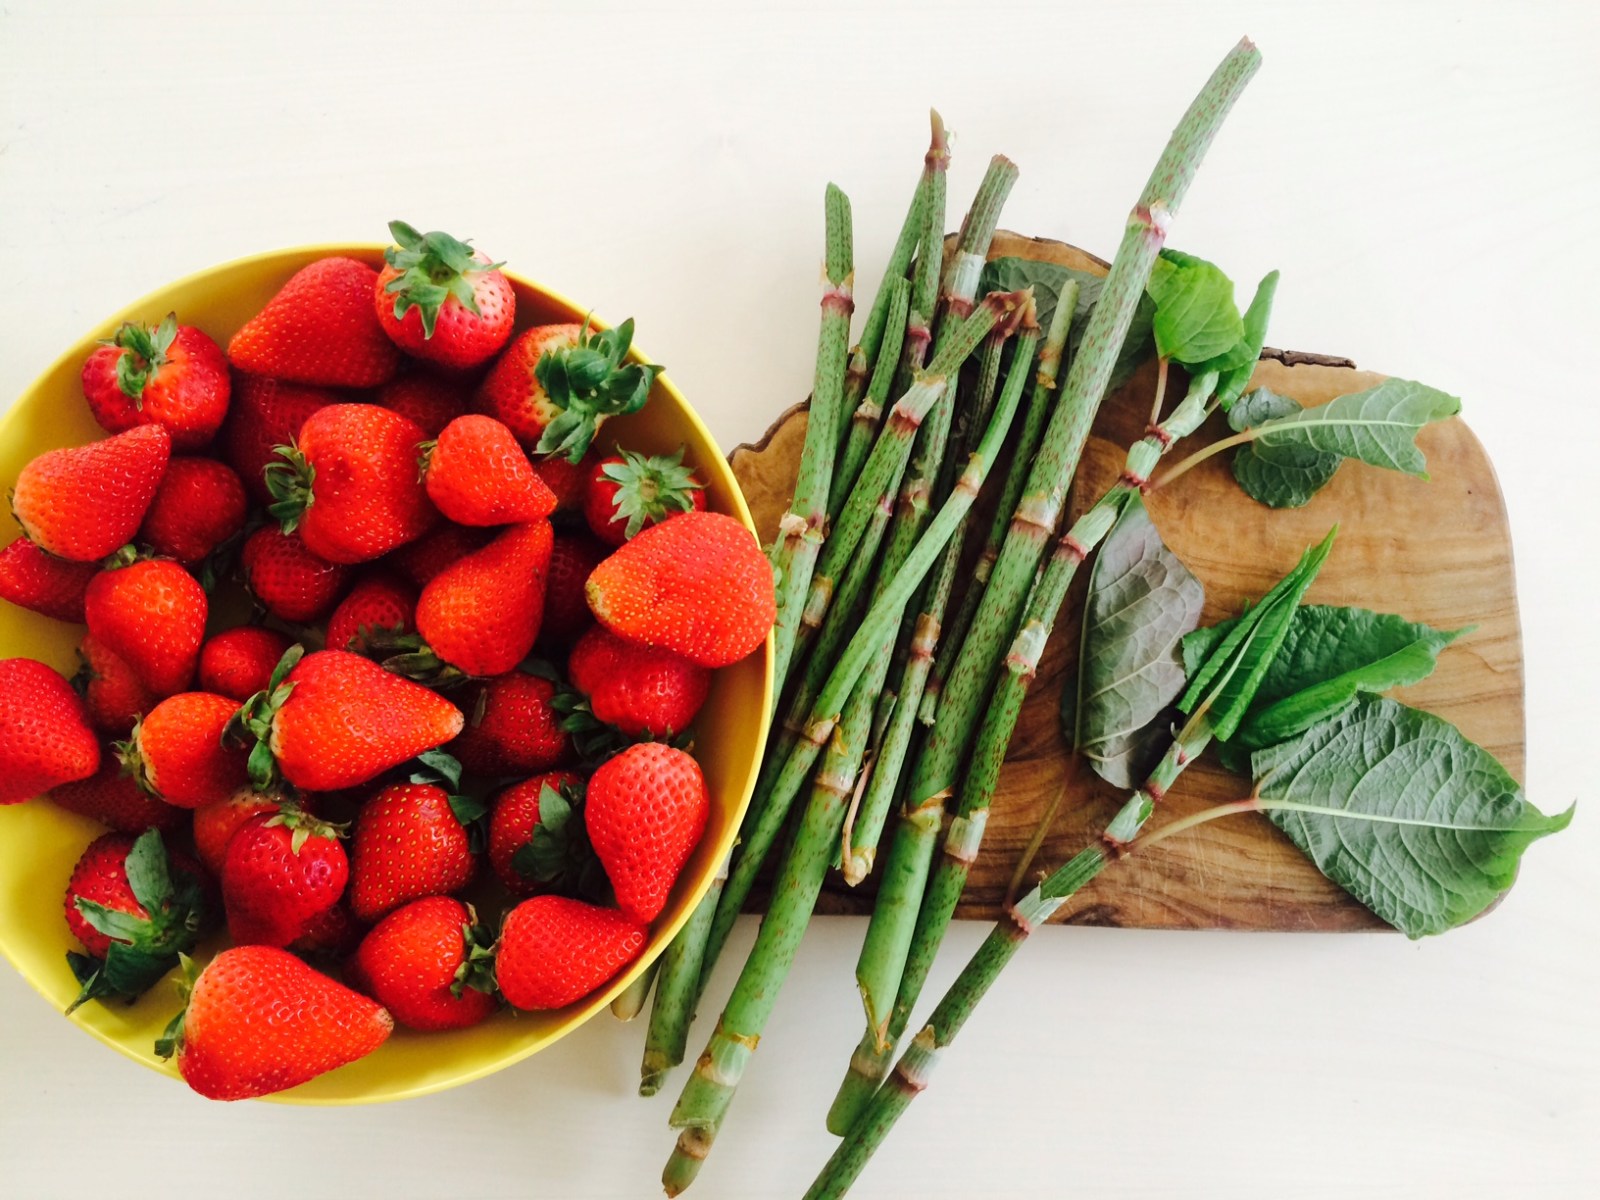
We all know and love a good strawberry-rhubarb pie in the month of June, when the wild berries are ripe or are getting big and juicy in the garden. But did you know that the invasive Japanese knotweed (Polygonum cuspidatum) can be transformed into a delicious strawberry pie with a similar flavor?
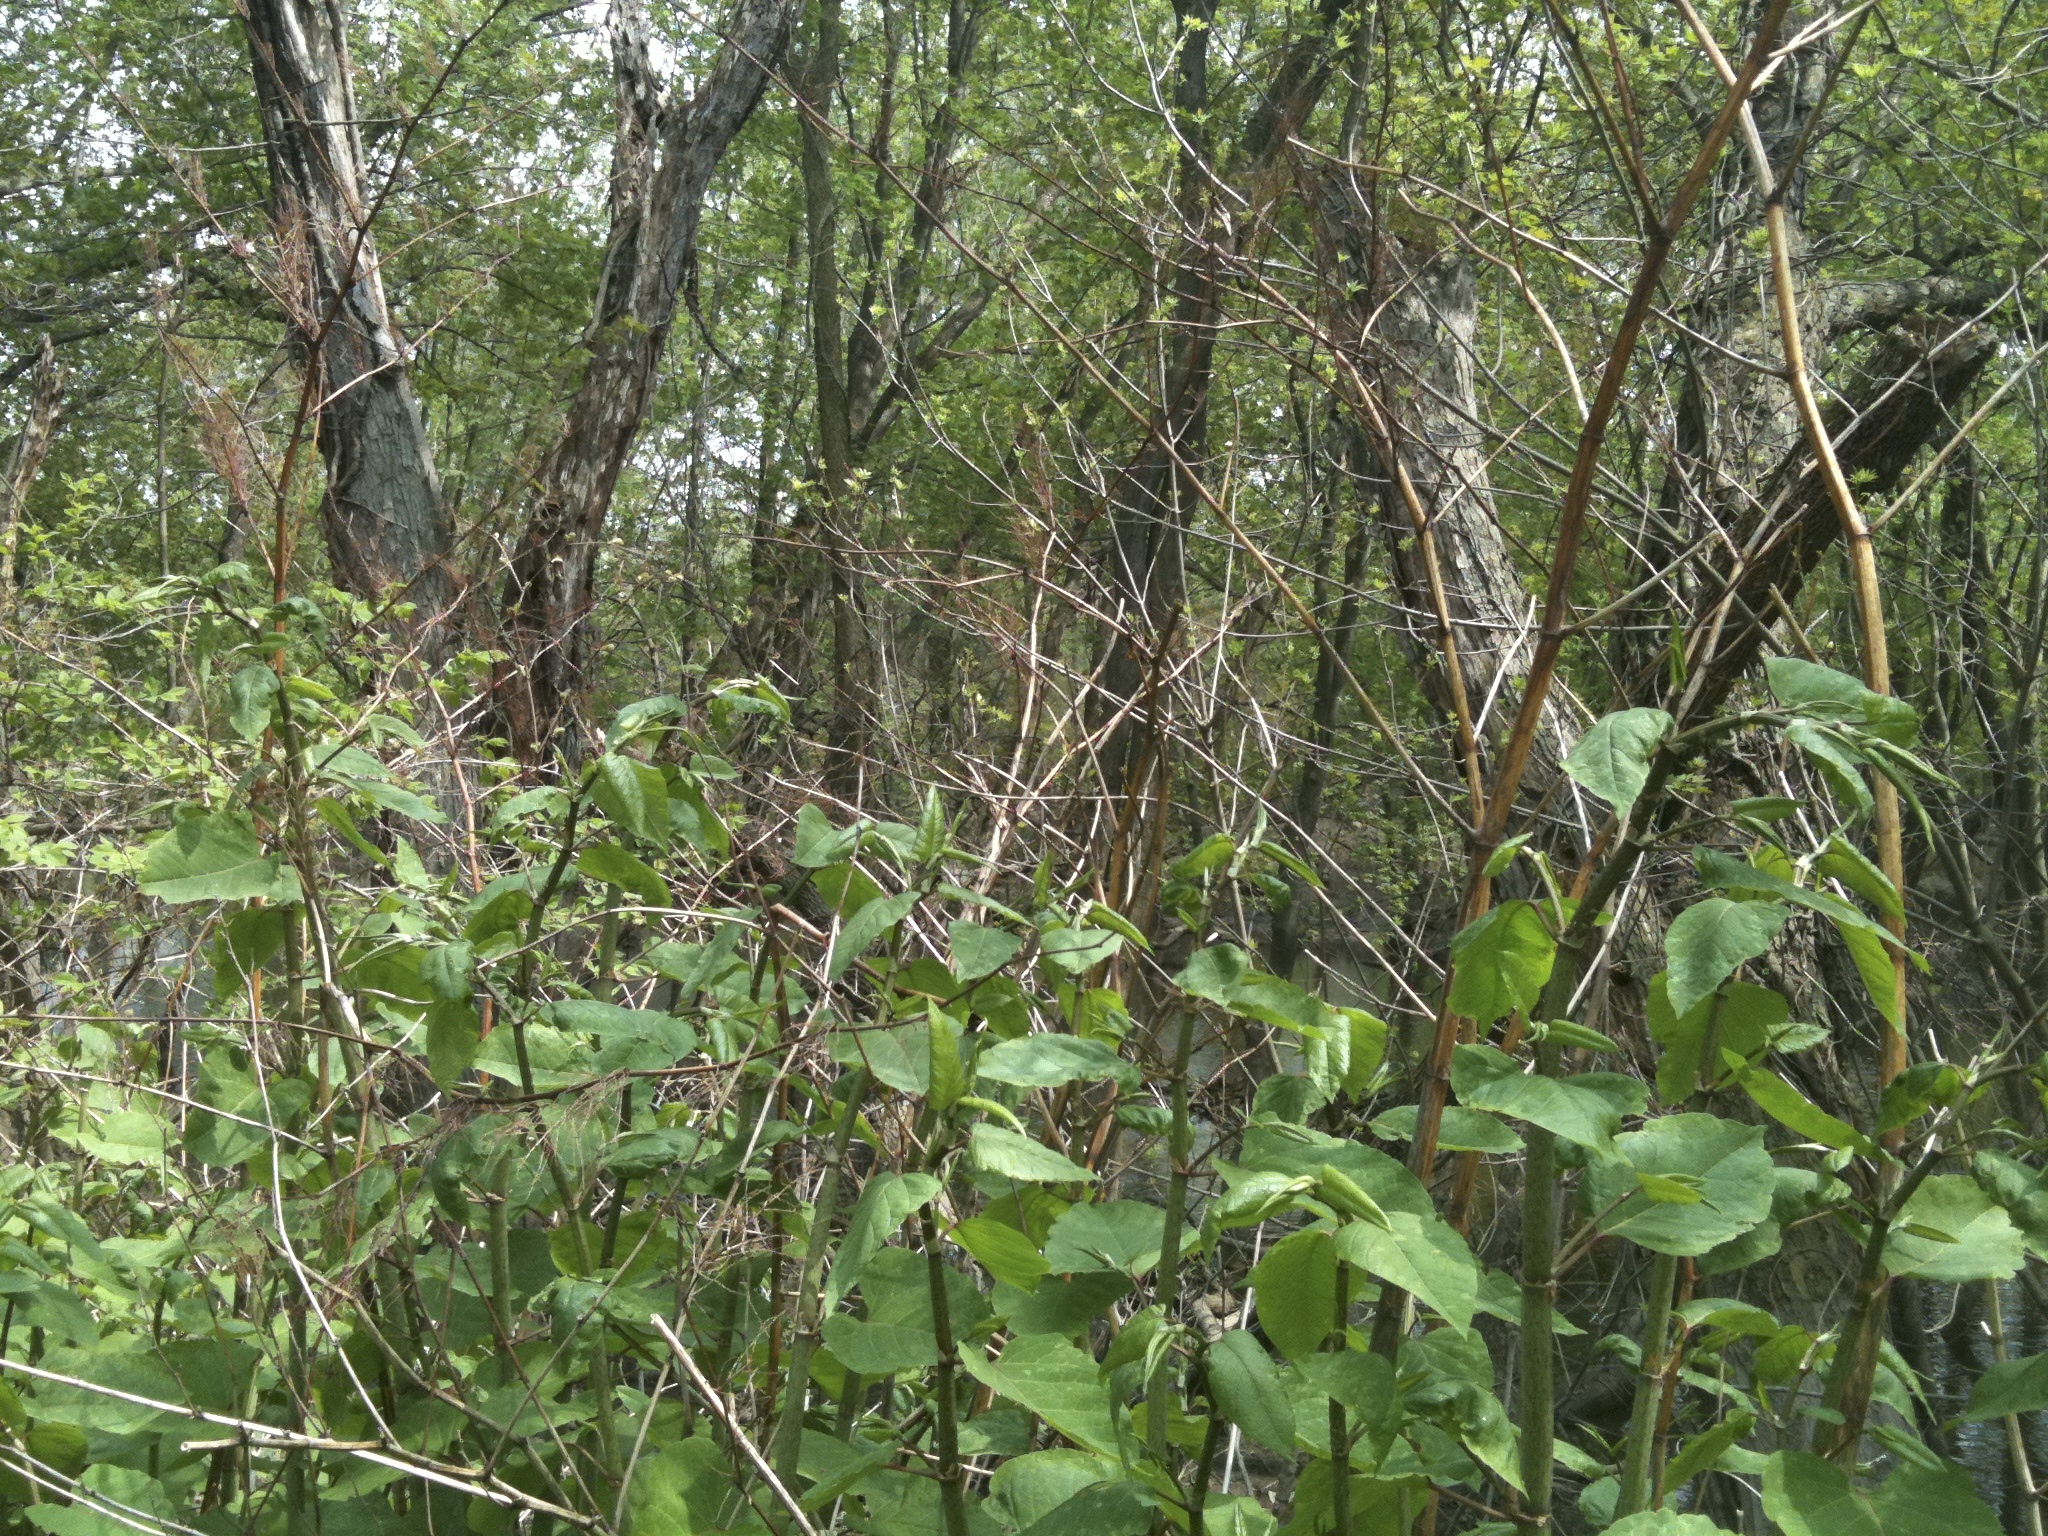
Japanese knotweed is at the top of nearly all of the invasive plant “Most Wanted” lists. It has virtually no known predator, other than foragers, to keep its spread in check. The Japanese knotweed spreads voraciously, lining ditches, streambeds, and woodland fields where there is damp soil. To find a stand of the Japanese knotweed, look for tall stalks left from the previous year as their woody, jointed stems last well into the next season.
Large stands of Japanese knotweed are fast growing and can reach heights of over 10 feet tall.
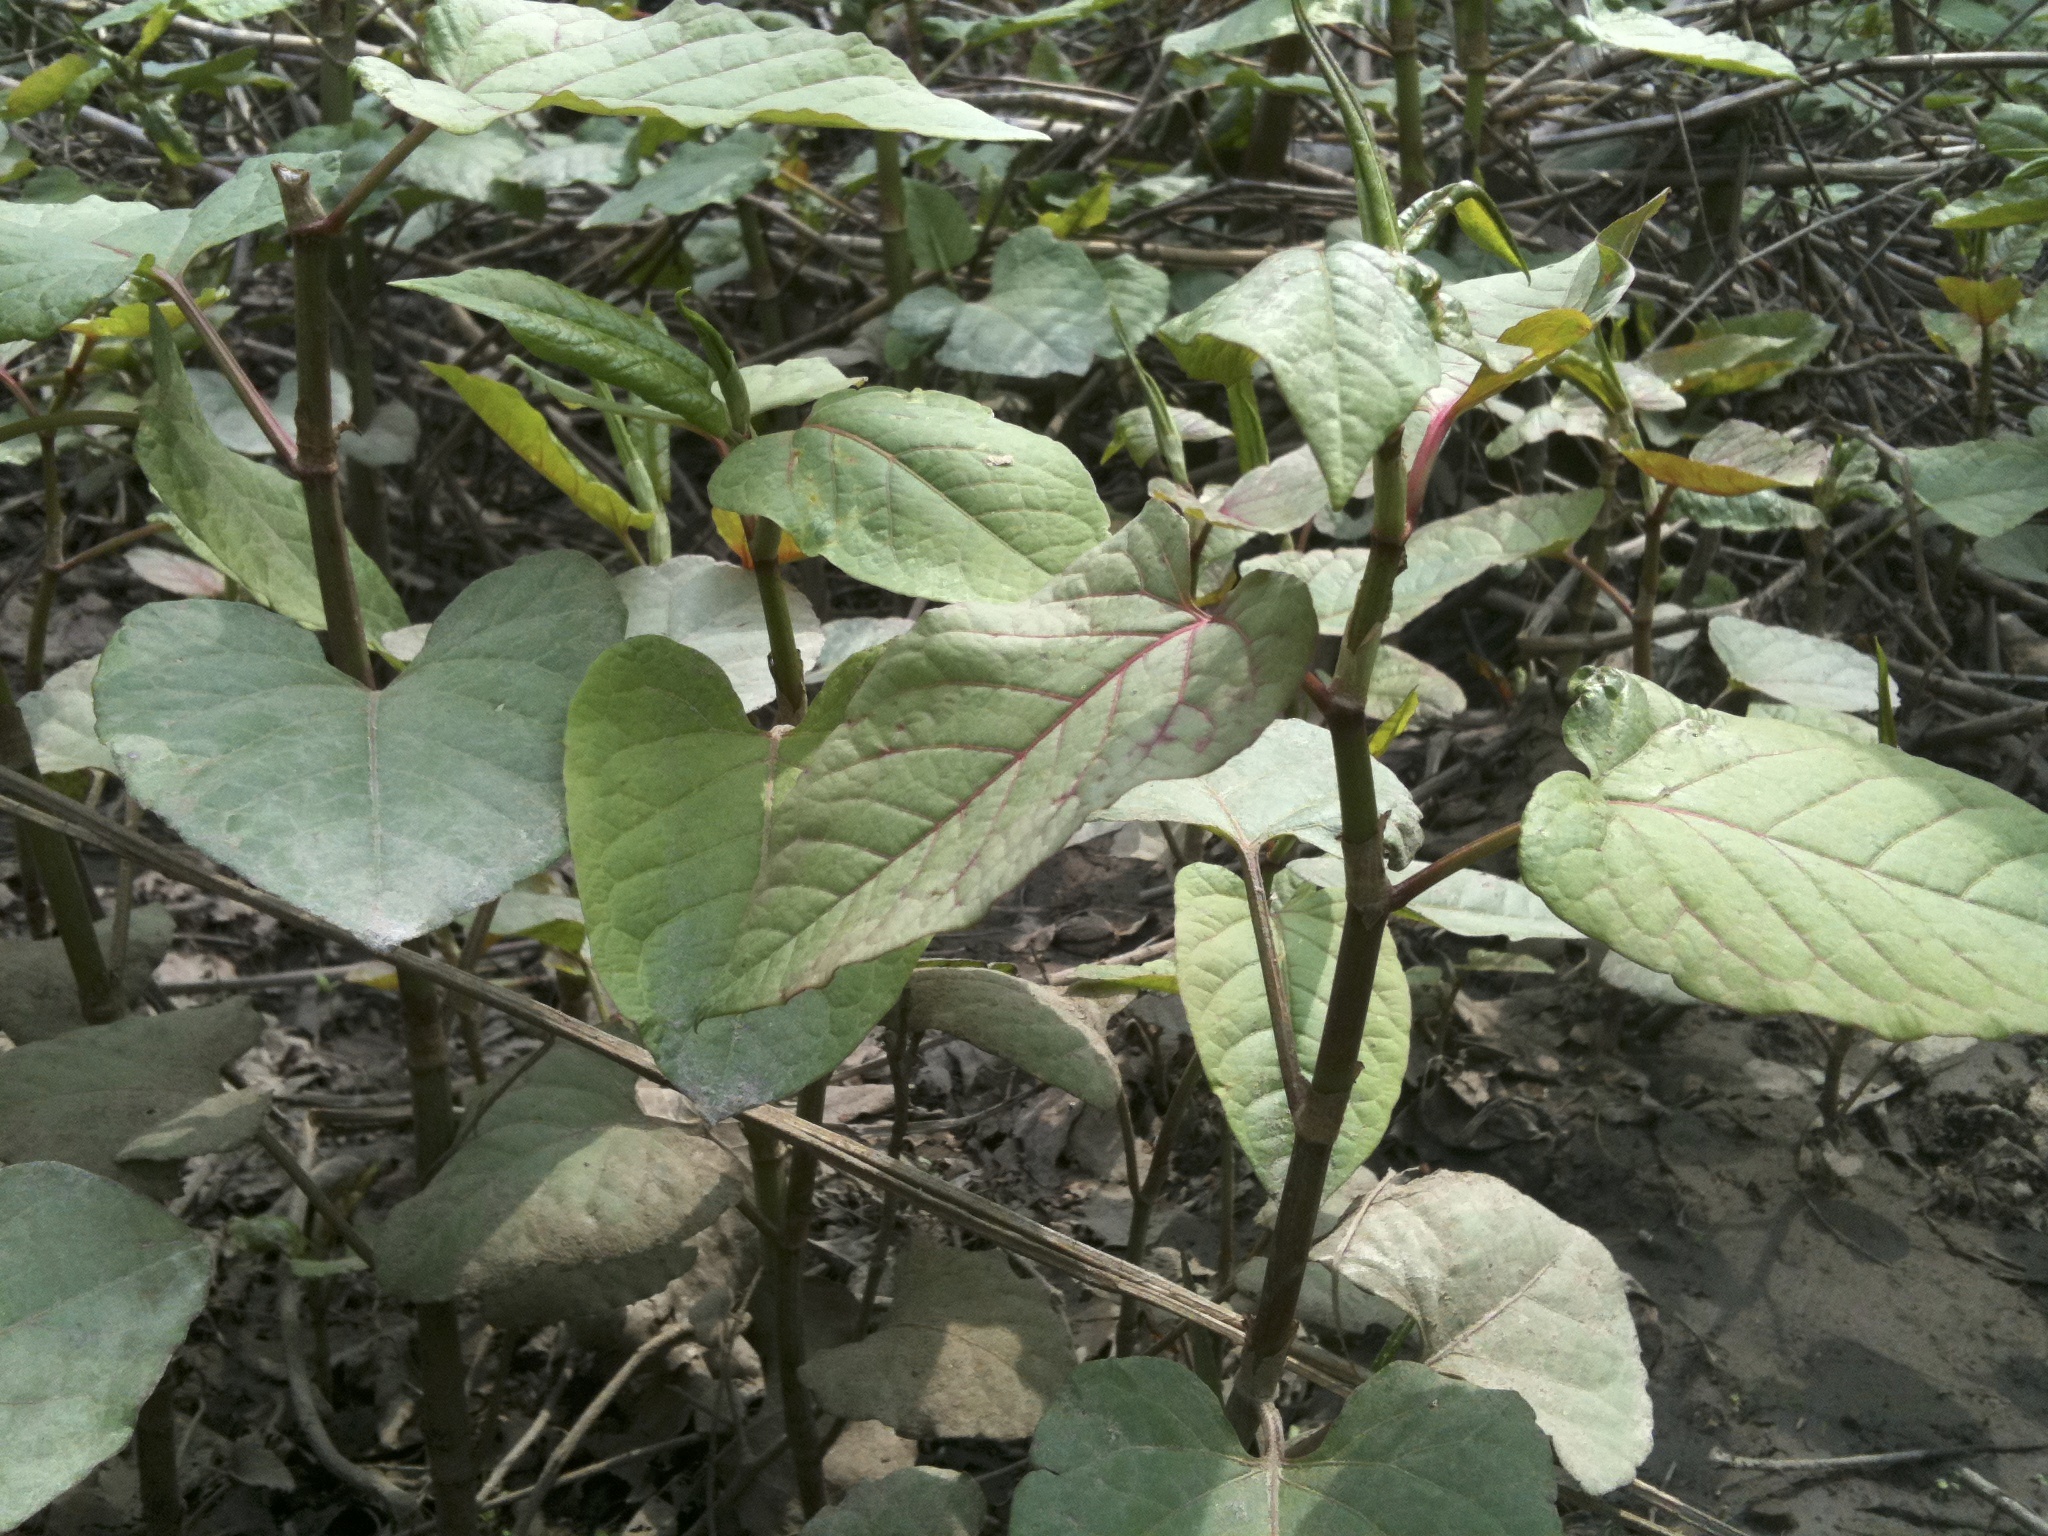
The perennial Japanese knotweed’s woody, bamboo-like leafy stalks grow in dense stands, towering in heights up to 10 feet. The new shoots emerge in early spring and are hollow and jointed with red flecks at the joints along the stem. The leaves are heart-shaped, bright green, and arranged alternately along the stem. The plant goes to flower in late summer into early fall, producing feathery clusters of dainty white blossoms.
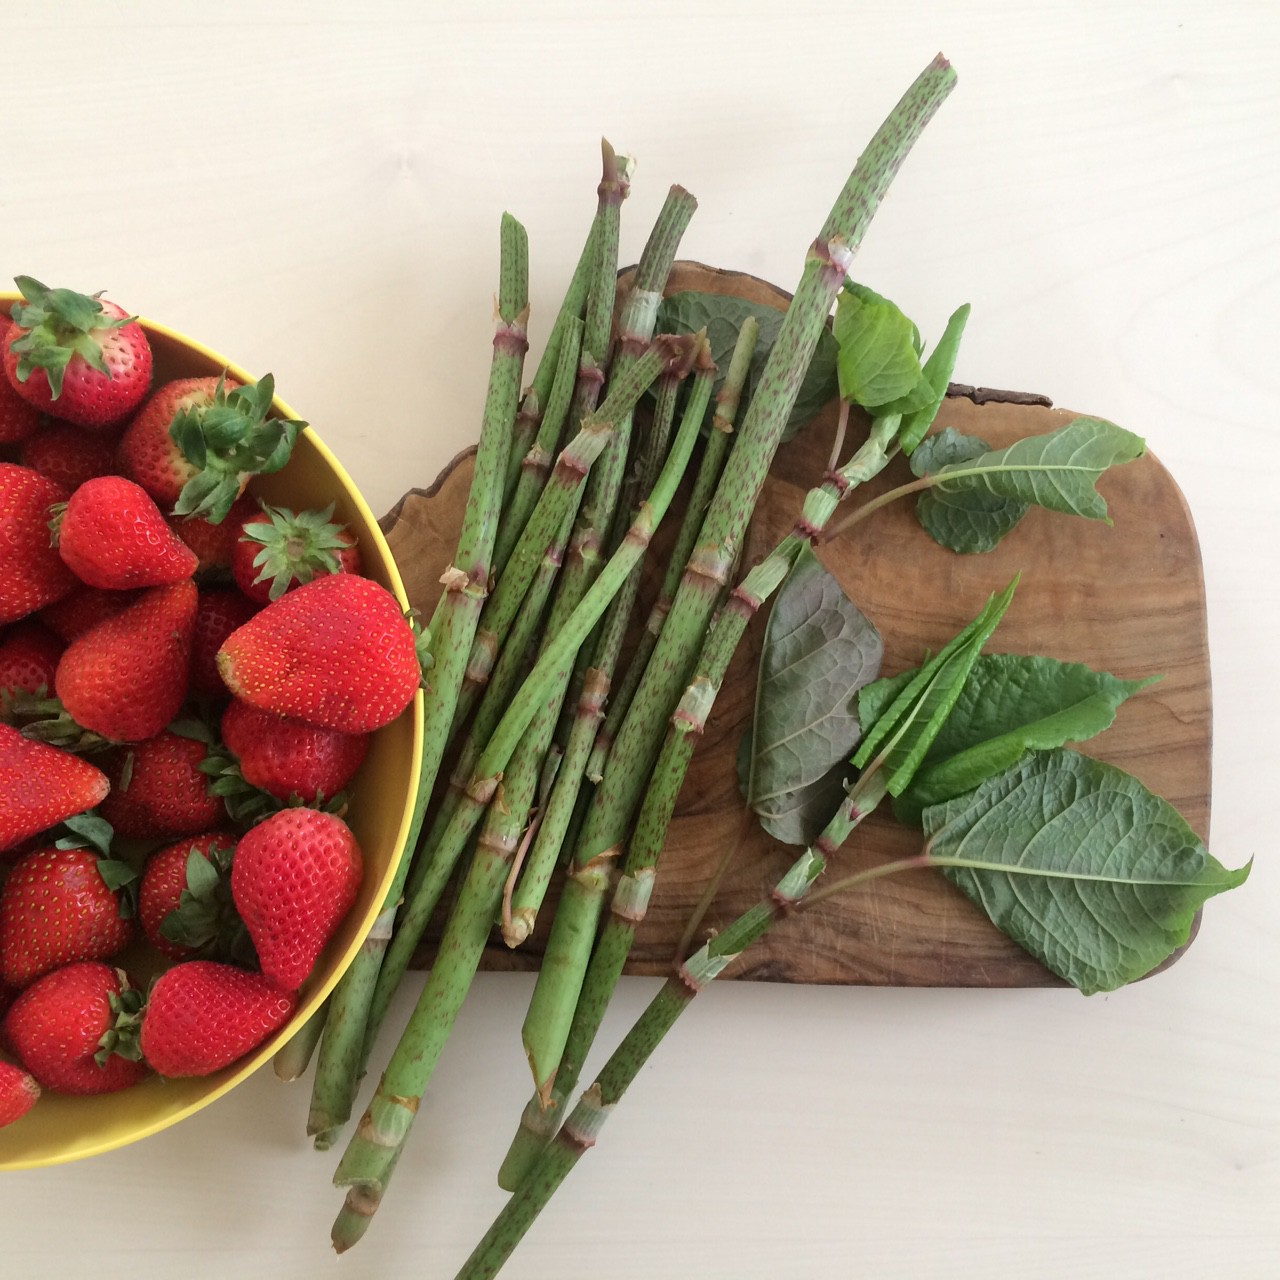
The tender stalks of Japanese knotweed (Polygonum cuspidatum) are best gathered in the spring and then stripped of leaves and used in pies, compotes and fruit jams.
The early spring shoots are crunchy with a tart, citrusy flavor similar to that of spring rhubarb. Its bright flavors make for a tart simple syrup, good for use in cocktail recipes. The larger stalks can be prepared as you would use rhubarb (unless you are cooking them, then the stalks soften significantly) in summer fruit compotes, jams, or pies. Because the fruit ripens much later than when you harvest Japanese knotweed, its stalks can be chopped and then frozen for later use.
While delicious and edible, many landscape companies and parks management protocols include using agressive herbicides on the plant to stunt its growth. So, be sure the area where you harvest hasn’t been treated with an herbicide meant to eradicate the plant. Look at surrounding vegetation for visible signs of plant burn, or ask the landowner or park manager about herbicide treatment.
One of my favorite Japanese knotweed & berry combo is in a strawberry rhubarb pie. While the strawberries from the garden aren’t ready yet here in the Midwest, the addition of the invasive Japanese knotweed was a delightful “re-wilding” of the grocery-store berries of May coming in from down south and out west (do choose organic – it matters!!).
A Forager’s Strawberry-Knotweed Pie
Preheat oven to 350 degrees. Blend ingredients in a mixing bowl for the filling and add to the prepared pie pan. Bake for 50 minutes until the filling begins to gel and the crust turns a golden brown. Serve with heaping spoonfuls of whipping cream, creme fraiche or vanilla ice cream. Garnish with lavender blossoms for a delightful herbal top note.
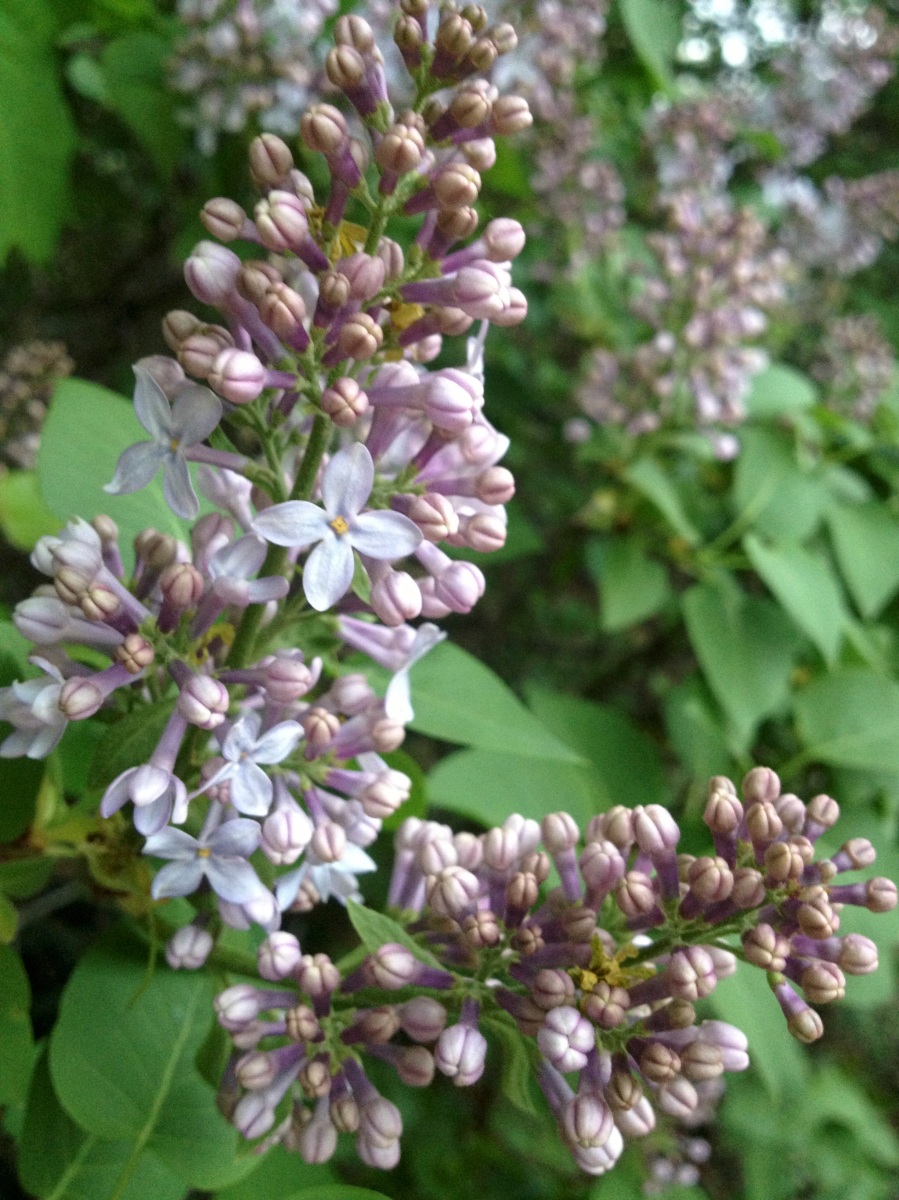
The common lilac (Syringa vulgaris) is anything but common. The lilac is an ephemeral scent of spring, its fragrance from the purple and white blossoms wafting in the warm breeze of May. For me, the scent reminds me of my own Mother, her love of Derby Parties and Mother’s Day with my own children.
Of course, the lilacs are gorgeous as cut flowers, arranged in large vases that should fill every room of the house. But did you know – the lilac flowers are also edible!
The Delectable Lilac
Gather the lilac’s blossoms and bring them into the kitchen, preserving their fragrance for use in drinks, confections, and desserts.
The lilac’s memorable springtime scent can be captured in an aromatic simple syrup or lilac jelly. The lilac syrup can be used in refreshing cocktail recipes, lemonades, and soda spritzers.
Lilac jelly can be topped over pastries, shortbreads, or an accompaniment (with fresh flowers as a garnish, of course), to French madeleines. It can also be drizzled over fresh spring goat cheese with spring chives for a savory and beautiful appetizer.
The fresh flowers and flower odor of the lilac can be infused directly into white sugar (let infuse for two weeks to allow the aromatics to scent the sugar) and used for baking projects – particularly delightful in shortbreads and sugar cookie recipes, or even for lightly flavoring ice cream or white yogurt.
How to Identify & Harvest the Lilac
The lilac is a European shrub that grows to heights of 15 feet tall. The lilac has dense branches with smooth, gray bark when young. As the branches grow older and larger in diameter, the bark becomes grayish brown and shreds. The leaves are simple, ovate, green and shiny. The lilac blooms around Mother’s Day in May, with showy flower heads (panicles) of sweetly aromatic white and purple flowers.
The lilac is commonly planted as an ornamental and found often feral along hedgerows and fences. Gather the flower heads (be sure to ask if you are gathering from someone’s private garden) on a dry sunny day. Take them into the kitchen and process immediately, as the flowers quickly wilt and do not tolerate refrigerated storage for a significant amount of time.
The lilac is a common planting across the Midwest, but the forager can propagate the lilac with cuttings, air layering, or from seed. It’s a delightful spring flower and adds a nice touch to a permaculture landscape design.
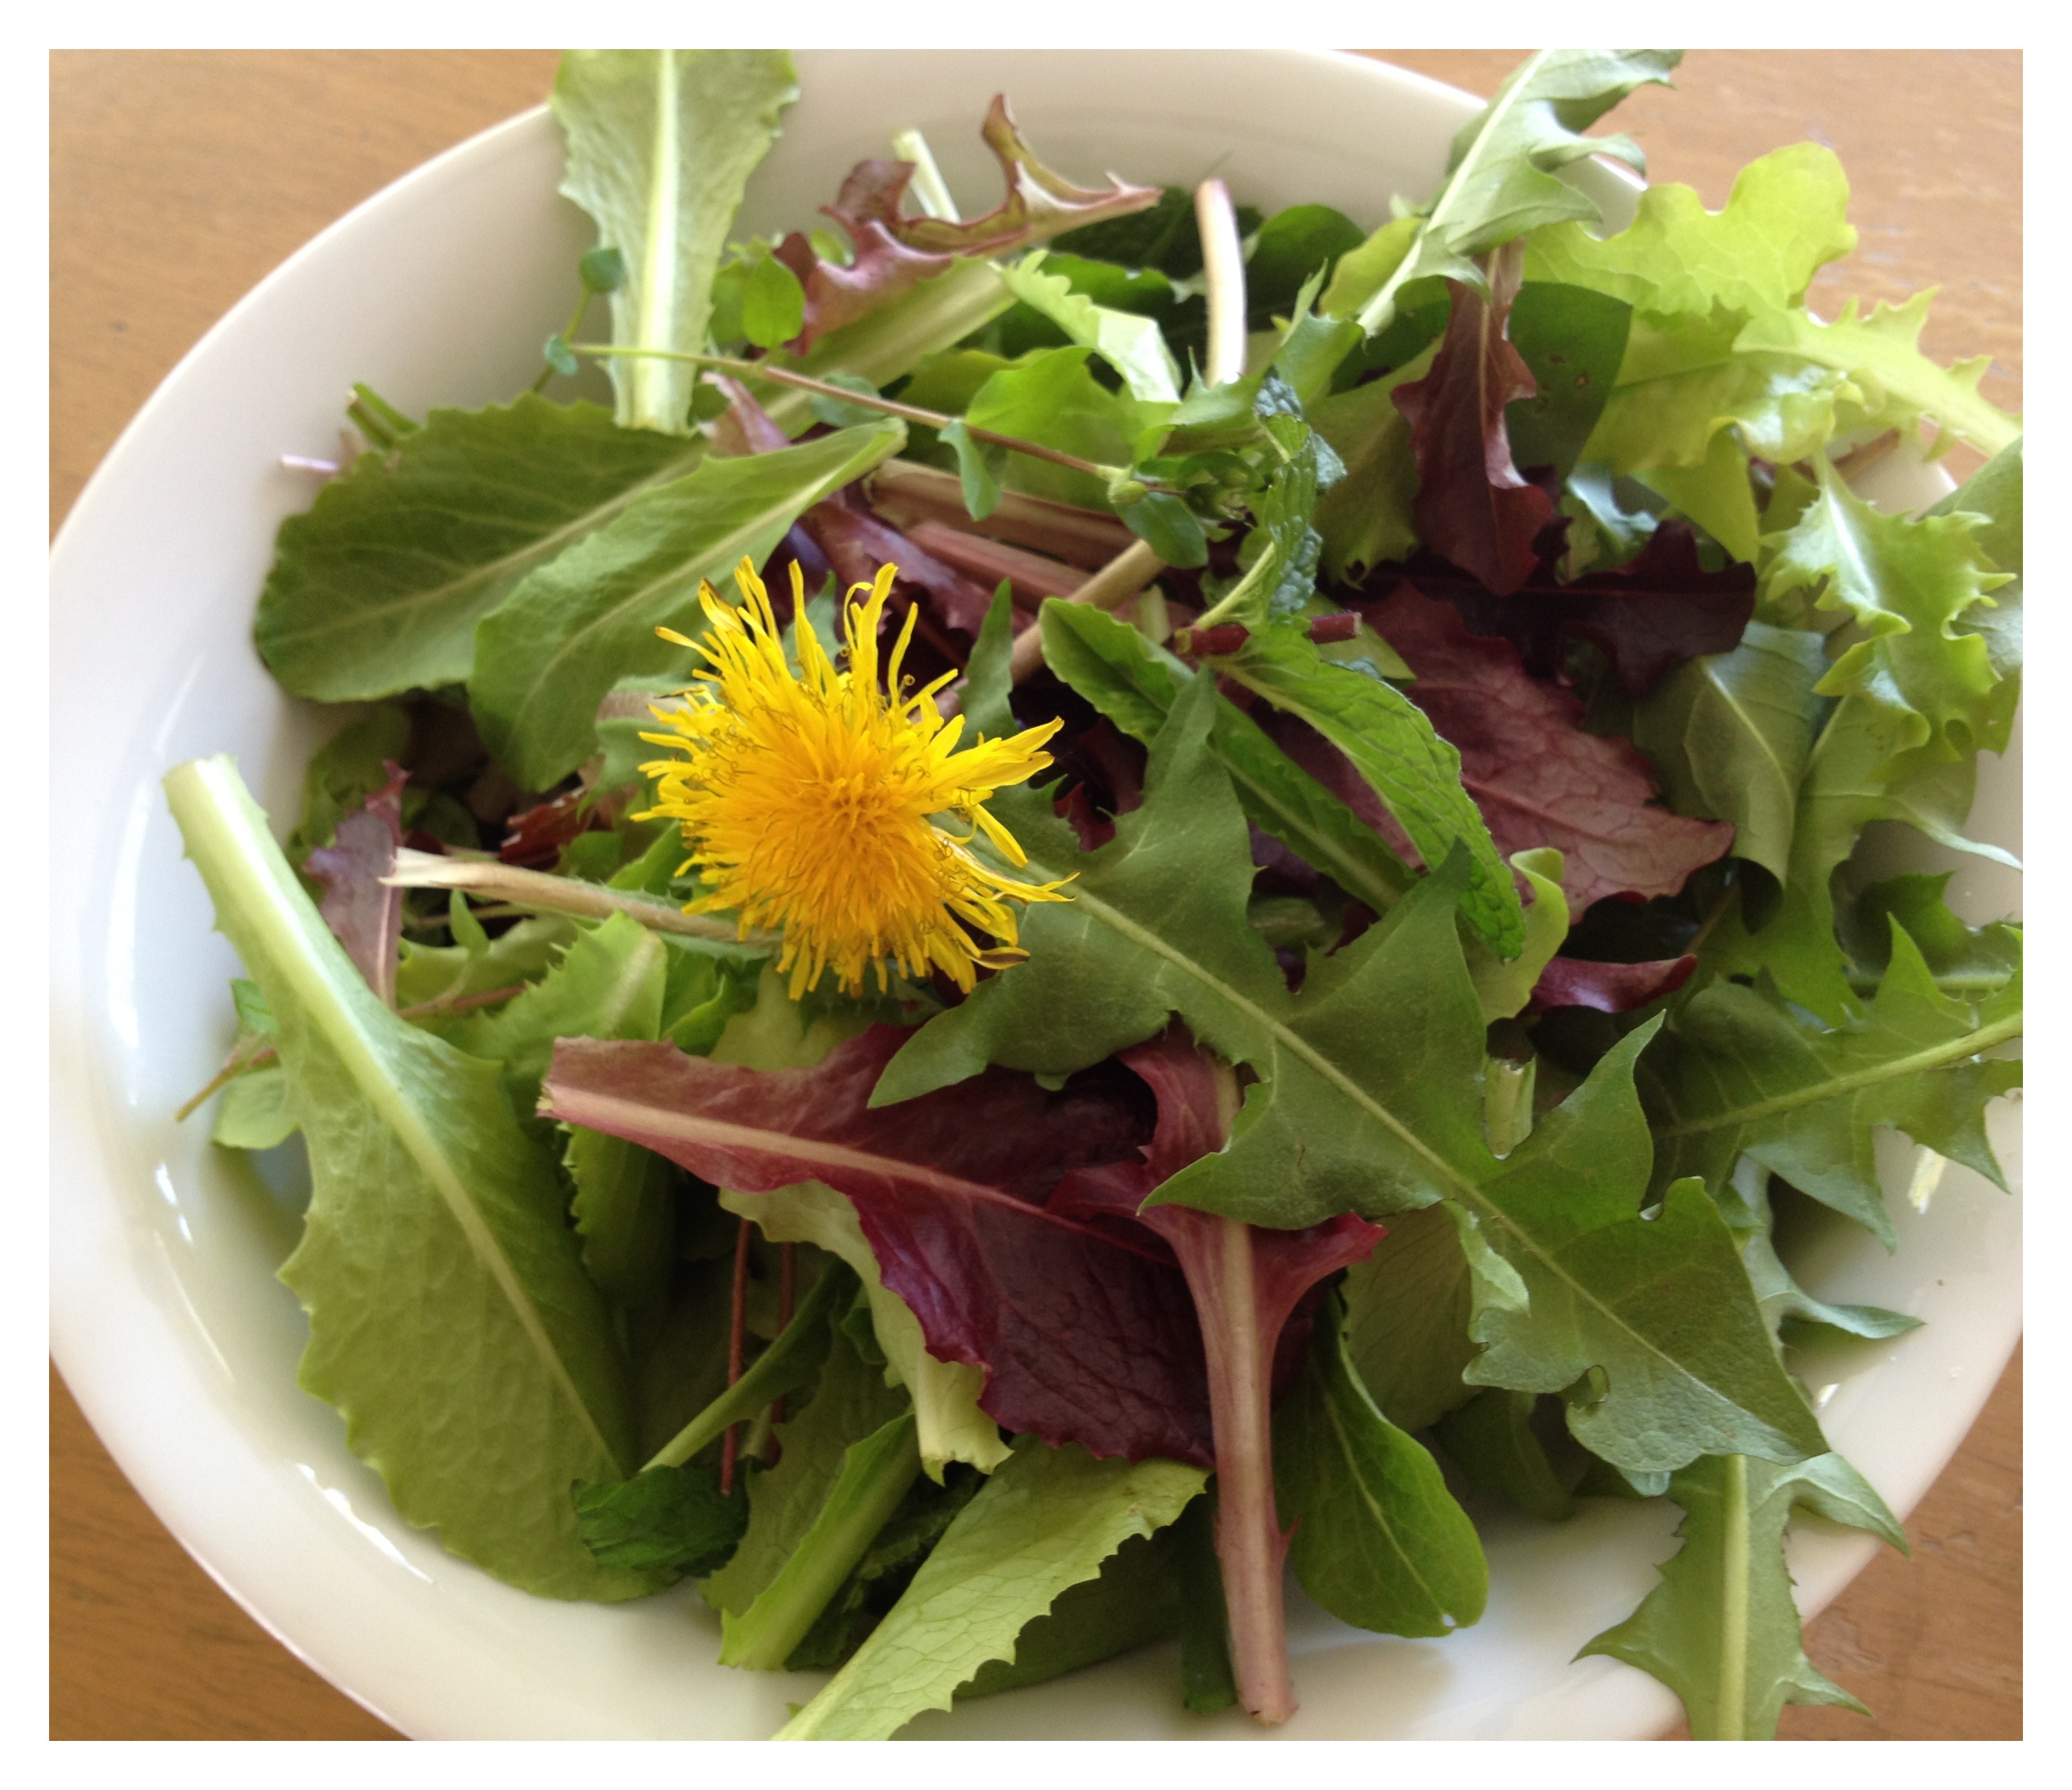
The dandelion (Taraxacum officinale) is much more than a weed — it is a healthful salad green and important herbal medicine.
As a food, dandelion should be included at the dinner table. Bitter greens such as dandelion help the stomach in digestion by increasing bile production. It’s a good spring habit to add handfuls of wild leaves to meals a few times a day, if possible.
Dandelions grow almost everywhere and are easy to find. In early spring when the weather is cool and moist, the rapidly growing leaves are tender for eating raw. Harvest the leaves with garden shears or by hand and gently clean them in the kitchen. Leaves are best when picked in the early morning.
Its nutrition, versatility, and abundance makes dandelion such an amazing plant medicine that it never ceases to amaze me why homeowners everywhere don’t allow the dandelion to take over the lawn. It truly is a wildly free medicinal!
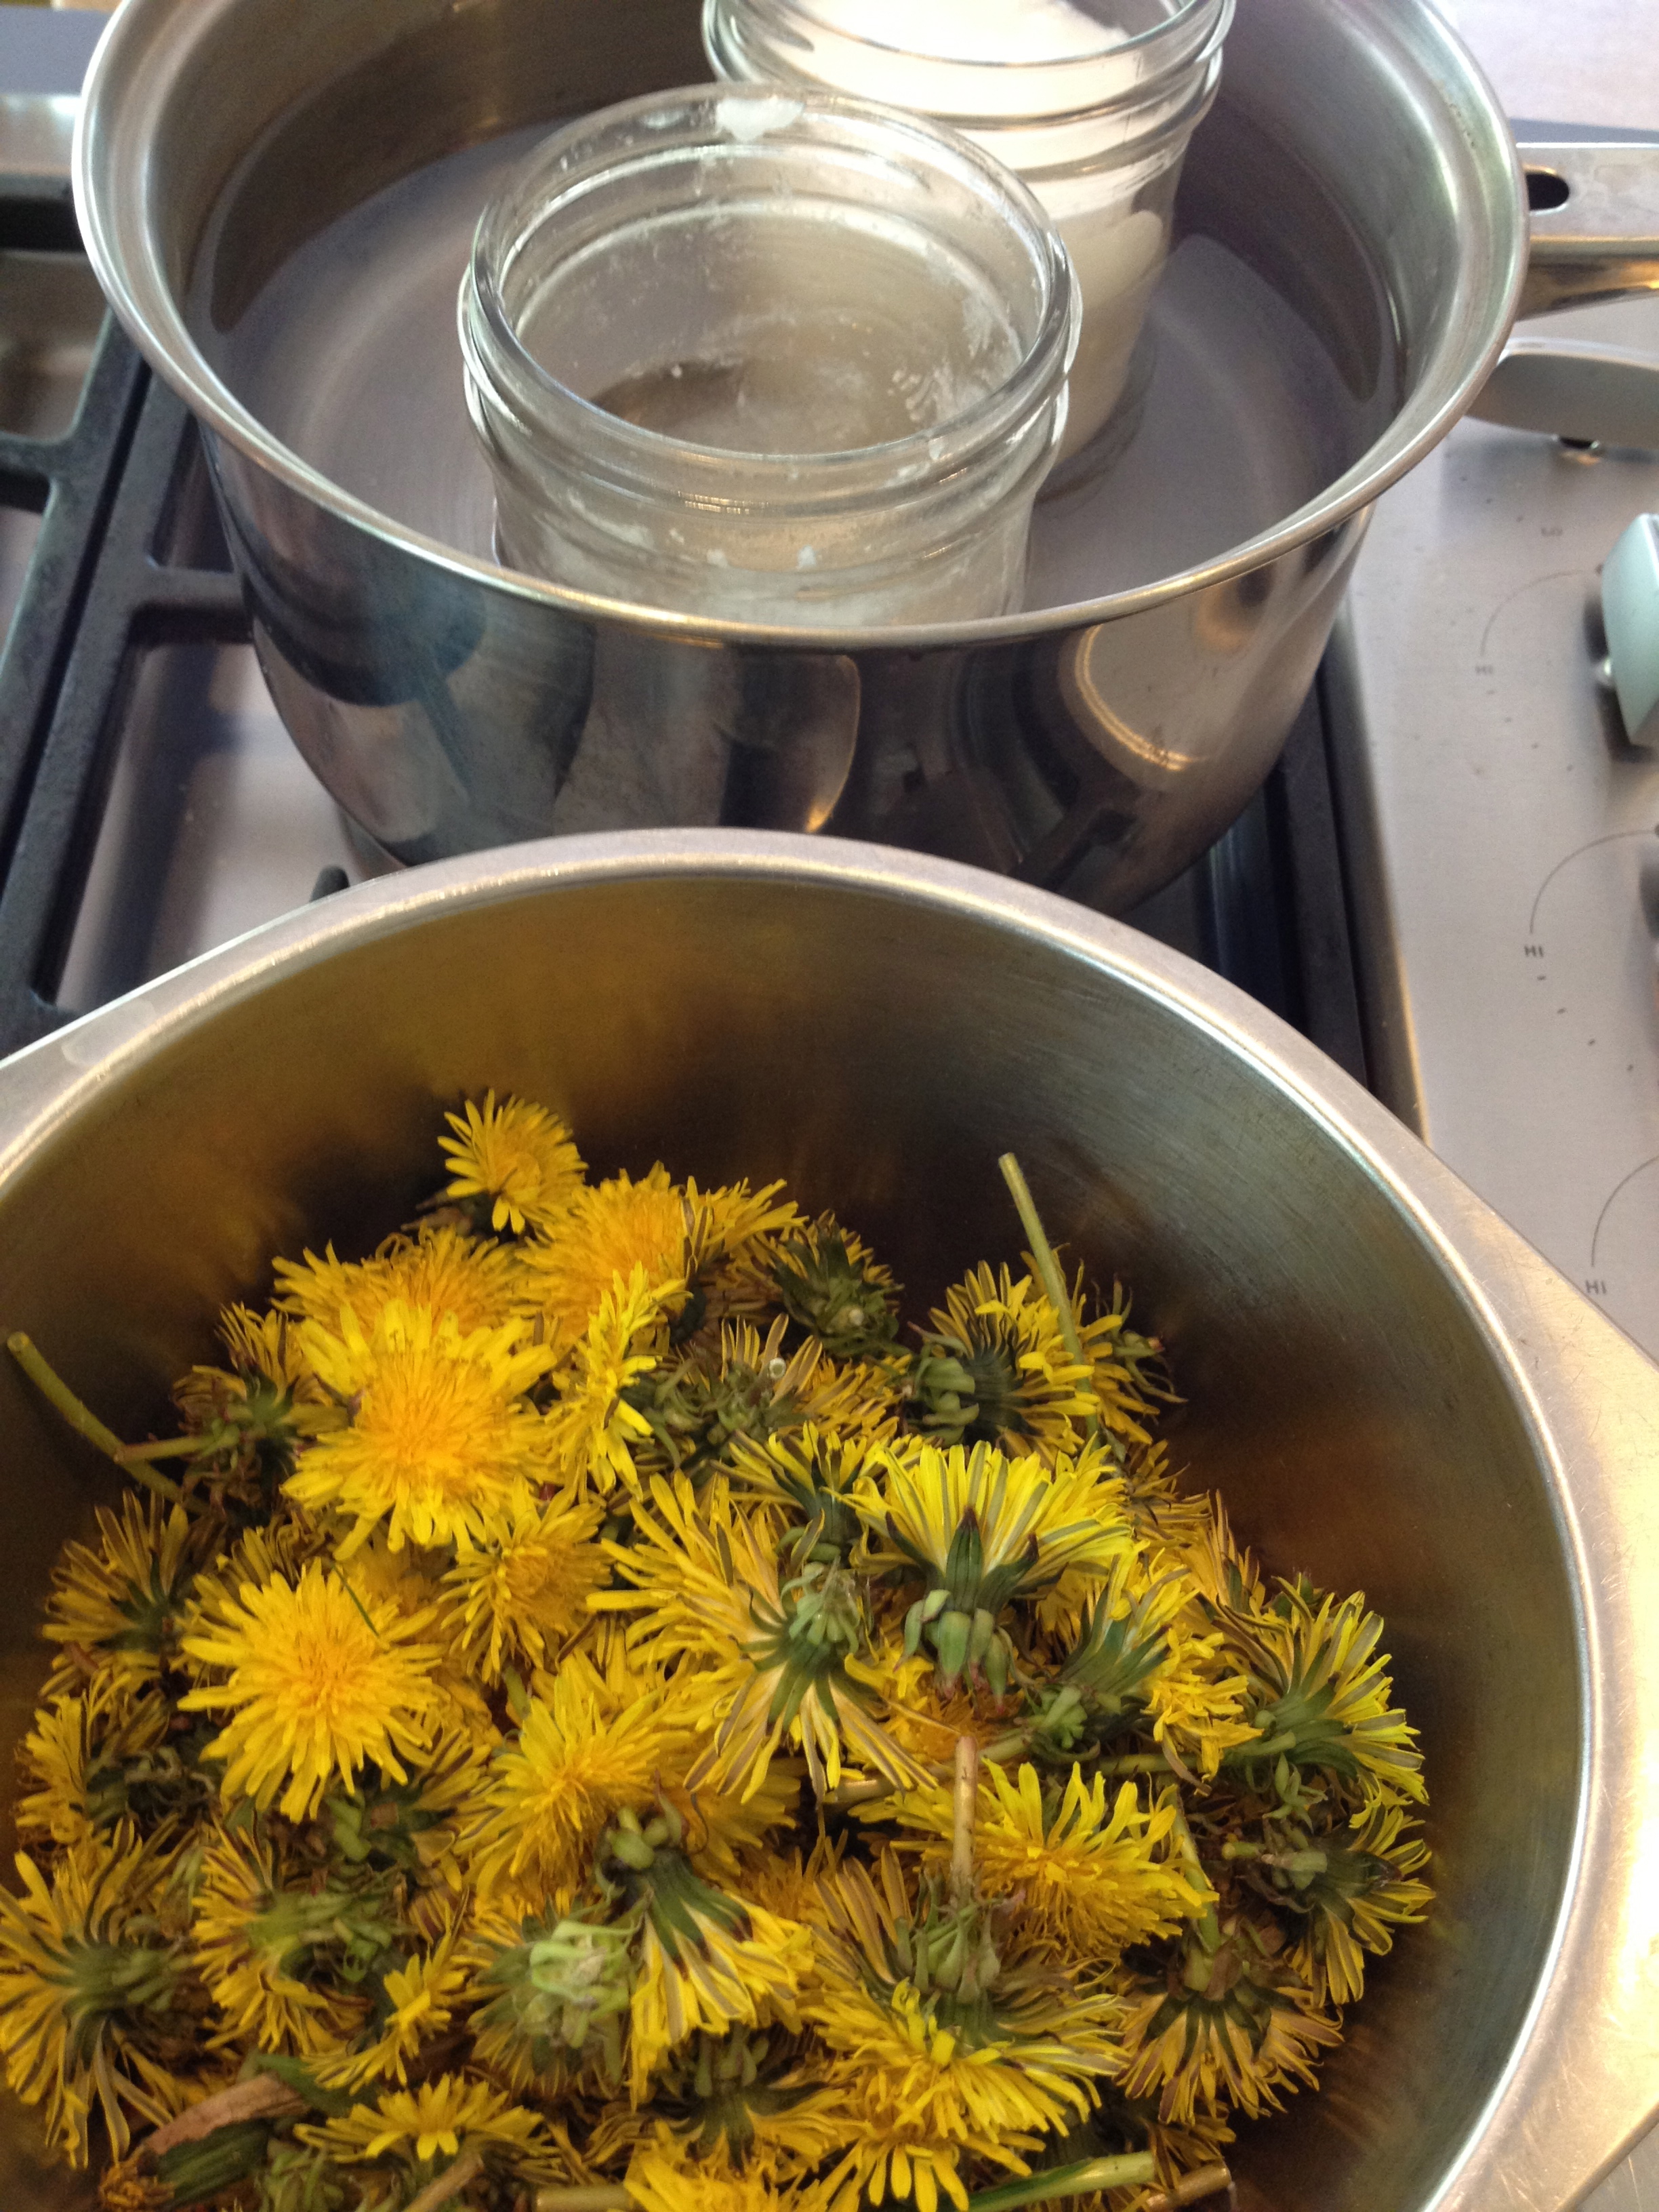
As an herbal medicine, the dandelion flowers, leaves, and roots are useful to support digestion, the lymphatic system, and healthy urinary tract function. It is a perfect medicine that’s readily available and easy to find.
Dandelion root is a helpful metabolic tonic for the digestive system, where it helps digestion and absorption of minerals. Roast the root and prepare it in a tea or tincture to include as part of a digestive herbal blend. Dandelion root tea has an affinity for the urinary tract system and can be included as part of a protocol to support healthy urinary function when mixed with other plants such as cranberry and echinacea.
As a lymphatic herb, dandelion flowers can be used in a topical oil to massage over cystic and fibrous tissues. I like to use a dandelion flower oil massage to bring sunshine and vibrancy to tissues that may be stagnant and stuck, particularly the lymphatic breast and pectoral tissues below the armpits and the tender lymphatic tissues along the leg and groin regions.
Dandelion flower–infused oil works well with infused oils of calendula, plantain, and violet flowers and leaves. This gentle herb-infused oil is helpful for Maya abdominal massage (a well-known technique developed by naturopath Rosita Arvigo, based on her apprenticeship with Mayan healer Don Elijio Panti), and for massage for postpartum mothers.
Gathering Dandelion
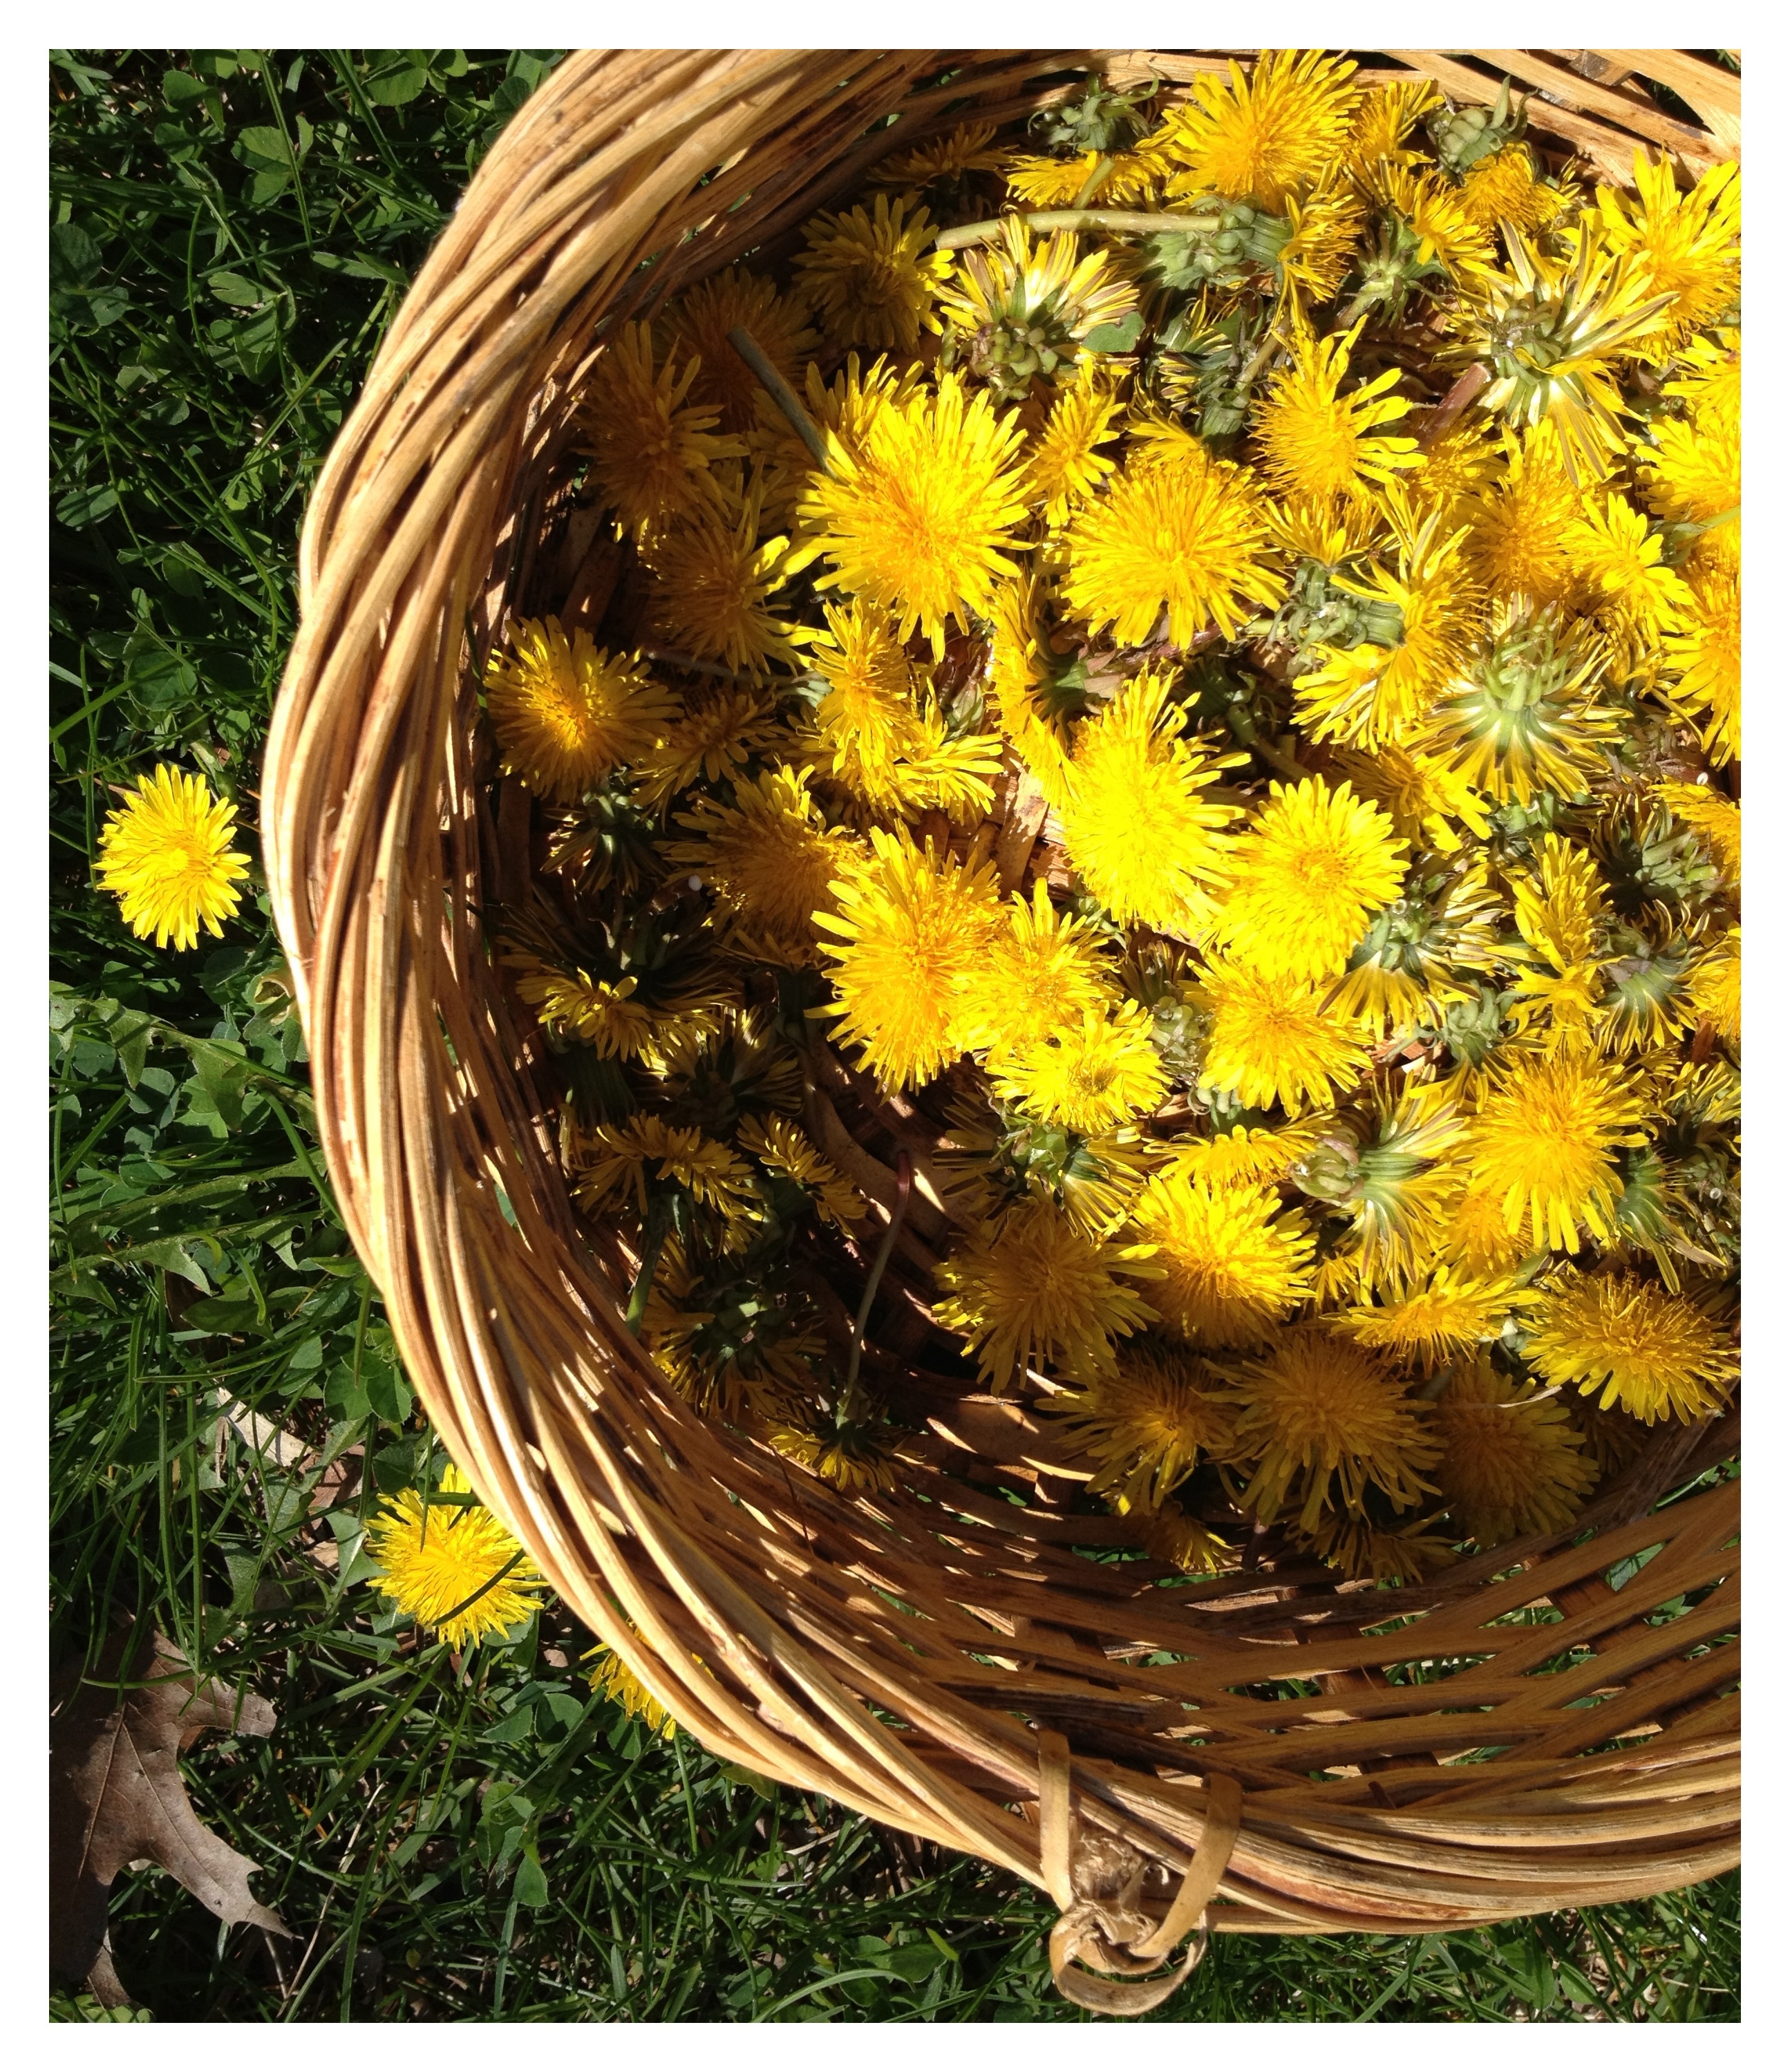
In midspring, as the weather warms, pluck the flowers easily with your fingers. Because they are difficult to wash well, harvest flowers that are free from significant dust and debris.
Dandelions that grow in the shade will be more tender and sweet than those growing in direct sun. They will also bloom later. Leaves become significantly more bitter, dry, and rough after the dandelion goes to flower and seed and as the weather becomes warm in summer.
Dig the roots any time across the seasons. The soil quality and moisture determine whether the roots will be easy or difficult to remove. Use a hand-digging tool, and be careful not to break off the taproot midway. Both the crowns and roots will need a good brushing and scrubbing in the kitchen to remove excess soil.
Dandelion, parsley, arugula, romaine, radicchio, endive are all delicious, bitter greens of springtime that make perfect addition to salads! Why do bitter flavors matter? Bitter flavors of plants, while having a negative connotation to many, may be one of the keys to our wellness. Bitter flavors help stimulate digestion, bile production and can support healthy liver function.
While Garlic Mustard continues to persist throughout our Great Lakes bioregion and threatens to crowd-out wildflowers and native vegetation, let us consider one of its virtues: It is an edible, bitter green. Harvest away, be sure to replace the area with other plants native to the area to help reestablish the disturbed space and prevent another Garlic Mustard Invasion (that could be a band name, hehe).
Garlic Mustard Pesto
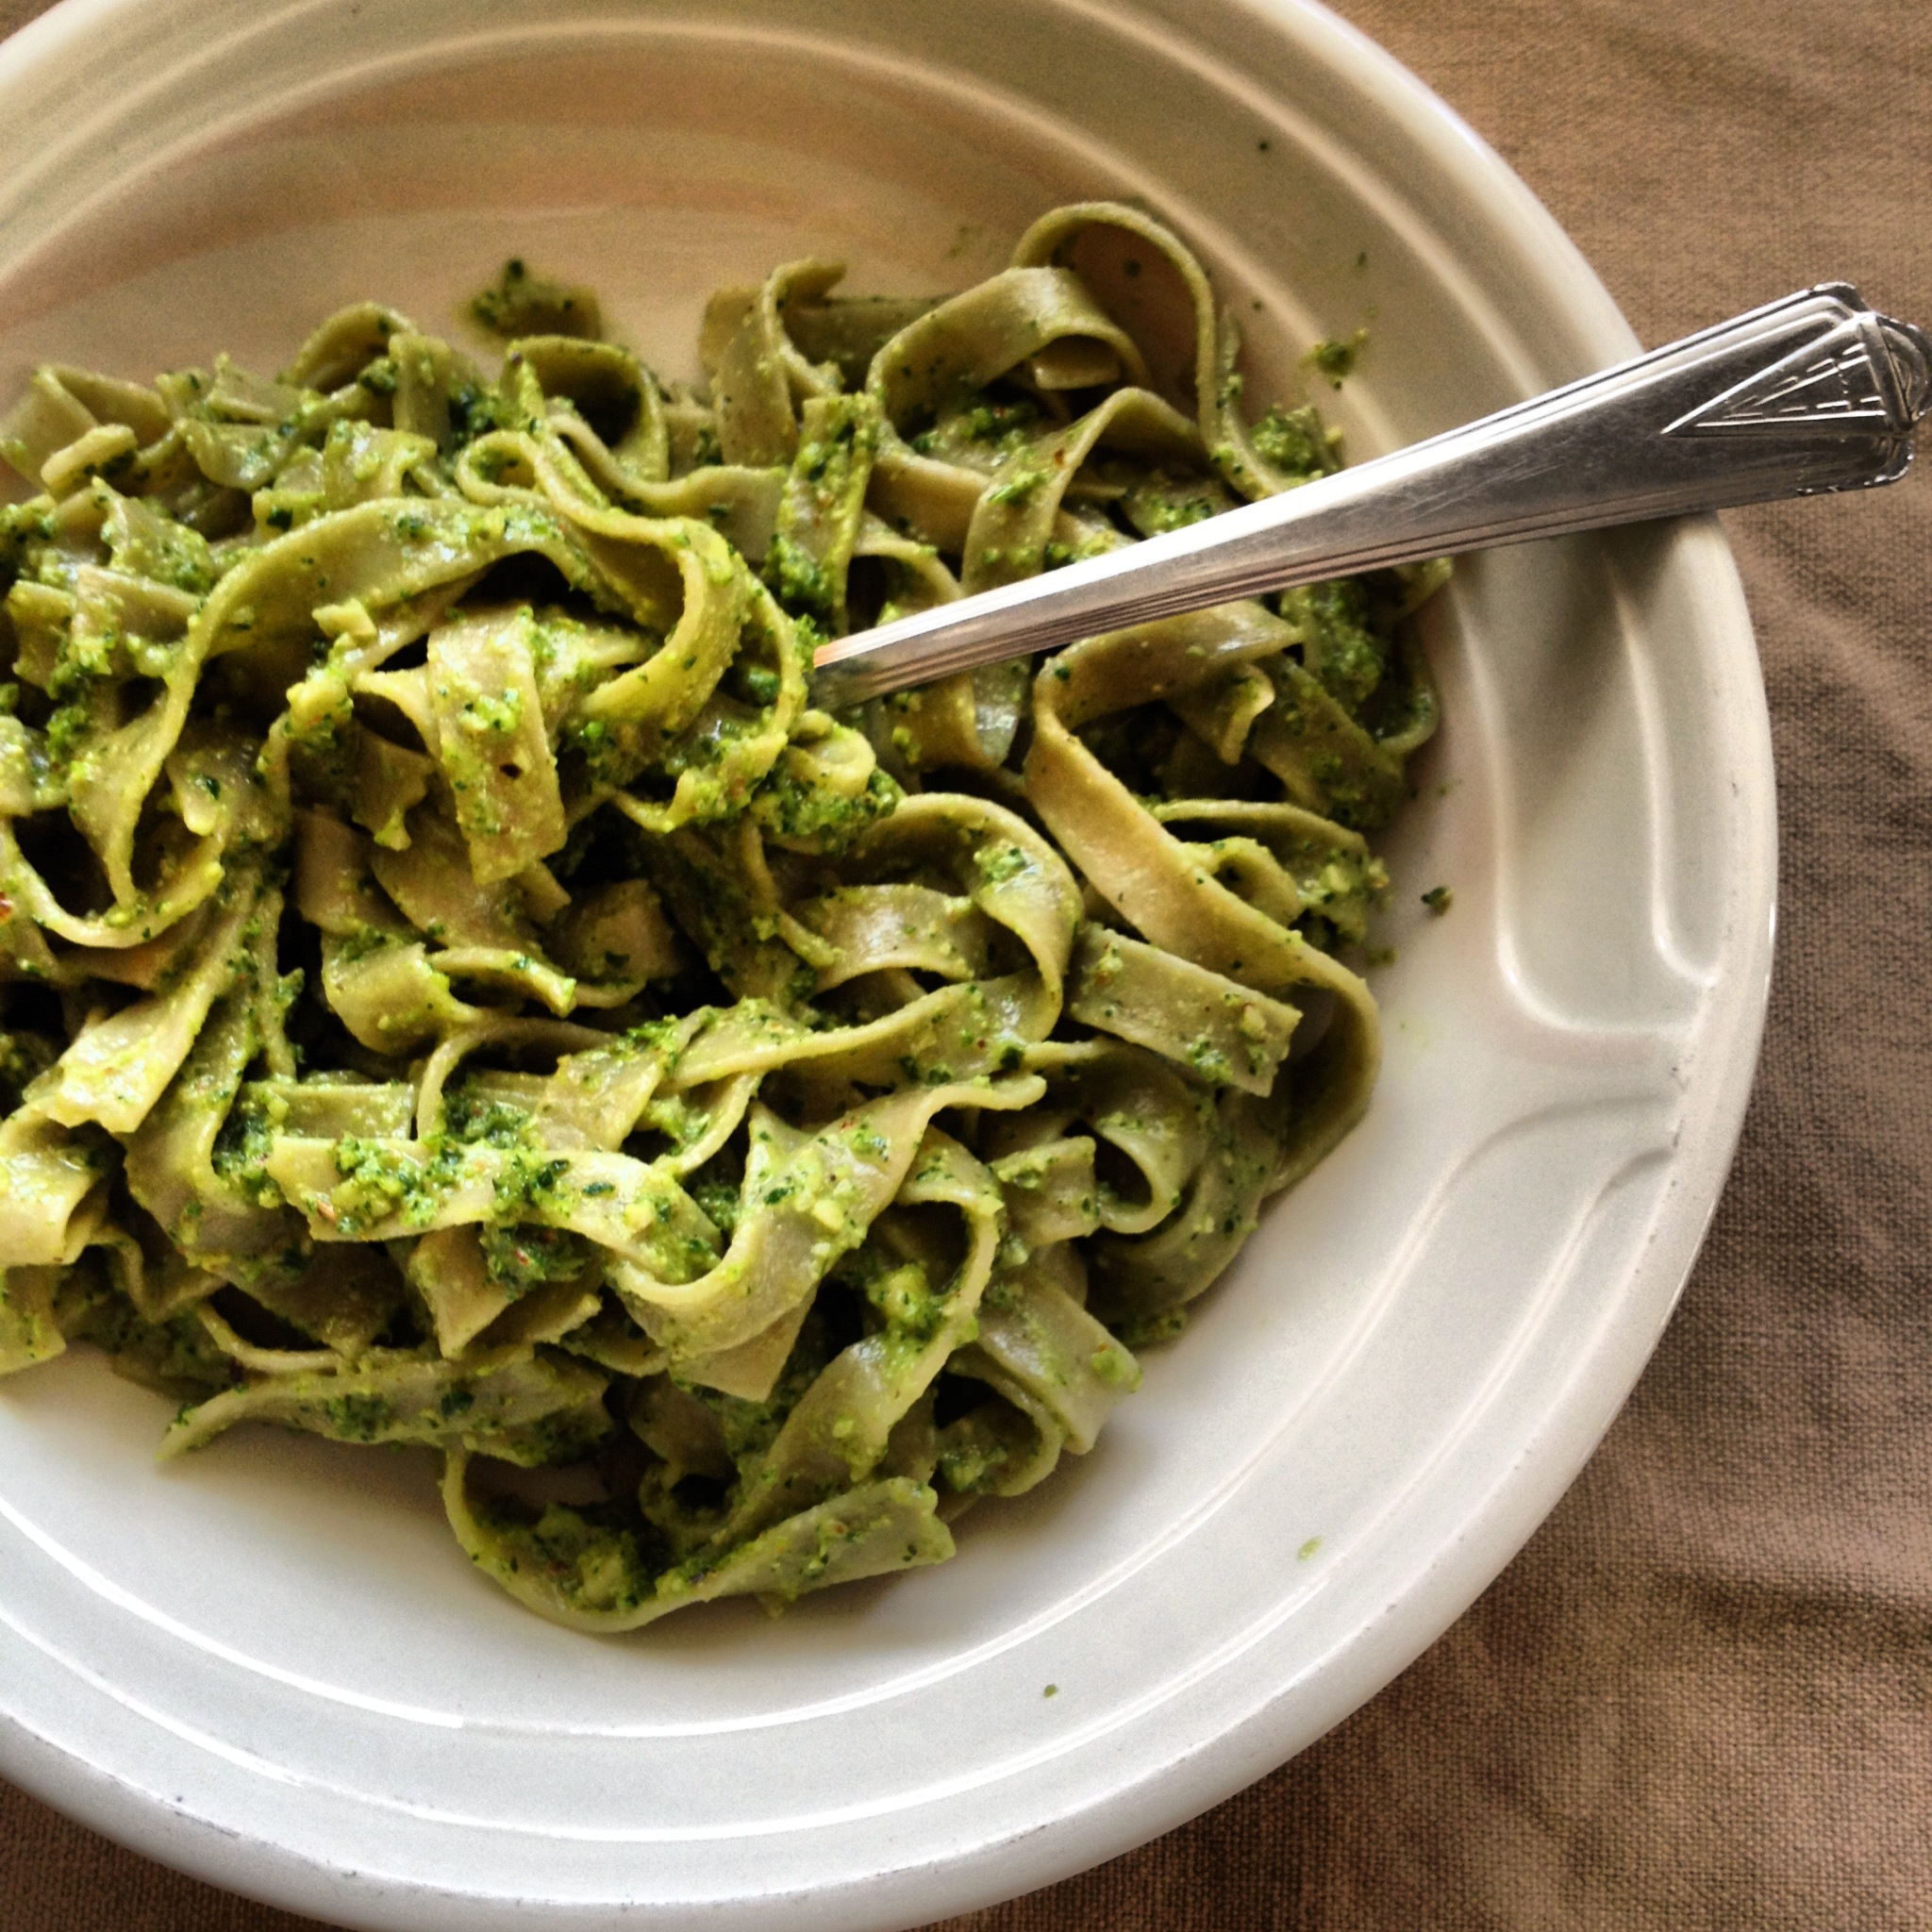
One of the most popular ways to prepare Garlic Mustard is preparing it as a versatile, delicious pesto. Variations on pesto recipes can vary to suit personal taste preference and the flavor of the Garlic Mustard that is being harvested.
Want to prepare a large batch? Pesto can be made without the nuts (they tend to taste rancid after thawing) and froze into ice-cube sized portions that will last for several months until the local Basil is ready for harvest here in Michigan.
The pesto can be added to pasta, used in soups (like a French soup au pistou), served on crackers with cheese as an elegant appetizer, or even used as a base for a wild foods pizza of local Michigan Morels, homemade soft cheese, and wild onion.
Recipe: Foraged Greens & Garlic Mustard Pesto
4 cups leaves, stems of Garlic Mustard (washed)
1 cup wild chives
1 cup wild garlic scapes
1 cup parsley (if desired)
1 cup walnuts
4 TBSP coconut oil
1tsp sea salt, pepper, squirt of lemon juice to taste
Add all to food processor, puree. Check flavor, add parsley, salt, pepper to preferred taste. Serve over crackers, on pizza, pasta, soup… the ideas are limitless and the pesto can be used in similar ways to traditional basil pesto.
The Rise of Garlic Mustard
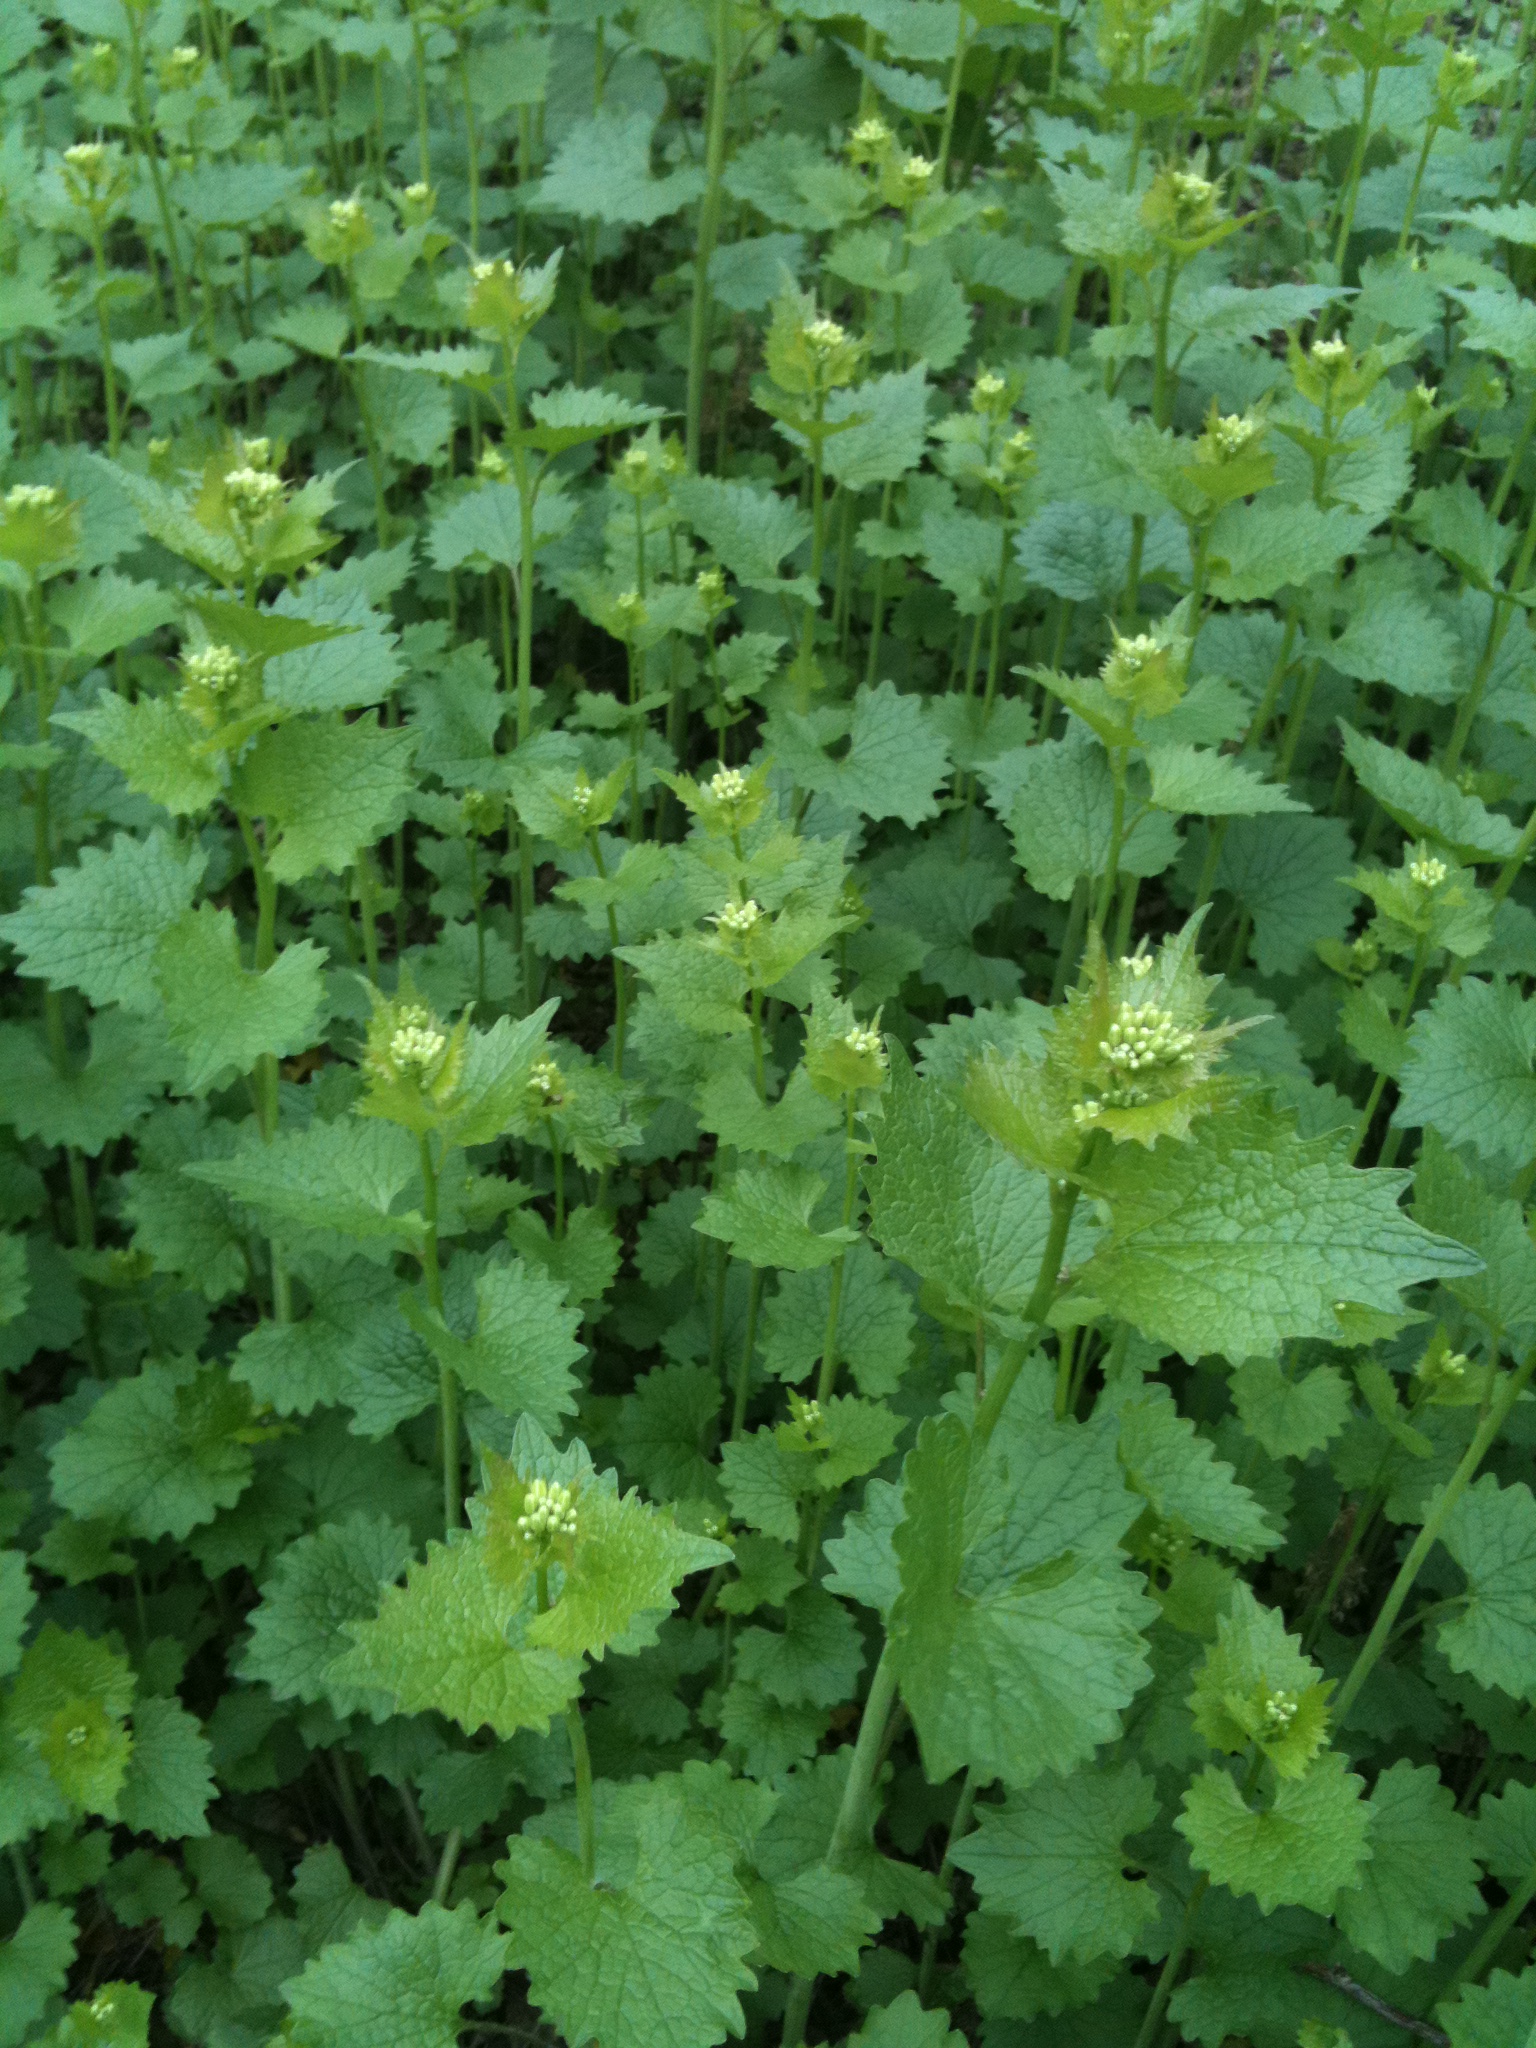
What is the adage, “A weed is a plant that is growing where you don’t want it?” Abundant in areas of disturbed soil – at the forest’s edge, along roadsides, and on river floodplains – the Garlic Mustard (Alliaria petiolata, Brassicaceae) is deemed by many as a noxious, invasive species, choking out native vegetation and spreading wildly across the state.
The Roots of Garlic Mustard
The National Park Service describes the earliest appearance of the Garlic Mustard on the Atlantic coast to be documented in 1868. High in Vitamin C and a nutritious bitter green, it is believed that it was brought along by settlers to the area of Long Island, NY for food and medicinal purposes.
Since that time in the 1800s, Garlic Mustard has spread south and west and has wrecked havoc on natural areas throughout the Eastern United States, particularly throughout disturbed areas within fields, floodplains, and woodlands here in the Great Lakes BioRegion.
What makes Garlic Mustard able to take over so much area in so little time? Garlic Mustard thrives on disturbed land and areas under development.
The Garlic Mustard Invasion
It is winter-hardy biennial plant and can reproduce lightning fast in its second year with its ability to produce hundreds of seeds once it goes to flower. And once the plant sets its seed, the seeds can remain viable in the soil for many years. So if you want it out, pull it as it sets out its showy white flowers (photo above).
Picking Garlic Mustard for the Best Flavor
The early basal roots are more bitter in the spring, the fleshy stems less so – and it is sweeter in the fall after a frost. The roots are slightly nutty, and the second year plant should be harvested just before it flowers… But don’t get caught up in these rules — if you are pulling it to preserve other plants in your garden or a participating in a pull, use it and partner it with other flavors like parsley, walnuts and lemon to suit your palate!
Want to learn more about wild edibles? Check out my book, “Midwest Foraging!” Available online at Amazon.com.
What is the adage, “A weed is a plant that is growing where you don’t want it?” Abundant in areas of disturbed soil – at the forest’s edge, along roadsides, and on river floodplains – the Garlic Mustard (Alliaria petiolata, Brassicaceae) is deemed by many as a noxious, invasive species, choking out native vegetation and spreading wildly across the state.
The National Park Service describes the earliest appearance of the Garlic Mustard on the Atlantic coast to be documented in 1868. High in Vitamin C and a nutritious bitter green, it is believed that it was brought along by settlers to the area of Long Island, NY for food and medicinal purposes. Since that time in the 1800s, Garlic Mustard has spread south and west and has wrecked havoc on natural areas throughout the Eastern United States, particularly throughout disturbed areas within fields, floodplains, and woodlands here in the Great Lakes BioRegion.
What makes Garlic Mustard able to take over so much area in so little time? Garlic Mustard thrives on disturbed land and areas under development.
It is winter-hardy biennial plant and can reproduce lightning fast in its second year with its ability to produce hundreds of seeds once it goes to flower. And once the plant sets its seed, the seeds can remain viable in the soil for many years. So if you want it out, pull it as it sets out its showy white flowers (photo above).
Be sure to replace the area with other plants native to the area to help reestablish the disturbed space and prevent another Garlic Mustard Invasion (that could be a band name, hehe).
Behind Every Vice… The Garlic Mustard’s Virtue
While Garlic Mustard continues to persist throughout our Great Lakes bioregion and threatens to crowd-out wildflowers and native vegetation, let us consider one of its virtues: It is edible!
Like many early spring greens, the flavors of the Garlic Mustard are predominantly bitter. Different parts of the plant, as well the age of the plant can affect the degree in the bitter flavor.
Great Lakes Herbalist Jim McDonald believes that the Bitter flavors of plants, while having a negative connotation to many, may be one of the keys to our wellness. Bitter flavors help stimulate digestion, bile production and can support healthy liver function.
Other bitter plants that are beneficial to add into the diet include parsley, arugula, romaine, radicchio, endive, dandelion, and coffee. Best thing about Garlic Mustard as a bitter – it can be easily harvested for FREE with little concern of damaging its plant population!
The early basal roots are more bitter in the spring, the fleshy stems less so – and it is sweeter in the fall after a frost. The roots are slightly nutty, and the second year plant should be harvested just before it flowers… But don’t get caught up in these rules — if you are pulling it to preserve other plants in your garden or a participating in a pull, use it and partner it with other flavors like parsley, walnuts and lemon to suit your palate!
One of the most popular ways to prepare Garlic Mustard is preparing it as a versatile, delicious pesto. Variations on pesto recipes can vary to suit personal taste preference and the flavor of the Garlic Mustard that is being harvested.
Want to prepare a large batch? Pesto can be made without the nuts (they tend to taste rancid after thawing) and froze into ice-cube sized portions that will last for several months until the local Basil is ready for harvest here in Michigan.
The pesto can be added to pasta, used in soups (like a French soup au pistou), served on crackers with cheese as an elegant appetizer, or even used as a base for a wild foods pizza of local Michigan Morels, homemade soft cheese, and wild onion.
Basic Foraged Greens & Garlic Mustard Pesto
4 cups leaves, stems of Garlic Mustard (washed)
1 cup wild chives
1 cup wild garlic scapes
1 cup parsley (if desired)
1 cup walnuts
4 TBSP coconut oil
1tsp sea salt, pepper, squirt of lemon juice to taste
Add all to food processor, puree. Check flavor, add parsley, salt, pepper to preferred taste. Serve over crackers, on pizza, pasta, soup… the ideas are limitless and the pesto can be used in similar ways to traditional basil pesto.
The dunes of my childhood where sassafras grows in abundance.
While on a trail run through the dunes of Hoffmaster State Park this summer I realized that there is no other smell reminiscent of my West Michigan lakeshore upbringing than sassafras. That aromatic, spicy rootbeer fragrance of the sassafras floats on the breeze in the dew of the morning or after a wet, damp rain. It is one of those smells that truly defines my life.
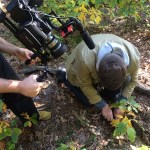
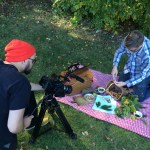
You can imagine my delight when forager friend Sam Thayer recommended me to host a Minneapolis-based film crew to learn all about sassafras for their “How To Make Everything: Rootbeer” segment! I enjoyed taking the crew through the dunes woods of my childhood stomping grounds to gather the sassafras roots for their project. Check out our final segment on sassafras HERE.
Though it is fall and the leaves are rapidly falling from the trees, it isn’t to late to gather a few saplings to make a late fall batch of rootbeer! Want to make your own local rootbeer? Read more…
A Mitten Gal’s Sassafras Rootbeer
Sassafras albidum. Sassafras is common along trails and beach areas and makes a delightful tea and culinary spice. Sassafras is a small deciduous tree that grows to heights of up to 60 feet or more in optimum conditions. It commonly has mitten-shaped, three-lobed and un-lobed leaves. Its bark is a rough and reddish brown, the aromatic roots range in color from white to reddish brown. The roots of a small sapling can be gathered in the spring or fall. Wash, chop, and completely dry them.
Here’s what you’ll need to make a simple syrup with sassafras and other woodland herbs for a refreshing batch of rootbeer soda pop.
Ingredients:
1/2 cup chopped roots of sassafras**
1/4 cup burdock root*
1/4 cup sarsaparilla*
1 tbsp dry hops*
1tsp juniper berries*
10 wintergreen leaves*
1 tsp dry ginger root*
1 tsp spicebush berries (optional)*
4 cups water
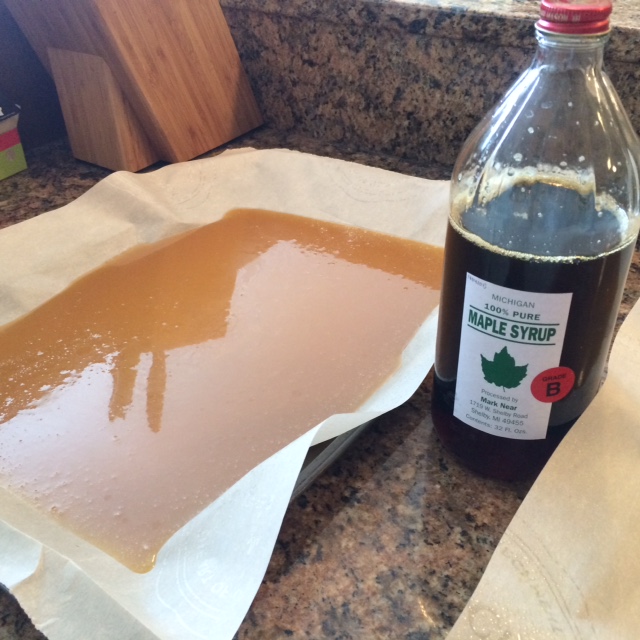
4 cups MICHIGAN maple syrup
Directions:
Simmer herbs in a pot with 4 cups boiling water for 5 minutes, covered to retain volatile oils.
Strain
Stir in maple syrup, let cool
Add 1 part sassafras simple syrup mixture to 2 parts club soda and serve over ice or with vanilla ice cream
Sassafras simple syrup can be stored in the fridge for up to 3 weeks
*Some herbs can be gathered by hand from the wild, procured from your local health food store or ordered online. I like Mountain Rose Herbs as an online supplier for organic herbs. To learn more about sassafras or other herbs mentioned in this recipe? Check out my book, “Midwest Foraging.”
As an anthropologist, culture is a central theme to all aspects of my personal and professional life. As a writer, I believe in the power of a collective narrative and how we can shape it to drive societal change. I believe we are the storytellers that can help shift the story, and shift the world.
On the other side of Covid, what will our cultures “value” on the other side of this pandemic? How can the way in which we have had to re-organize and re-work to accomodate the constraints of Covid re-create organizational cultures – business, govt, education, arts, religion – that are more equitable?
Will our cultures prioritize transparency, shared accountability, and equitable access to power/resources/decision-making?
Will our cultures continue to empower economies that extract natural and human resources at a rate that exceeds the earth’s ability to replenish/restore, or will there be an intentional shift to regenerative, regional economies?
Will cultural narratives based on “fear” and “scarcity” be put to rest so we can see clearly that we live in a world of abundance? That we humans are the ones that cause that fear and scarcity, and its we humans that can end that with Covid?
We can re-write our future together and create a new narrative. Question is, will we?
What’s more delicious that home-boiled maple syrup fresh from the sugar shack? A fleur de sel caramel made with said maple syrup, of course!
These classic French-style caramels are styled similarly to a Fleur de Sel caramel. The use of maple syrup in lieu of the commonly-used corn syrup will require close monitoring as the mixture reaches 248 degrees, but results in a much more balanced vanilla flavor that’s worth the effort managing the viscosity.
Ingredients:
1 cup heavy cream
5 tablespoons unsalted butter, cut into pieces, room temperature
1 teaspoon fleur de sel
1 1/2 cups sugar
1/2 cup maple syrup
Parchment paper, baking sheet or pan and a candy thermometer
1) Prepare pan with parchment, oil slightly – the caramel making process is a sticky one.
2) Bring cream, butter and fleur de sel to a boil in a small saucepan, then remove from heat and set aside.
3) Boil syrup, sugar in a large saucepan, dissolving sugar and gentle stirring until syrup comes up to a boil.
3) Stir in cream, stir constantly and simmer until the candy thermometer reaches 248 degrees.
4) Pour caramel mixture into the prepared sheet, let cool.
5) Cut into strips or bite size candies, wrapping them in pieces of cut parchment, twisting ends.
6) Caramels store in a cool location for up to two weeks.
Want to learn more? Click HERE to go to WZZM13 to learn how Maple Syrup is made or visit my other posts on the blog HERE to learn about the syruping process. For more on foraging wild foods and other wild edibles, check out my book, Midwest Foraging.
You know the scene. It’s 4 a.m. You wake up, chilled and feverish. In denial, you toss and turn, hoping that you haven’t caught that cold going around the office. Instead of ignoring the symptoms, reach for this homemade elderberry elixir.
Medical research has shown that taking an elderberry-based tincture within the first 48 hours of a virus’ onset can shorten the duration of symptoms by as much as four days.
Keep a stockpile of this syrup on hand for whenever illness strikes. It tastes way better than the cherry-flavored stuff, it’s all natural, and in under an hour you can make a batch large enough to keep you and your family healthy all winter long.
Want local elderberry syrup? Shop my apothecary for my foraged chaga elderberry blend.
Or if you’re too sick to make a bottle, there are store-bought versions like Urban Moonshine’s Herbal Immune Zoom that are quite nice, too.
DIY Elderberry Elixir
Makes 1 quart
1 cups dry or fresh elderberries**
2 cups water
2 tablespoons fresh ginger, peeled and chopped
1 cup 40 percent alcohol
1 cup raw local honey
1 quart size canning jar
Small bottles for dispensing
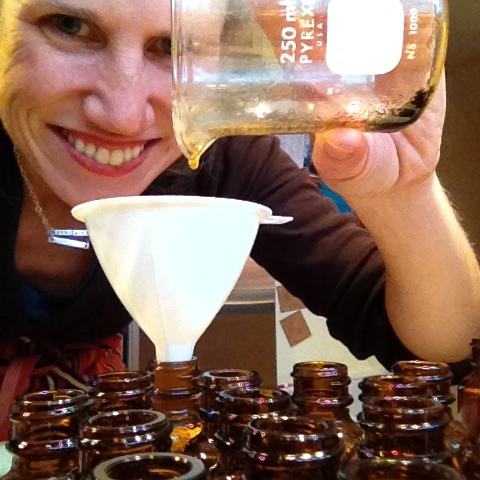
1. In a large saucepan, combine the water, elderberries, ginger. Bring to a boil, reduce heat, then simmer for 20 minutes. Press and strain elderberry-ginger mixture into a quart-size canning jar. Stir in 1 cup honey and 1 cup alcohol to preserve the mixture. Shake well to mix. Divide into smaller containers, if you like. The elderberry elixir will keep in the refrigerator for 6 months.
2. At the first signs of a cold or flu, take 2 tablespoons of elderberry every hour for up to 5 days.
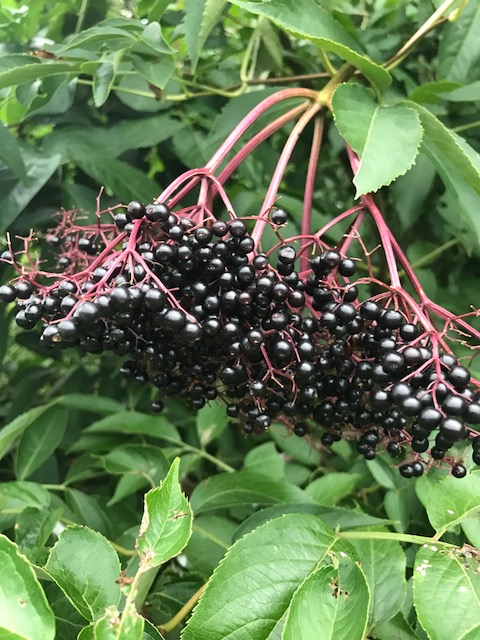
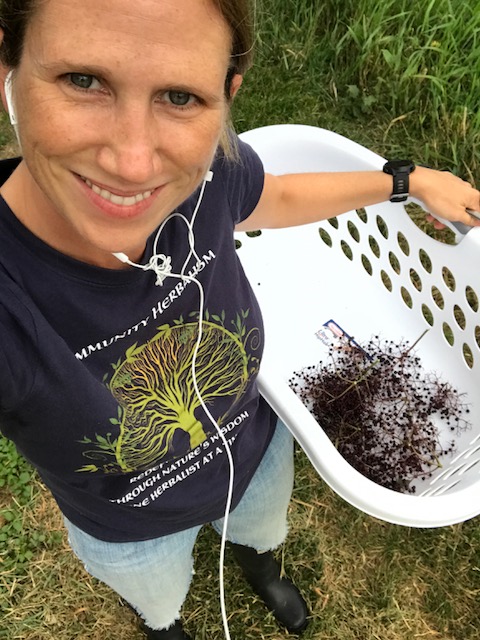
Elderberry (Sambucus nigra) is abundant across North American, and its berries can be foraged from the wild across much of the United States. No time for foraging? Order dry elderberries online from reputable herbal sources like Mountain Rose Herbs, or choose to buy local from an herbalist in your area.
Want to wildcraft your own berries? Order my newest book, “Midwest Medicinal Plants” to learn how to ID and wildcraft the plant yourself!
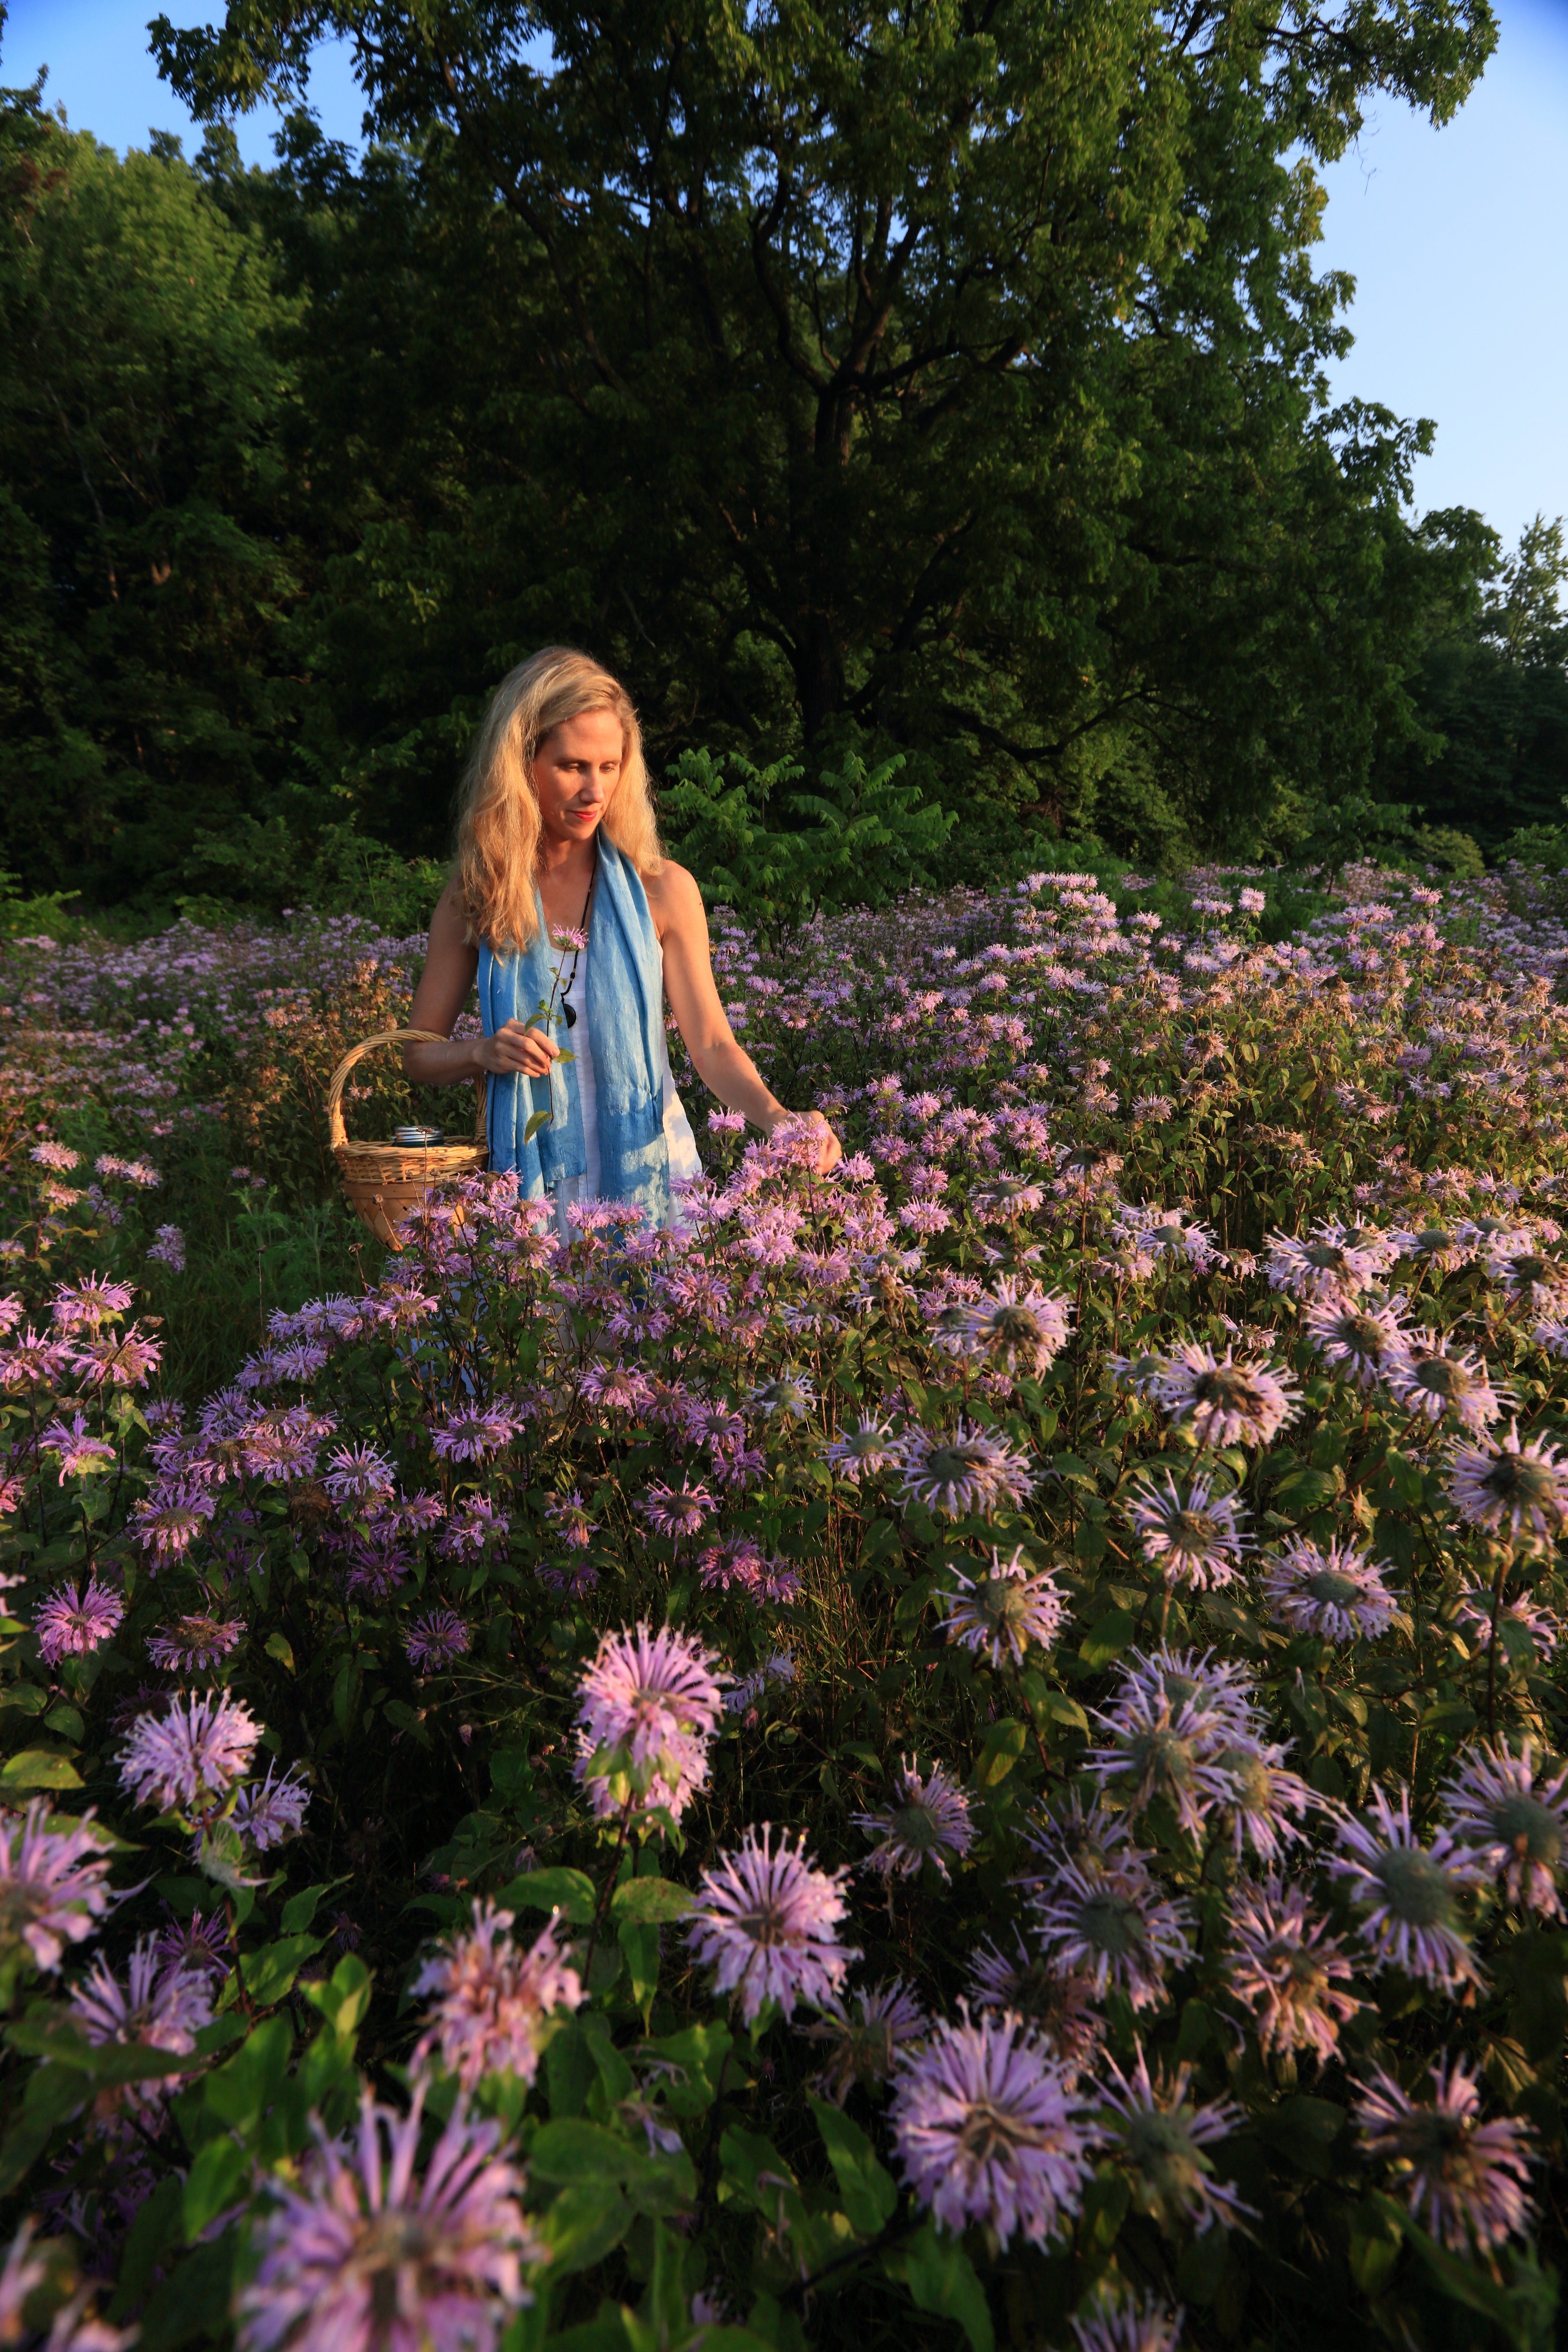
Gathering wild bee balm for my well-known Gypsy Tea.
Sometimes when you feel a cold or a flu coming on, it’s easy to brush it off and keep pushing ahead. But when that little voice tells you that your body has caught a virus, heed its warning! Learning when and how to use popular herbal remedies can help you prevent from getting stuck at the corner of sick and miserable!
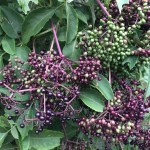
Elderberry (Sambucus nigra)
Plant medicines like elderberry can help shorten the lifespan of a virus — If you know when and how to use them! If you listen to your body’s call, and try preparations of elderberry elixir within the first 48 hours of the start of a virus, medical research shows that symptoms that come from colds and flus can be lessened by as much as 4 days. (1) Now, that doesn’t mean you can just chug elderberry elixir and NOT rest. Of course not. Resting is a crucial part to the body’s healing process.
But how does elderberry work? Elderberry is not only filled with antioxidants and flavonoids useful for the body, but it stimulates the body’s inflammation response against the virus. By triggering the production of cytokines – the inflammatory and anti-inflammatory agents that regulate the body’s immune system – elderberry powers the immune system which then inhibits the virus’ ability to reproduce. (2)
Elderberry is most commonly prepared as a syrup of the fresh or dry berries. Elderberry (Sambucus nigra) syrup is easy to make (visit my recipe online), but if you don’t have time, make a trip to your local health food shop to stock up, or better yet – support this local herbalist by stocking up with her elderberry elixir blends!! (Hint, hint) So at those first signs of illness – down that elderberry syrup in large tablespoon doses!
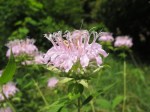
Bee Balm
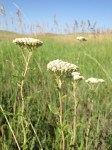
Yarrow
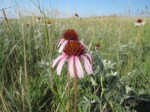
Echinacea
Gypsy Tea: Echinacea, Mints, Yarrow & Elderflower
While downing tablespoons of elderberry when I start to get sick, you will also find me making pots of my favorite tea traditionally known as Gypsy Tea- a formula that goes back generations. Gypsy Tea is a tea blend of aromatic mints (I prefer the wild bee balm, Monarda fistulosa), the bitter yarrow, and the relaxant elderflowers. I also add in echinacea for its additional immune boosting power, and sometimes garden herbs like sage and thyme for extra aromatics.
Gypsy Tea is also a great base in which to add honey and your elderberry elixir!To make your own Gypsy Tea, these herbs can be foraged from the wild, or you can procure your own herbs from a reputable forager or an online source like Mountain Rose Herbs.
Gypsy Tea Ingredients:
1 Part Yarrow (Achillea millefolium)
2 Parts Elderflower (Sambucus nigra)
2 Parts Bee Balm (Monarda spp) or Peppermint
1 Part Echinacea (Echiancea spp)
Directions: Add herbal ingredients to a french press or directly to a pot of boiling water. Cover, let steep for 5 minutes and drink hot. And like Grandma always says, Put on a hat! Cover the body, keep it warm, take to bed and REST. If you really are feeling crummy, consider making a large thermos of tea to keep hot by the bedside – this will help you to stay in bed and support the body’s immune system as it works on staying well.
Even herbalists get sick.
It’s easy to forget how to care for yourself once a virus settles in and your body begins to ache. Be prepared! Have on hand the ingredients you need to care for yourself allows your body to rest and fight off the virus. And remember to have a backup friend to rely on when you are at the corner of sick and miserable – even if it’s your golden retriever.
1) “Randomized study of the efficacy and safety of oral elderberry extract in the treatment of influenza A and B virus infections.” J Int Med Res. 2004 Mar-Apr;32(2):132-40.
2) “The effect of Sambucol, a black elderberry-based, natural product, on the production of human cytokines: I. Inflammatory cytokines” Eur Cytokine Netw. 2001 Apr-Jun;12(2):290-6
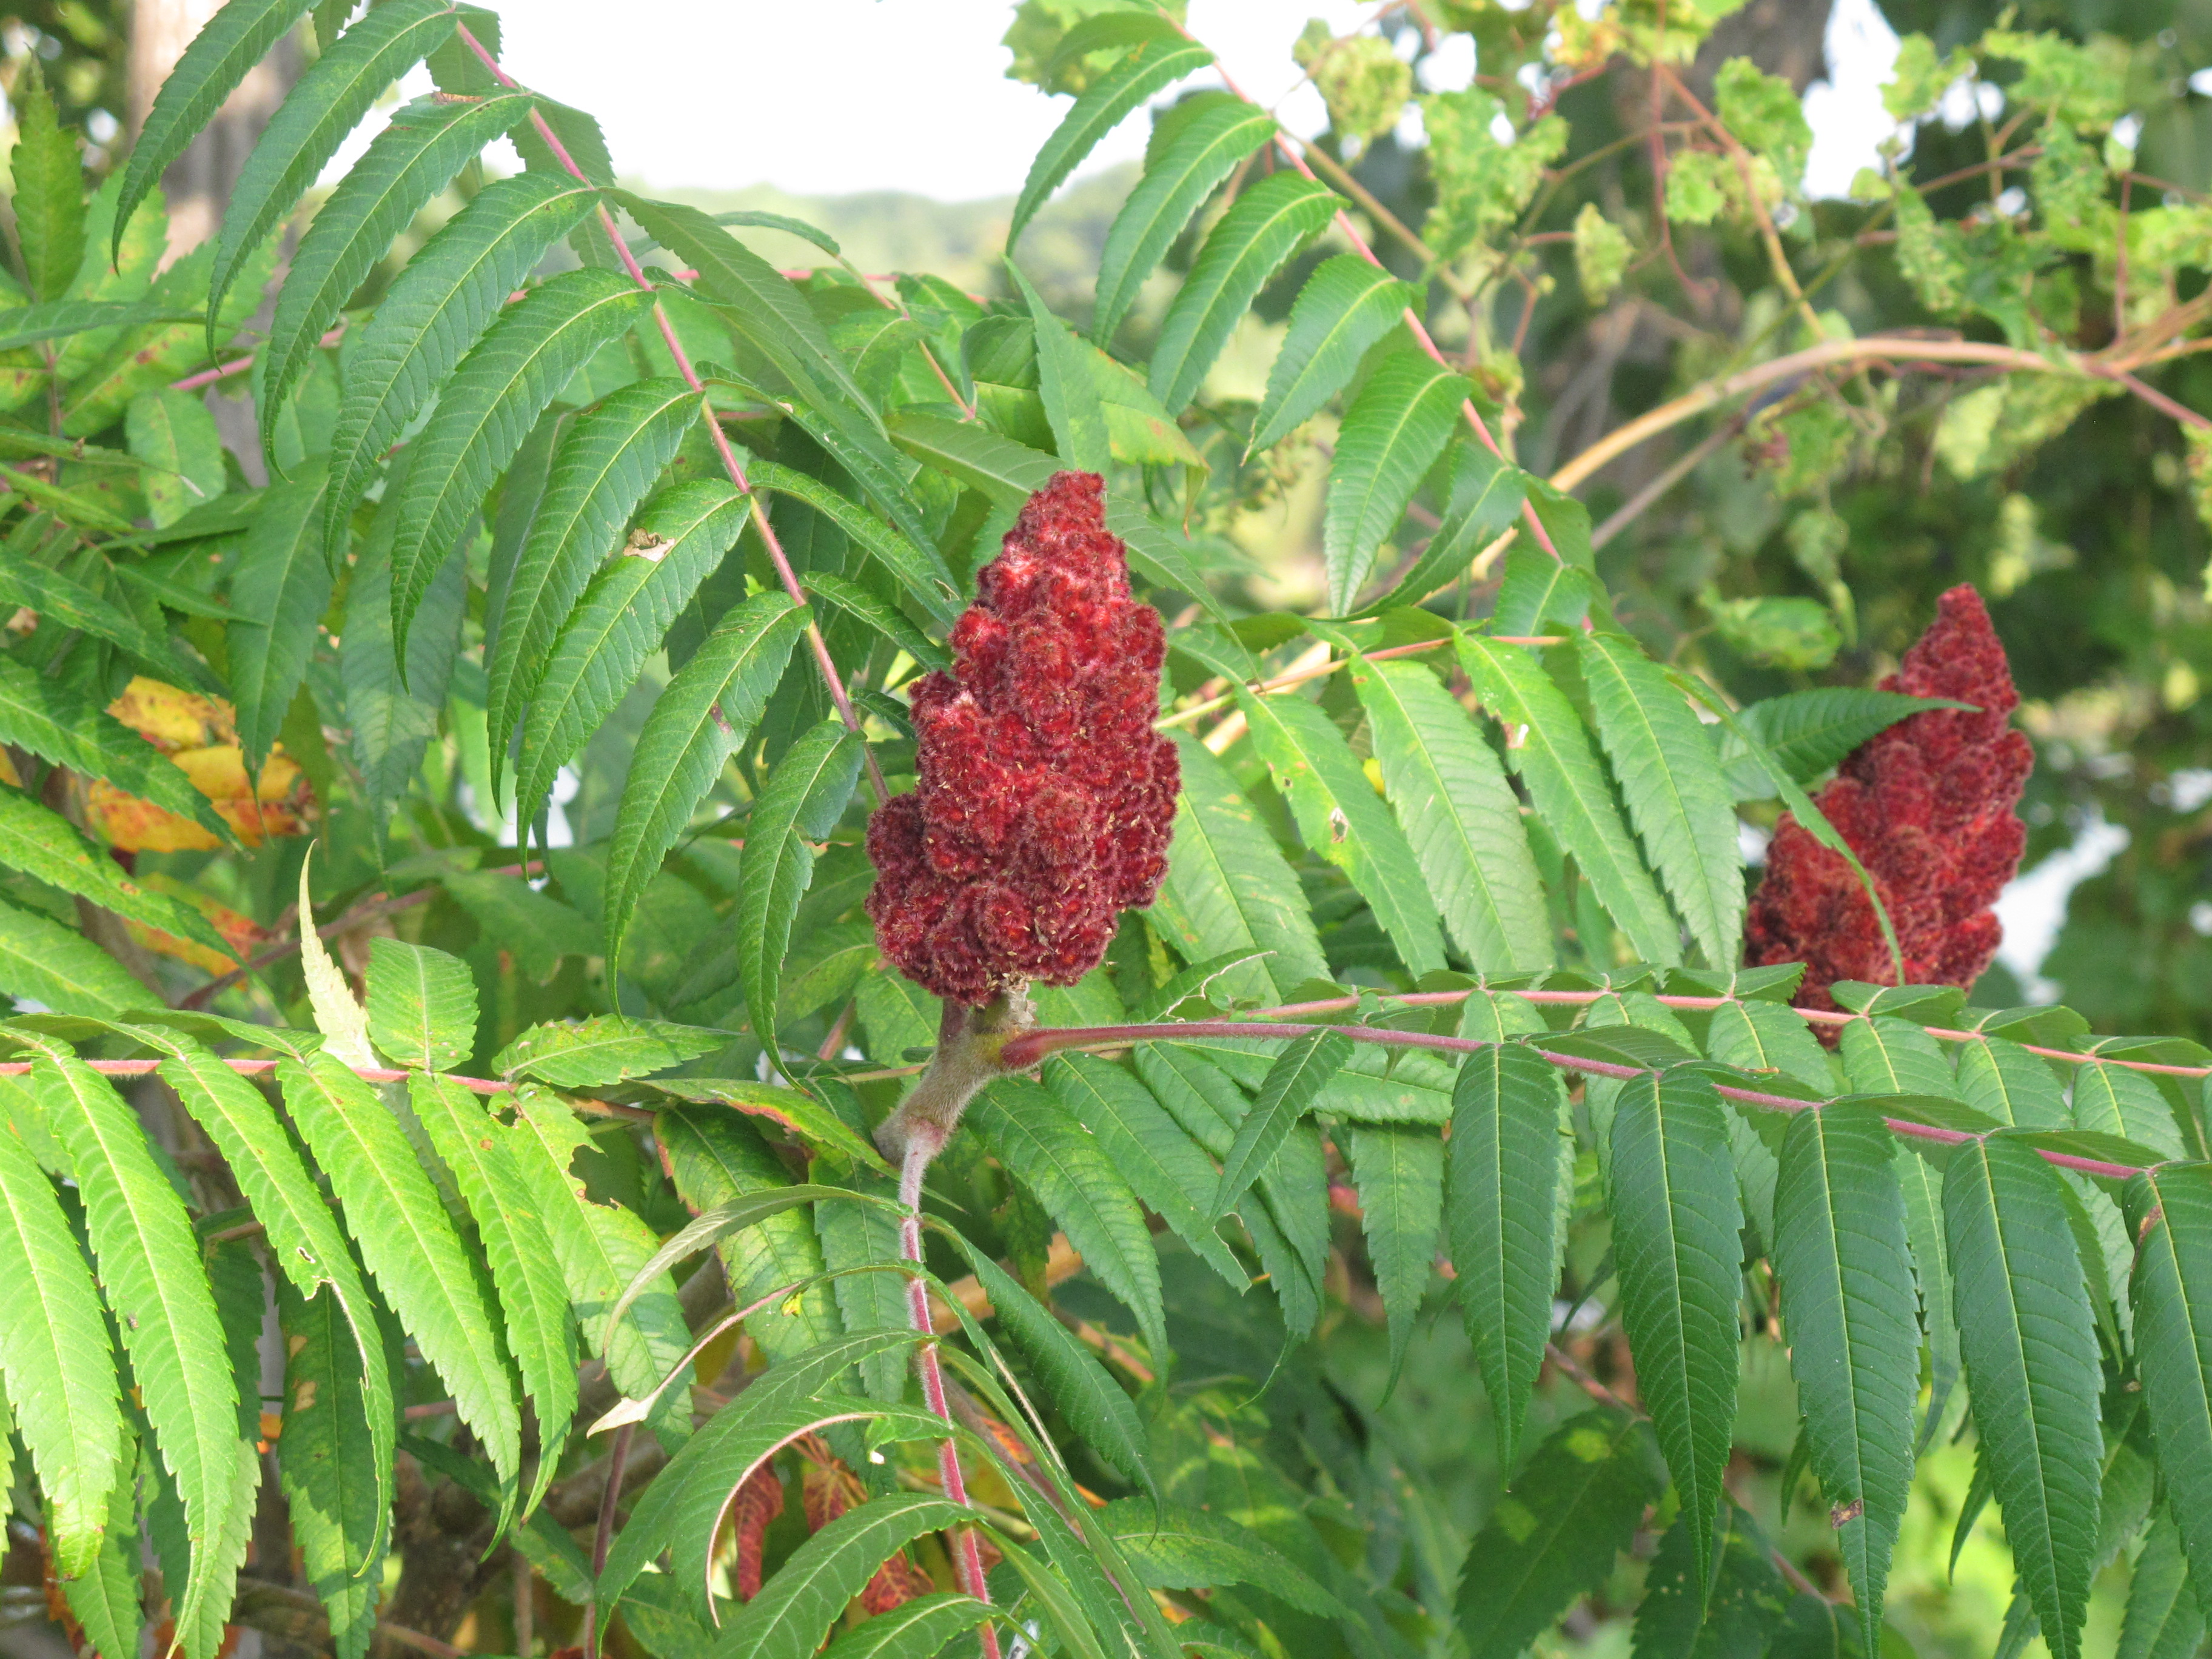
In the middle of a hot and steamy July, there’s nothing like a tall glass of refreshing lemonade. But here in the Midwest, lemons aren’t local… but guess what? You can make that pitcher of lemonade – or a copycat “lemonade” without the lemons while using the staghorn sumac berries instead!
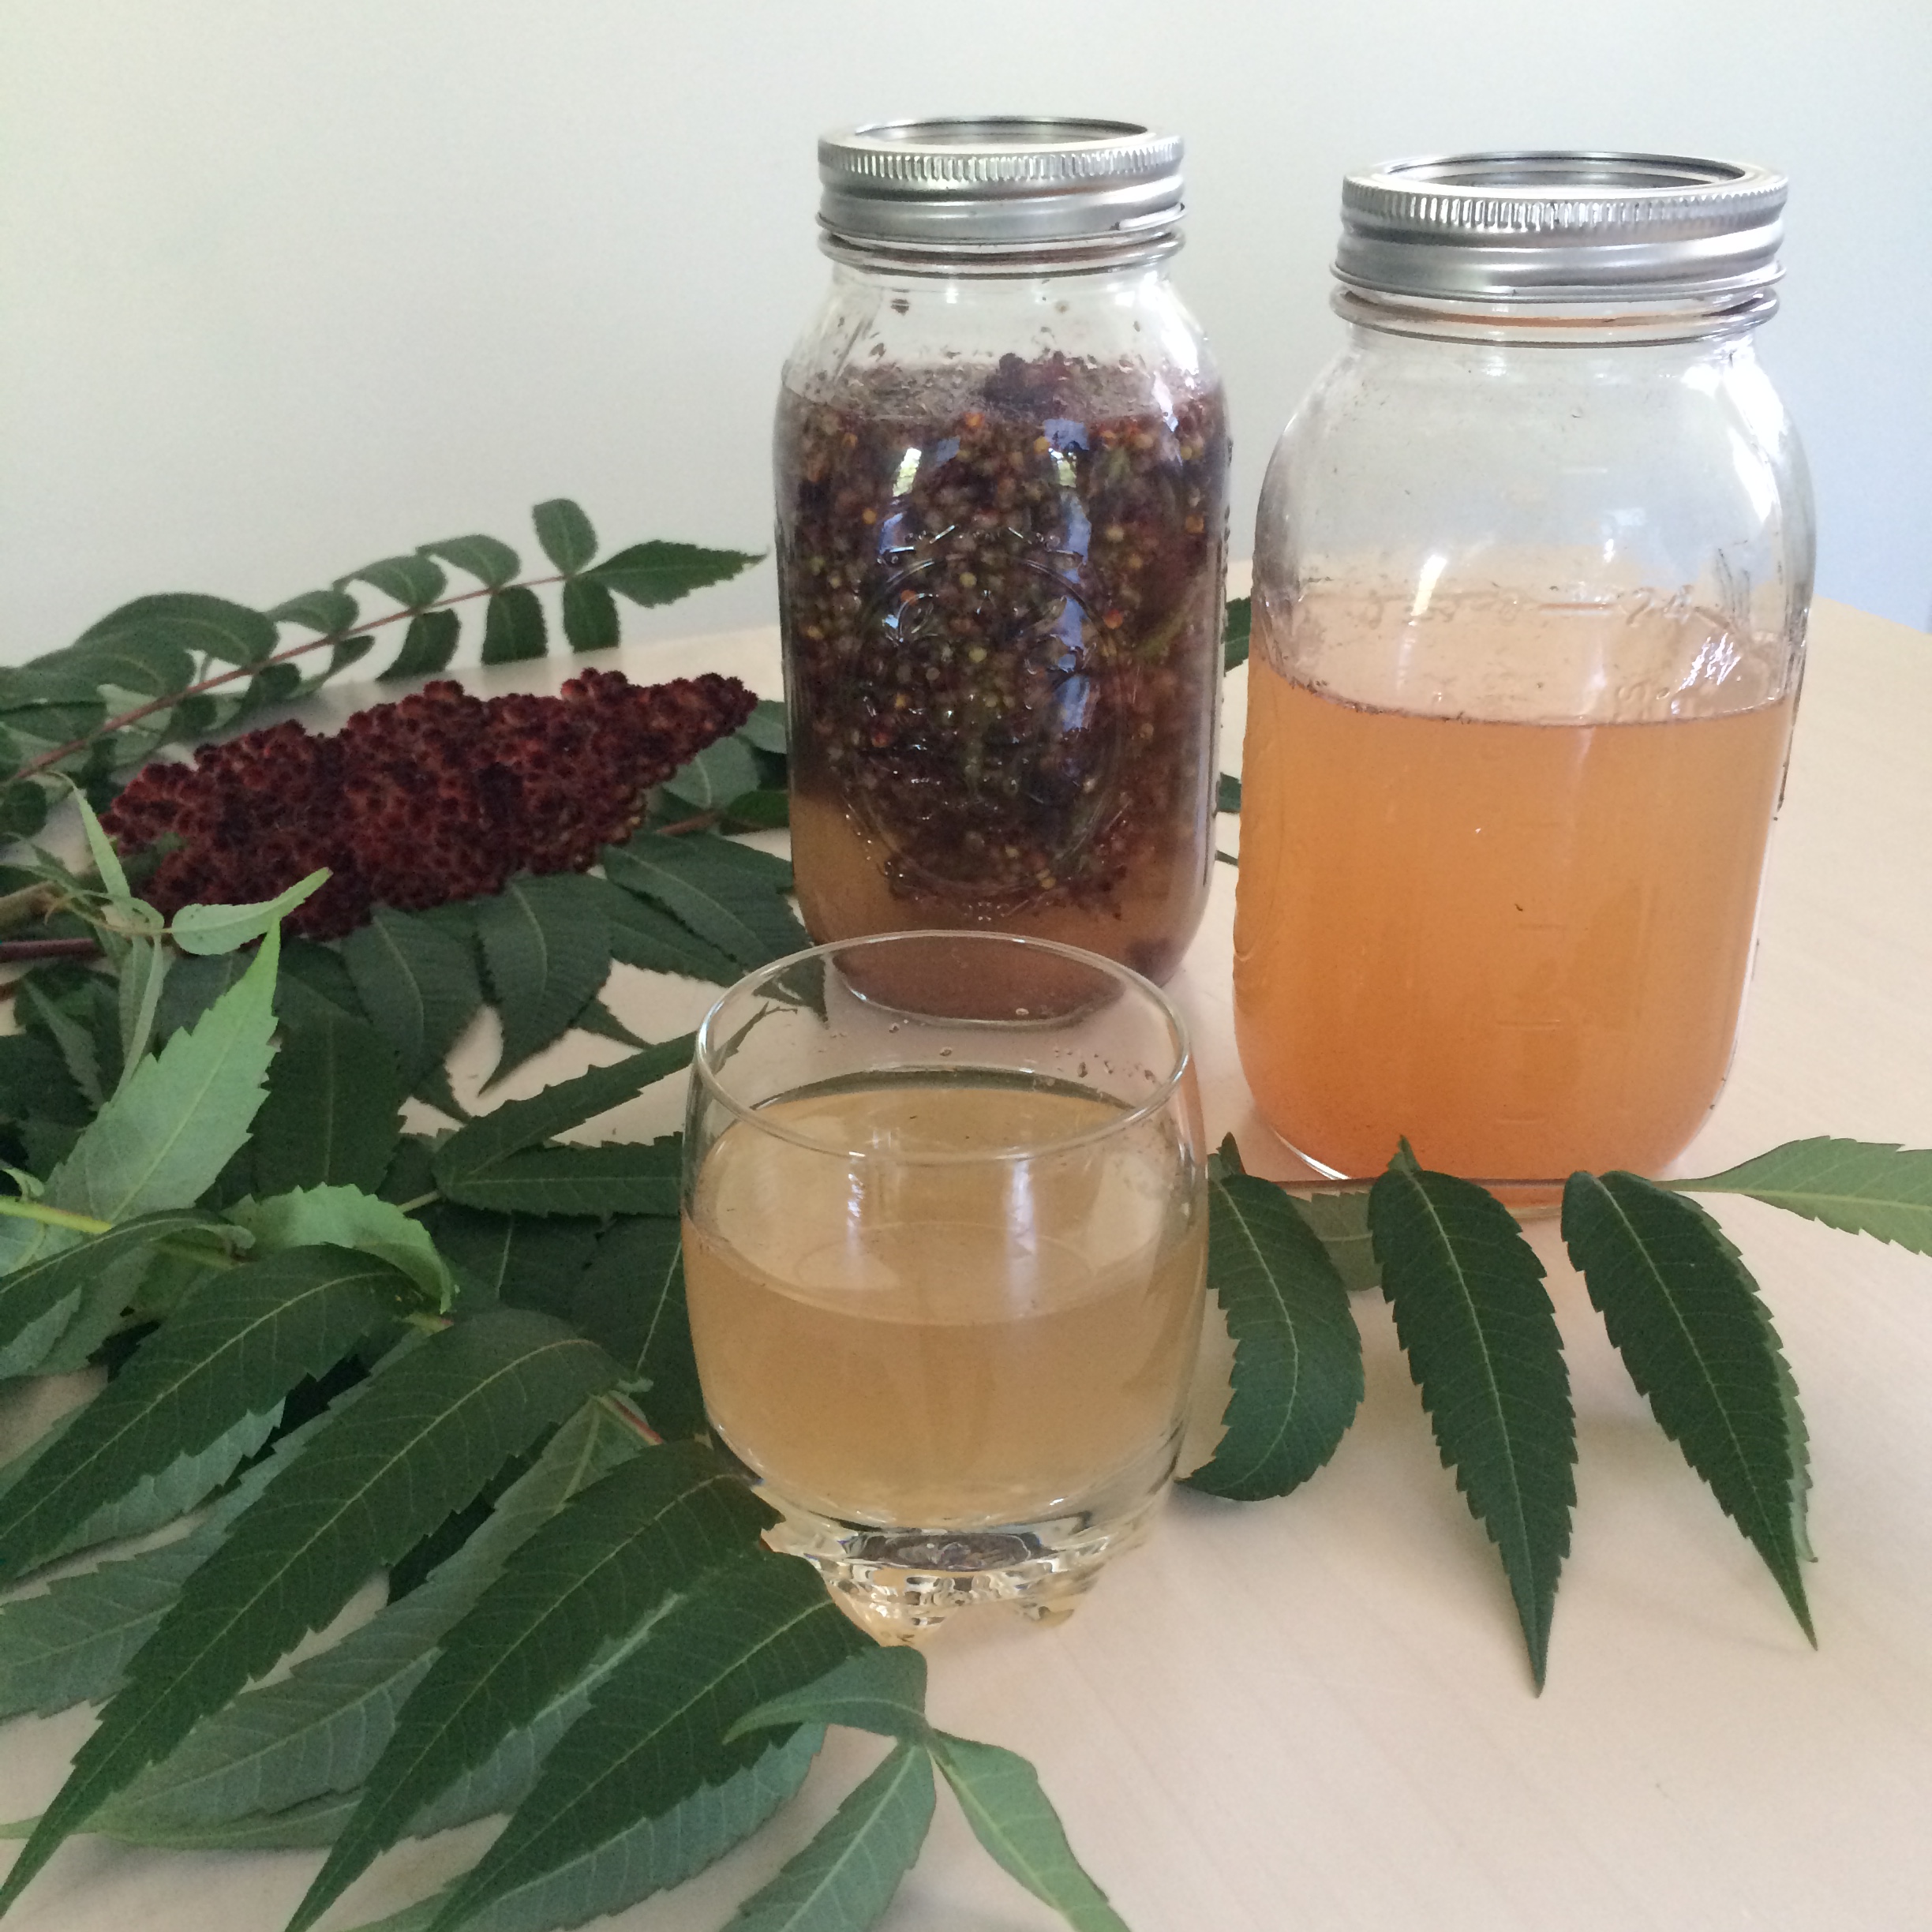
Staghorn sumac, Rhus typhina
“What,” you say? Lemonade without lemons??? Well, ok, so sumac “lemonade” would more appropriately be called a tea. But that’s besides the point… Infused in cold water overnight, the sumac berries of Rhus glabra and Rhus typhina make a great-tasting, refreshing sour and citrus-like beverage that is delicious on its own or simply sweetened with honey and garnished with lavender for an extra herbal flavor.
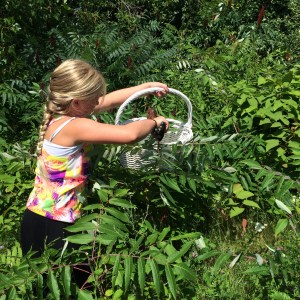
Common in hedgerows and at the edges of the field are the staghorn and smooth sumac (Rhus typhina and Rhus glabra respectively). Both sumacs are common native shrubs whose flower clusters ripen into deep red fruit clusters toward the end of July and into early September. For more tips on identifying sumac, get a copy of my book, Midwest Foraging to take with you into the fields!
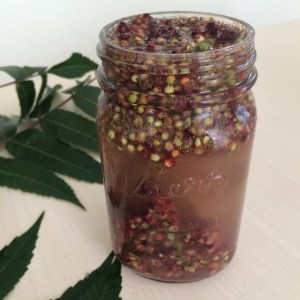
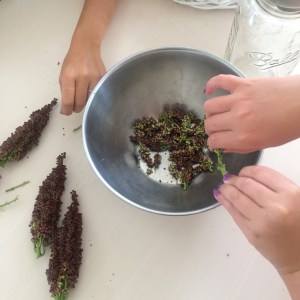
The berries – or drupes in botanical language – taste sour like lemonade. Use hand pruners to gather the drupes into a bucket, choosing the clusters that are most bright in color and most uniformly red. In the kitchen, separate the red and sour drupes from the stems – be warned there may be a scattering of small bugs as you sort the plants.
To prepare: Pack the drupes into a jar and cover them with cold water. Let them soak for a day or so in the fridge. Strain the liquid into a serving pitcher and voila – a delicious pink lemonade! Serve cold over ice and garnish with sprigs of lavender.
To see my TV segment on Staghorn Sumac Lemonade and easy tips for foraging with kids, visit WZZM13 Online: Staghorn Sumac.
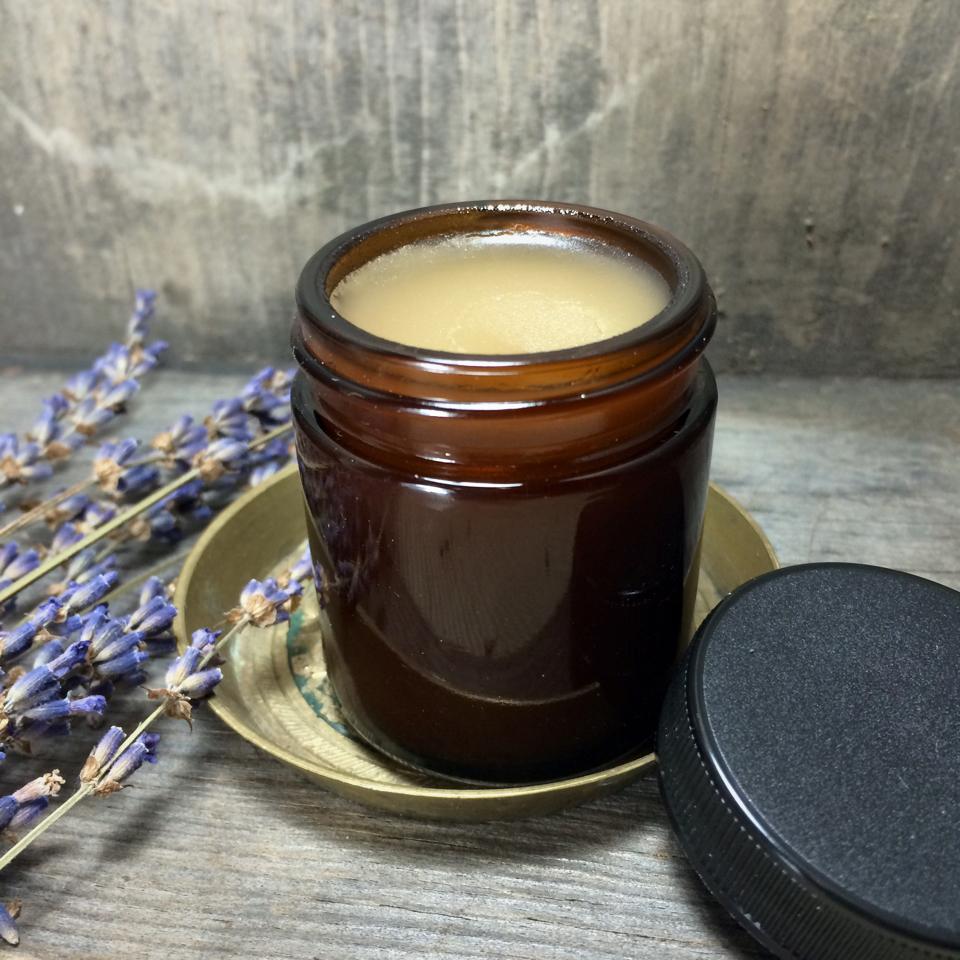
Old Man Winter is upon us and rough lips, chapped cheeks and split cuticles are all signs that the dryness of winter months has gotten under our skin – literally.
I love winter. As a runner and skier, the cold doesn’t keep me inside. BUT, the time outside in the dry cold can wreck havoc on my skin. Having a great skin-healing balm at the ready helps me enjoy the winter’s cold, as it protects my lips, cheeks, hands and feet from becoming overly dry!
Many products line the pharmacy shelves claiming to heal our dry skin and protect from chaffing and chapping. Conventional products often contain synthetic chemicals derived from petroleum, and while they may act like sealants on the skin, they do little to truly heal the dermis.
Fortunately the marketplace offers other options for skin care that are plant-based and more environmentally sound.
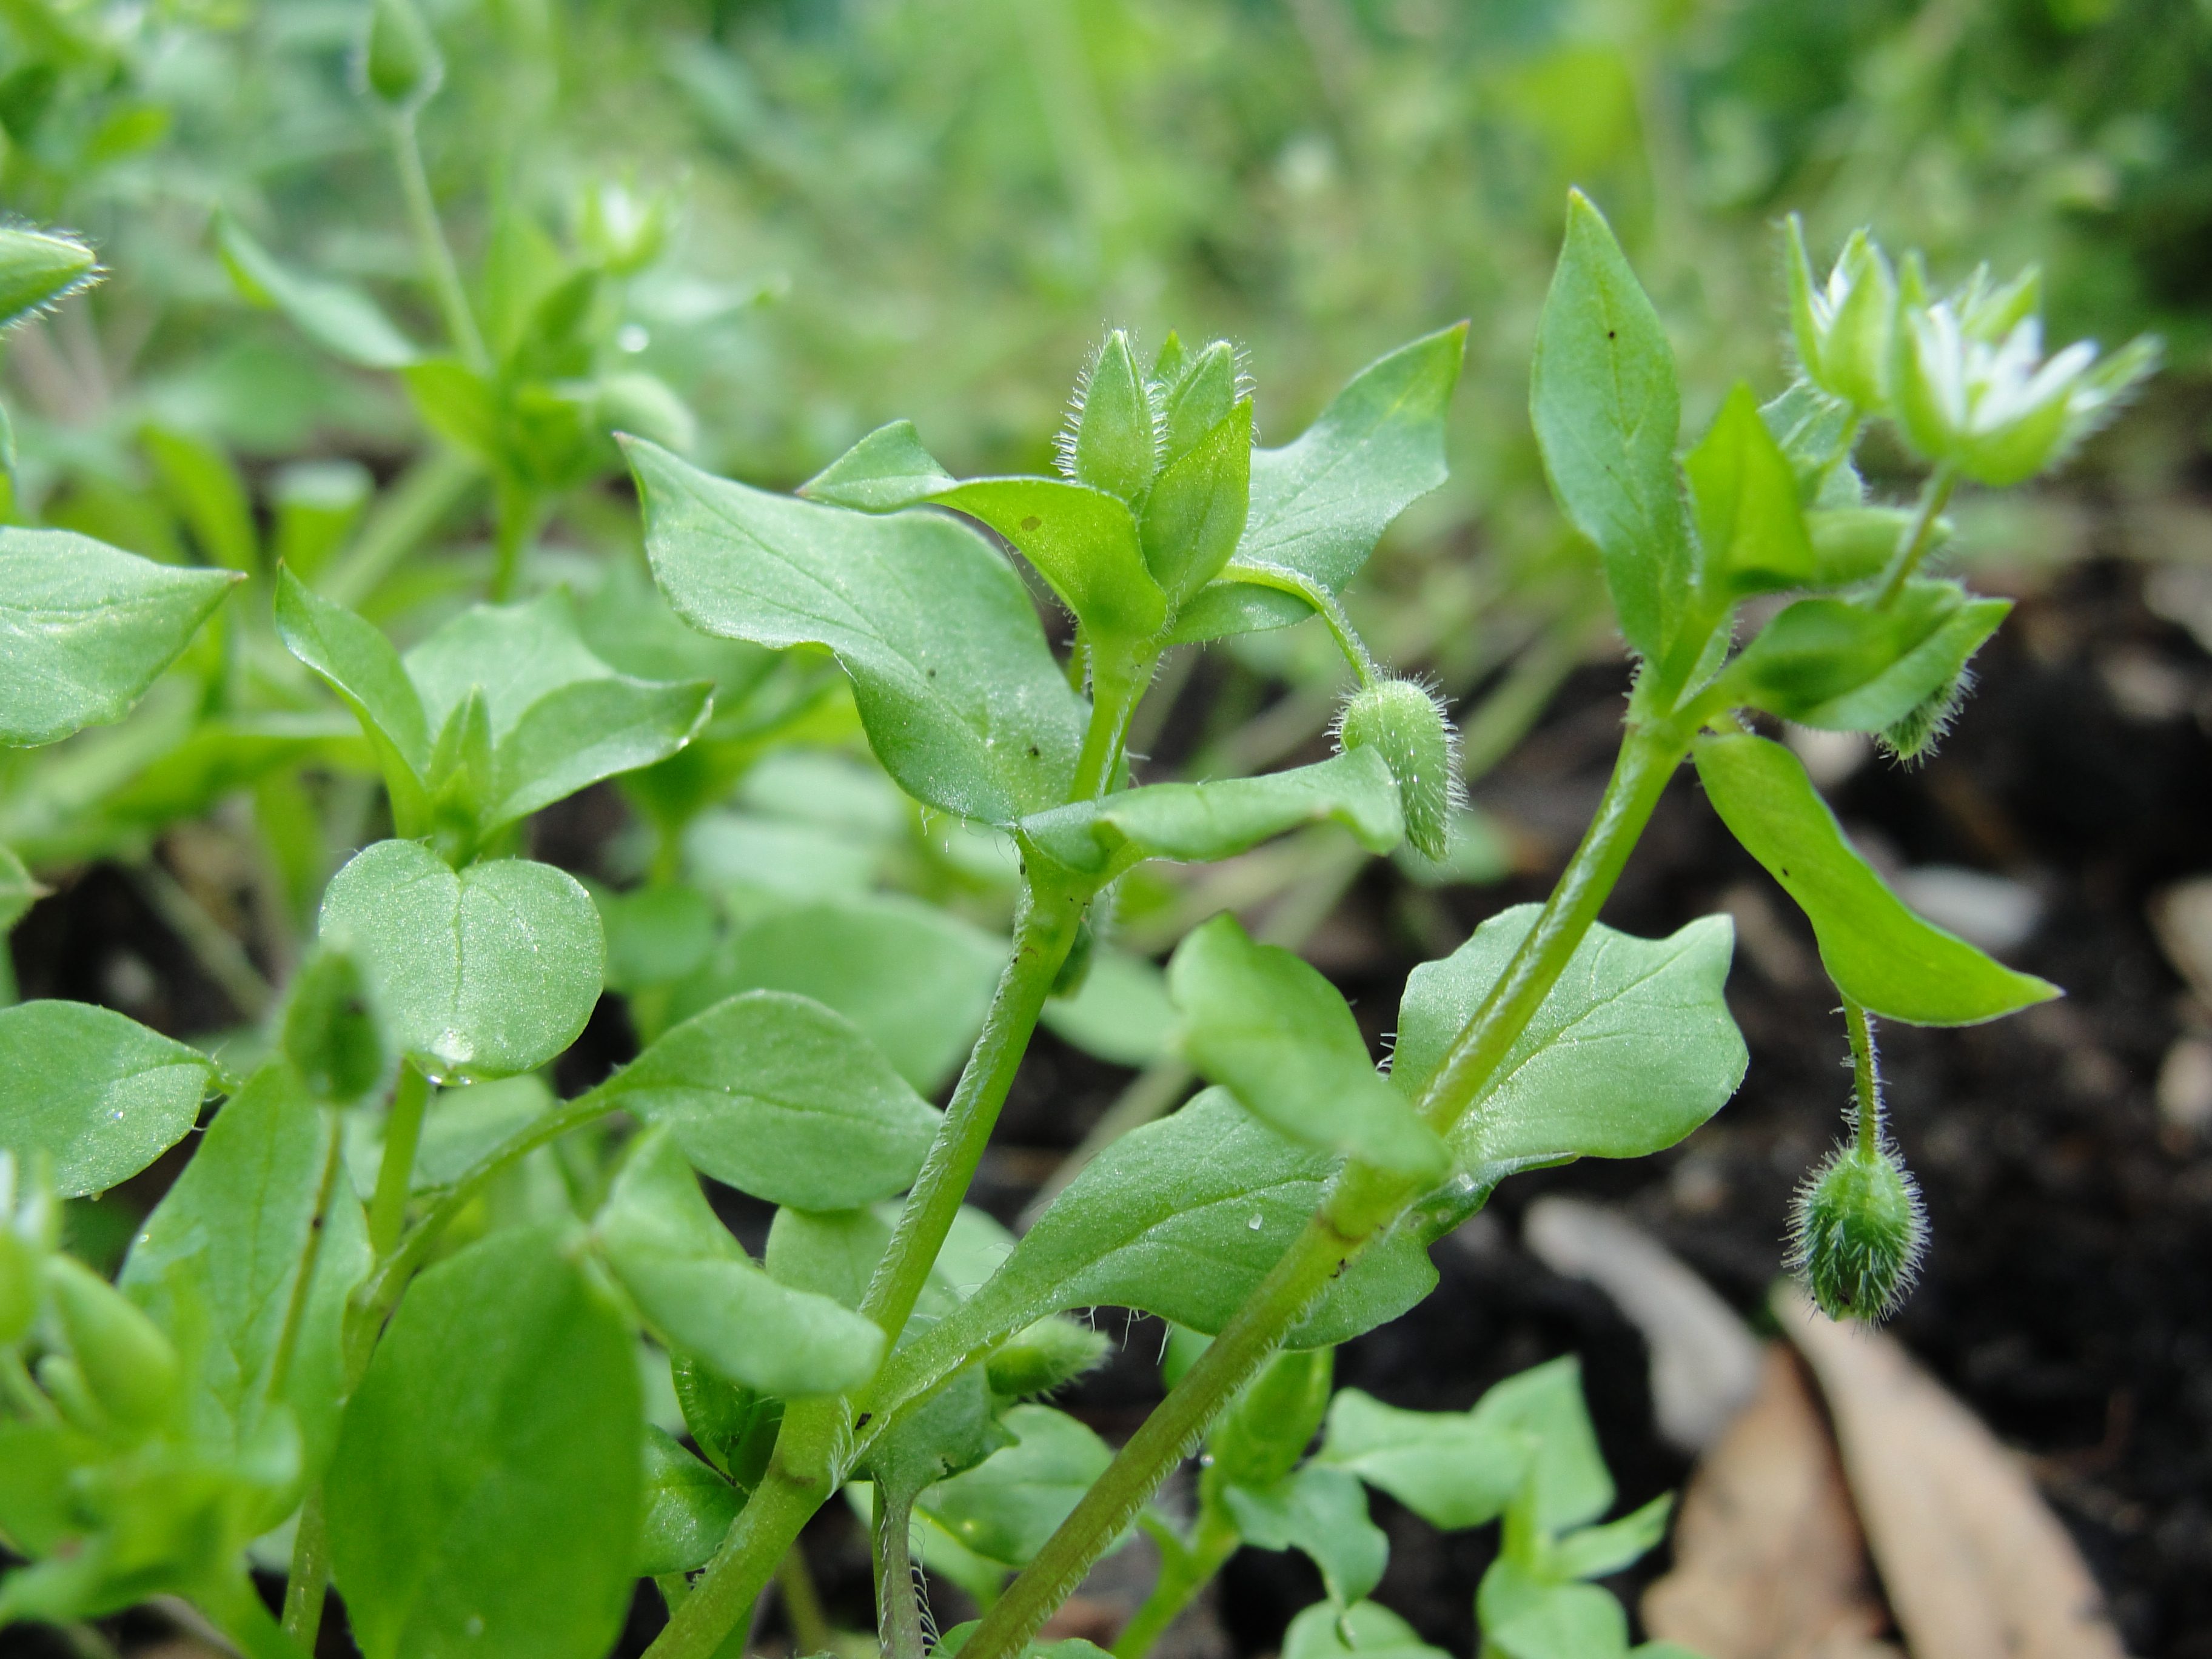
Chickweed
Botanicals for Skin Healing
As protective bases; plant-based oils like coconut oil, olive oil, grapeseed oil, and rose hip oils are all excellent choices and are versatile for all skin types. The healthy alternative to parrifin wax in skin care is beeswax. This helps create a protective barrier from the elements while letting the skin sweat and helps support bee-keepers.
While perusing the skin care aisle, look for creams that contain plants like plantain, calendula, comfrey, chickweed. These plants are deep-tissue healers that can repair the cracks and splits in the skin.
Want to make your own skin-healing salve?
Do you go through a lot of balms and salves and want to make your own? Good news! You can easily make your own calendula skin healing balm in a big batch in your own kitchen. Create a batch of chapped cheek balm in your kitchen with just four ingredients: herbs, olive oil, and beeswax. Beeswax helps solidify the balm and works as a protective layer on the skin without leaving a greasy feeling.
Chapped Cheeks Calendula Balm
Ingredients:
• 1oz dry calendula
• 8oz olive oil oil
• 1oz local beeswax
• Jars or containers
1) Infuse oil with the calendula. Infuse calendula in the oil in a double boiler and let simmer over low heat for 8 hours. This also can be done in a crock pot, taking care to not heat the oil past 130 degrees (lest it burns).
2) Strain the calendula herb material from the oil
3) Place infused calendula oil in a double boiler and heat until the beeswax melts. Adjust the consistency by adding more wax or oil, depending on your preference.
4) Remove from heat and pour into prepared tins or jars. Salves should be stored in a cool location.
Apply the balm before heading outside to protect the skin from harsh elements. If your skin feels sensitive in the shower, apply the balm before you rinse off. It may sound counter-intuitive to getting clean, but it will protect your skin from drying hot water and allow the botanicals to soak deep into the dermis for healing.
If you don’t have time to make your own, support local. While there are large-scale manufacturers making these botanical ointments, there’s a chance you live nearby a local herbalist that makes these skin creams from plants in your area.
And remember – keep those balms handy to help you enjoy the cold. As my dad used to say, “There’s never the wrong weather, only the wrong clothing!” Protect your skin!
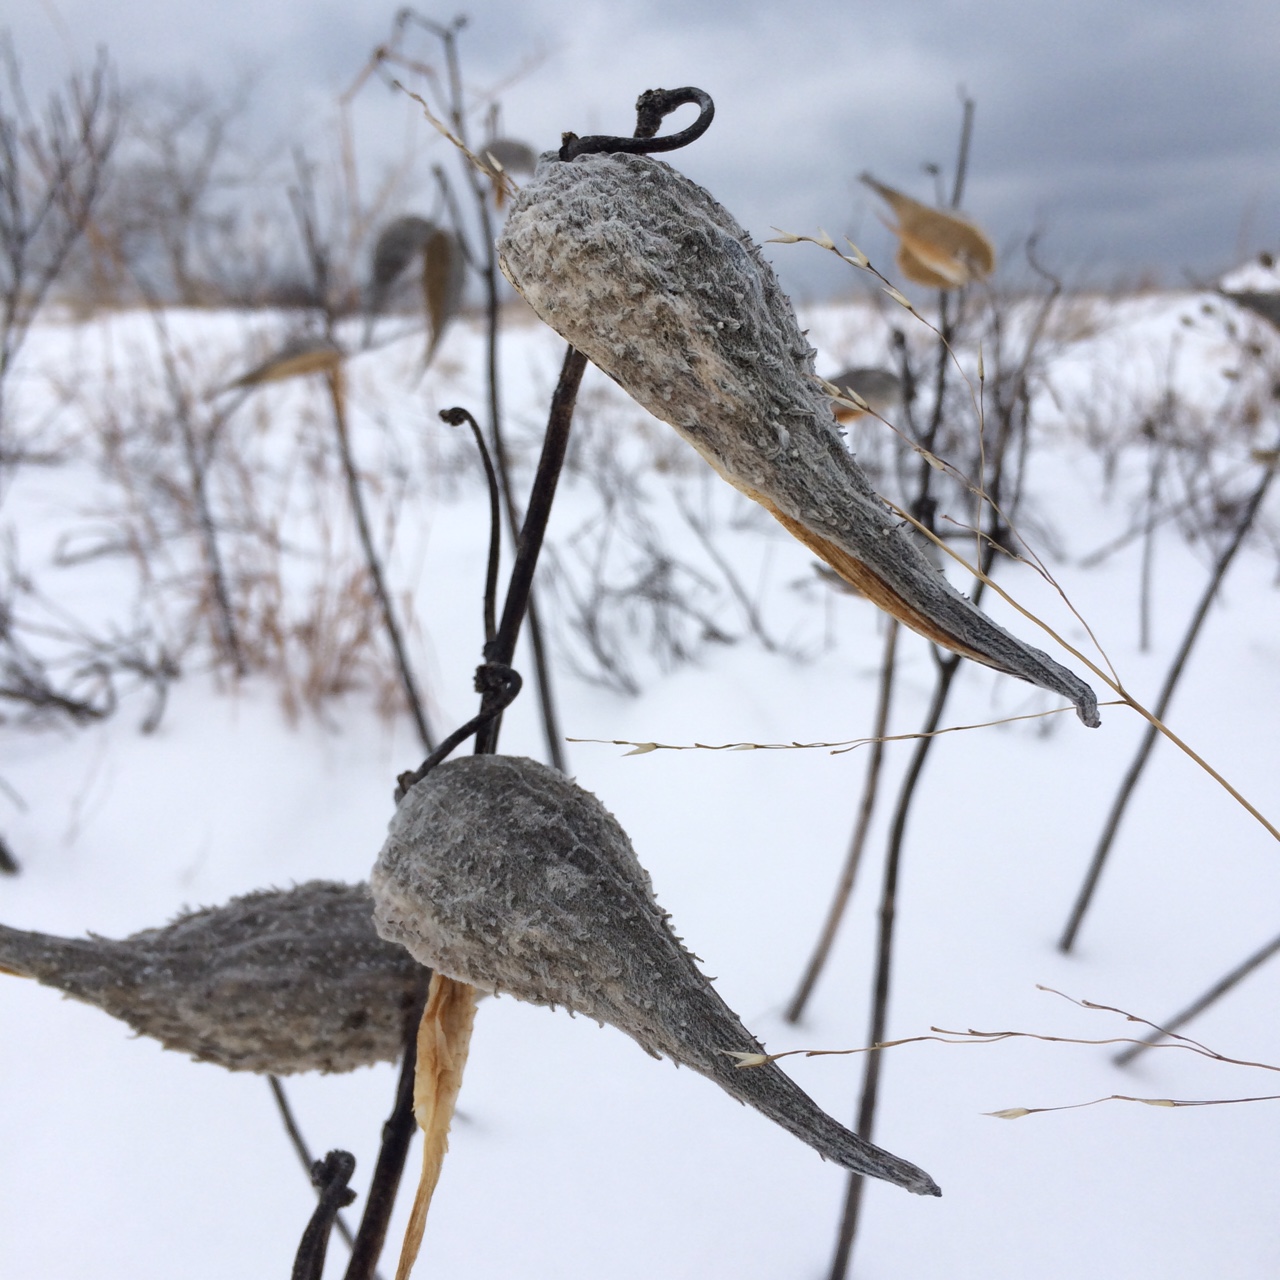
Folks frequently ask, “Can you forage in winter?” and my response is always a resounding yes! While there aren’t the summer’s berries and flowers to be found in the deep snow of the Great Lakes; a forager can delight that there are barks, buds, and even sap to be gathered in the cold of January and February.
Not only are there plants that can be gathered in the winter, but wintertime is a perfect chance to practice your plant identification skills – you can practice keying out plants and trees from last season’s leaves, stalks and barks as well as discover new plant stands for spring harvesting. Moreover, I am a believer that we should spend time outdoors in all four seasons – it helps with seasonal depression, can boost immunity and is just all around good for the soul to get outside and appreciate the natural world around us.
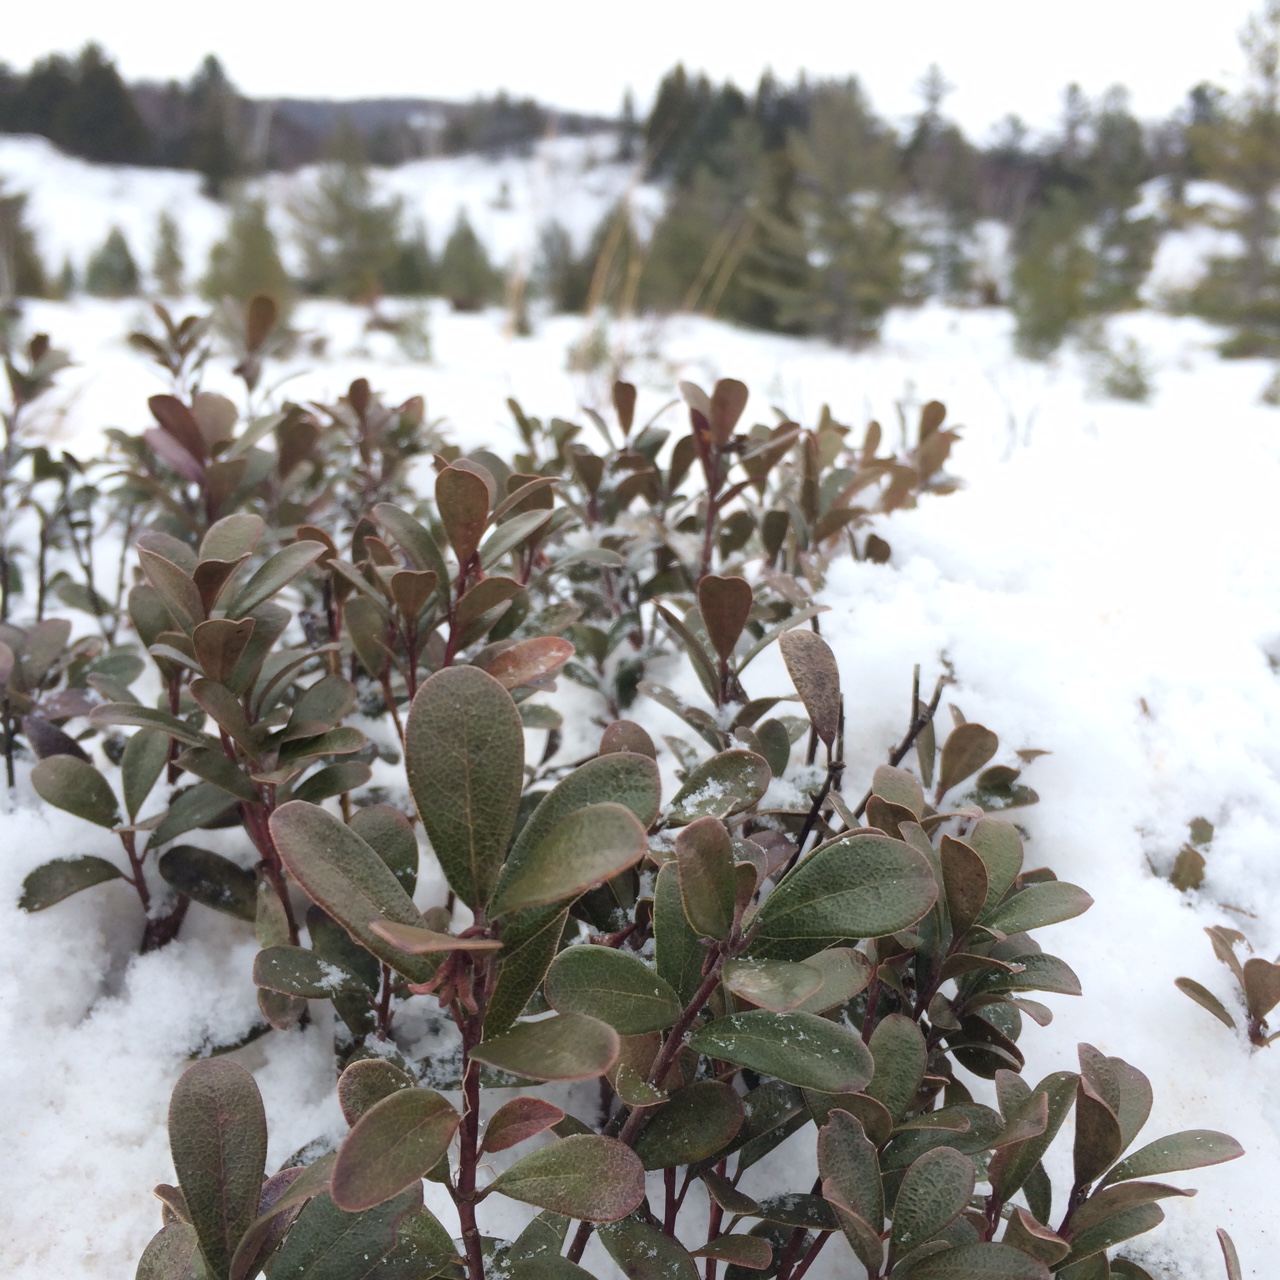
Just this past weekend, I headed out with my trusty and patient companion, Rosie, to walk along the icy Lake Michigan shoreline in northern Michigan. As I made my down the beach, I said hello to the overwintering uva-ursi who will soon have pink flowers again in May.
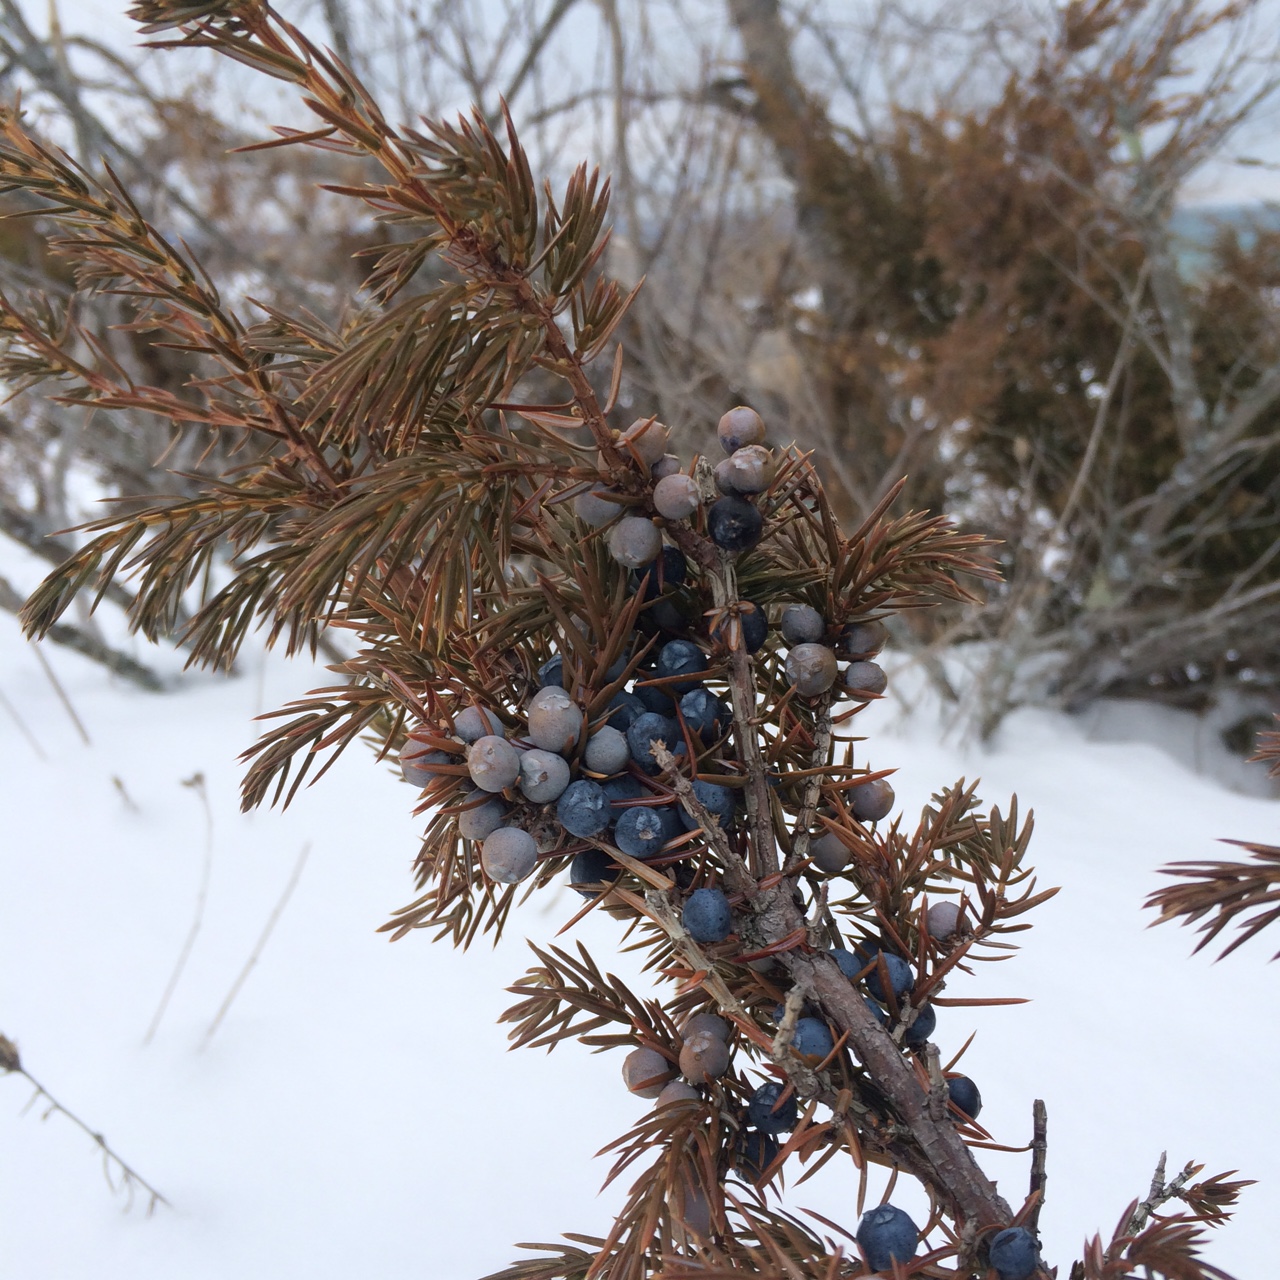
I saluted the stately milkweed, whose pods looked like a well-crafted sculpture against the white snow. I even bent down to collect a few handfuls of juniper berries for spice and tea in my kitchen.
I hiked along the front dunes, stopping at the clustering stands of Poplars to gather their aromatic and resinous buds to make a Balm of Gilead warming muscle salve. Stopping at each tree (stands of P. grandidentata; though stands of P. tremuloides, P. balsamifera, and P. deltoides are also common on the foredunes of this area), I tasted the buds for that signature resinous-camphor-like flavor on my tongue so I would know which buds to gather. My dog stopped along with me — patient and musing as to why her human companion was tasting trees again. I tasted to be sure they were the most strong buds. Not surprisingly, the flavor varied from tree to tree.**
The large-toothed aspens delighted me with super resinous buds – way more warming, resinous and spicy than the quaking aspens (P. tremuloides) back downstate in my own woods and in the nearby back dunes, from which I’ll gather bark later in the spring for bitters blends. The buds will vary from species to species and from locale to locale. Use your senses to determine strength and how you might want to use them.
The buds will be extracted into a coconut oil base to be made into a muscle salve. If I have enough, I will also extract the buds into a tincture of high-proof alcohol to make a topical liniment for tight and sore muscles. The poplar buds can be formulated also with goldenrod, St. John’s Wort, and yarrow for a well-rounded muscle salve or liniment.
Balm of Gilead Infused Oil Recipe : Add 1 cup fresh Poplar buds (taste for resinous and aromatic flavor) to a mason jar, cover completely with olive or coconut oil. Let steep for 6 weeks and then strain. For faster extraction, simmer mason jar in a double boiler with water or in a crock pot. Finished oil can be used alone as a massage oil or used as a base for a nice salve.
**A note on sustainability: Poplars drop their branches during heavy windstorms, making it most sustainable foraging to gather barks and buds from fallen branches. Buds can be gathered from live trees, but do gather only a handful from tree to tree, and be sure to give thanks for the harvest the trees offer.
Foraging connects us with the natural world, offering a pathway to understand the land, its cycles, and the bountiful edible plants that grow wild around us. Whether you’re a novice eager to explore the greens outside your doorstep or an experienced forager looking to deepen your practice, this guide provides essential insights into starting your foraging journey, identifying plants, harvesting sustainably, and ensuring safety.
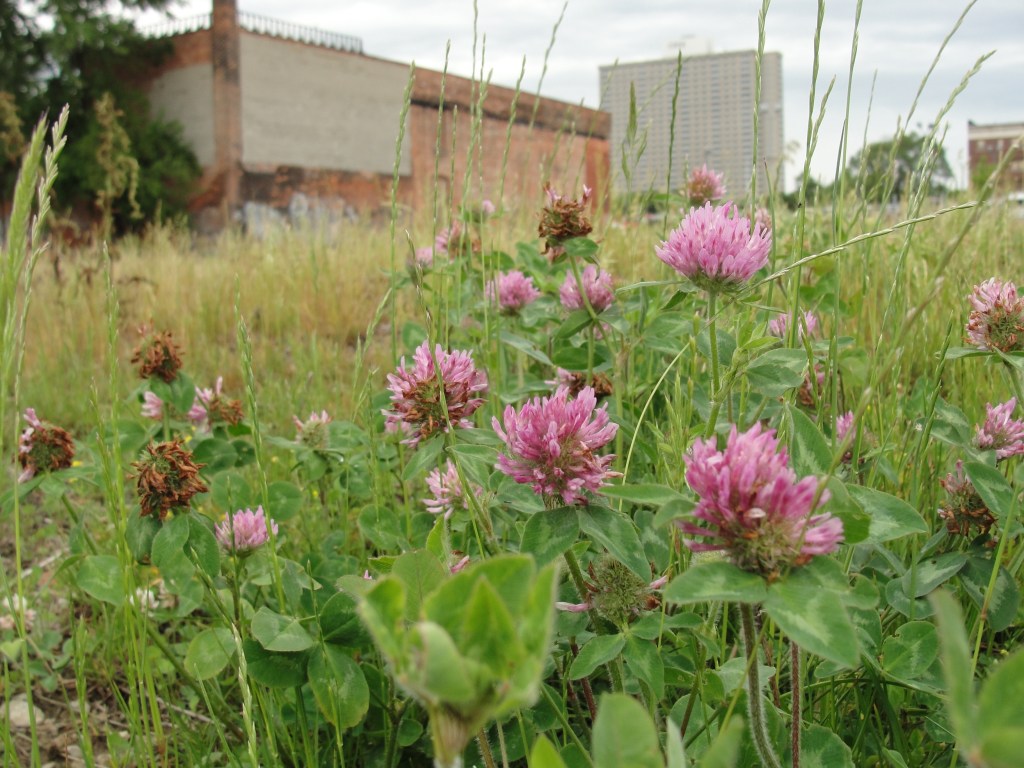
Red clover is shown here growing in an abandoned urban lot in Detroit. Because of the likelihood of heavy metal contaminants like lead, avoid gathering plants that are high in minerals from industrial urban areas.
Getting Started
Foraging begins with a simple step: get outside. Familiarizing yourself with the local flora and the landscapes they inhabit forms the foundation of foraging. Observation and immersion in nature allow you to notice the subtle cues that indicate when and where to forage. Start in your immediate environment. Pay attention to the wild plants growing near you, document them through sketches, photos, or notes, and use a hand-drawn map to mark your discoveries. This process not only aids in plant identification but also fosters a deeper connection with your surroundings.
Identifying Plants
Plant identification is both an art and a science. When foraging, it is essential to make certain you have correctly identified a plant before consuming it. There are two primary rules to follow: Never eat anything you’re not 100% certain about, and always cross-reference your identification with multiple reliable sources.
Get to know botany by starting with the basics — understand how plants are organized. This includes learning about leaf arrangements (alternate, opposite, whorled), types of leaves (simple vs. compound), and other plant structures (stem types, root systems, flower arrangements). Familiarize yourself with botanical terms. Words like “petiole,” “lanceolate,” and “umbel” describe specific plant parts and shapes, providing a universal language to aid in identification, and these characteristics are often key to differentiating between species.
Sustainable Harvesting Practices
As foragers, we act as stewards of the land. It’s crucial to know the status of the plants you’re harvesting — are they abundant, endangered, or invasive? Sustainable harvesting means taking only what you need without impacting the plant’s ability to reproduce.
Familiarize yourself with the different habitats and microclimates in your area, and let the abundance or scarcity of plants guide your foraging decisions. A good rule of thumb is to never harvest more than one-third of what is available in any given area, leaving plenty for wildlife and for the plants to continue their life cycles.
Acknowledging Indigenous Land Rights
Before foraging, take time to learn about the Indigenous peoples whose ancestral lands you’re on. Every region is home to Indigenous nations whose communities have stewarded these landscapes for generations. Understanding their relationship with the land and their traditional ecological knowledge can enrich your own foraging practice and foster deeper respect for the ecosystems you’re exploring.
As foragers, acknowledging the legacy and rights of Indigenous peoples encourages a practice that is not only sustainable but also ethically grounded in respect for the land and its original caretakers. We must remember that our foraging activities are conducted on lands that have been occupied, stewarded, and cherished by Indigenous peoples long before us. By recognizing this, we can foster a deeper connection to the land, guided by principles of respect, sustainability, and shared stewardship.
Get Permission to Gather
Foraging on private or public lands requires permission. Many areas have regulations to preserve local flora and fauna, and it’s essential to adhere to these rules to promote sustainable practices. Whether it’s a municipal park or a friend’s backyard, always ensure you have the right to forage in the area.
Foraging laws can vary widely from one location to another, with some areas allowing limited foraging of certain species, while others may prohibit it altogether to protect local ecosystems.
Here are a few things to consider that may be relevant to an area near you:
Municipal Parks: Check the websites of city or town parks and recreation departments. They often have rules regarding foraging, which can vary significantly.
State and National Parks: These areas typically have more stringent regulations. The National Park Service and state Department of Natural Resources (DNR) websites provide guidelines on what is and isn’t allowed in terms of foraging.
Federal Regulations: If you’re near federal lands, including national forests and grasslands, the U.S. Forest Service has regulations regarding foraging. These can usually be found on their official website or by contacting the nearest Forest Service office. Regulations can vary, with some areas allowing for the collection of certain plants or mushrooms for personal use without a permit.
Check for Special Permits: Some areas may require permits for foraging, even for personal use. This is more common for high-impact or highly sought-after species. Check with local DNR offices or park management to see if such permits are necessary.
Private Land Permissions: Always get explicit permission from landowners before foraging on private property. This not only respects the property owner’s rights but ensures you’re legally covered to forage in that area.
By thoroughly researching and respecting the legal boundaries set for foraging, you contribute to the sustainability and preservation of natural spaces while enjoying the bounty they offer. Always prioritize the health of the ecosystem and the legal guidelines established to protect these areas.
Consider Pollution Risks
One of the most critical aspects of foraging safely is understanding and mitigating contamination risks. Pollutants in the environment can be absorbed by plants, making them unsafe for consumption. To minimize these risks, remember these steps:
Research the Land: Before foraging, investigate the area’s history and potential contamination sources through public records or inquiries with landowners.
Avoid Known Contaminated Areas: Steer clear of sites with a history of industrial use, heavy pesticide application, and areas near railroad tracks or heavily trafficked roads.
Focus on Low-Risk Plants: Some plants are less likely to uptake contaminants; prioritize these for safer foraging outcomes.
By being diligent about the locations chosen for foraging, individuals can significantly reduce the risks of contamination, ensuring the safety and sustainability of their practice.
Urban Areas: Heavy metals and lead, common in brownfields and old industrial sites, are absorbed by plants, making some unsafe for consumption. Railroad tracks, treated with chemicals, also pose a risk of arsenic contamination.
Suburban Zones: The use of herbicides and pesticides in lawn care, golf courses, and landscaping introduces chemicals that can be absorbed by wild plants.
Agricultural Pollution: Agricultural lands are affected by nitrates, fertilizers, and manure runoff, leading to potential E-Coli and Salmonella contamination in nearby plants and water sources.
Industrial and Municipal Pollution: Activities in these sectors can lead to a variety of pollutants entering the soil and water, including heavy metals (from manufacturing, painting, and pharmaceutical companies), chemical residues (from sewage overflows, fracking, and industrial processes), and herbicides and chemicals (used in easements, road maintenance, and park conservation efforts).
Resources to Explore
Field Guides and Botanical Resources: Invest in quality field guides specific to your region, as plants can vary significantly by geography and climate. Digital apps and websites offer supplementary information, but always cross-reference to avoid reliance on potentially inaccurate sources.
USDA PLANTS Database — Comprehensive information on plant distribution and status across the United States.
NatureServe Explorer — An online source for authoritative conservation information on more than 70,000 plants, animals, and ecosystems.
Local Foraging Experts & Educators (Great Lakes Region Examples):
Join a Community: Foraging and botanical groups, both online and in-person, can offer support, answer questions, and share experiences. Learning from others can accelerate your understanding and identification skills.
Search for foraging and botanical groups in your area on Facebook, Meetup.com, or through local botanical gardens and nature centers.
r/Foraging on Reddit — A large online community for foragers of all experience levels.
Keep a Foraging Journal: Document your foraging journeys with notes and pictures of plants you encounter. This not only helps in solidifying your knowledge but also creates a personal reference guide that grows with your experience.
Seasonal Bounty: A Forager’s Seasonal Quick Guide
This seasonal quick guide provides a starting point for foragers everywhere, emphasizing the rich variety of plants that can be harvested throughout the year. As always, ensure proper plant identification, harvest sustainably, and be aware of local regulations and contamination risks to enjoy the bounty of your region safely.
A few considerations to keep in mind:
Local Climate Variations: Geography and climate patterns create unique conditions that can extend or shorten growing seasons. Always pay attention to conditions specific to your area.
Invasive Species: Be aware of and consider harvesting invasive species where safe and legal to do so, such as Garlic Mustard, to benefit native ecosystems.
Pollution Concerns: Be mindful of water quality, especially near urban and agricultural runoff areas, when foraging near water bodies.
While each plant showcased in this guide is relatively safe, you must be certain in your plant identification. And as with introducing any new food or herb into your diet, do so with care to eliminate any potential for adverse reactions.
Foraging Early Spring
As the ice and snow begin to melt, the first green shoots emerge, offering a variety of plants for the early forager.
Open Fields and Edges of Woods: Look for early greens such as Dandelion (leaves, roots), Chickweed (stems, leaves, flowers), and Plantain (leaves). Burdock (roots, shoots) can also start to be harvested.
Wetlands and Waterways: The tender leaves of Nettle, rich in vitamins, can be found in these moist areas.
Woodlands: The sap of Maple trees starts running, ideal for tapping. Pine (needles, bark) and Blackberry (leaves) are also accessible in partially shaded woodlands.
Foraging Mid- to Late Spring
As the climate warms, the region’s flora begins to diversify further.
Open Fields and Edges of Woods: This is the time for Garlic Mustard, Violets (leaves and flowers), and Wild Onion (bulbs, greens). Clover (flowers, leaves) and Sorrel (leaves) are also in season.
Wetlands and Waterways: Cattail (shoots, pollen) is now ready to harvest.
Woodlands: Morel Mushrooms can be found across many regions during this time. Oak (bark) and Spruce (needles) are good for harvesting.
Foraging Summer
The full bounty of the season becomes available, with an abundance of berries and flowers.
Open Fields and Edges of Woods: Wild Berries, including Blueberries and Strawberries, begin to ripen. Yarrow (flowers) and Goldenrod (leaves, flowers) are widely available.
Wetlands and Waterways: Elder (flowers) are ready for picking, perfect for making syrups and teas.
Woodlands and Partial Shade: Pine (needles) can be harvested for teas rich in Vitamin C.
Foraging Fall
As the temperatures cool, the focus shifts towards roots and late-season fruits.
Open Fields and Edges of Woods: It’s time for Apple (fruit) harvesting and collecting Rose (hips) for Vitamin C. Burdock (root, seeds) and Dandelion (roots) are ideal for fall harvesting.
Wetlands and Waterways: Late Nettle leaves can still be found, along with Peppermint and Spearmint for fresh teas.
Woodlands: Hickory Nuts and Walnuts are ready for gathering. Hawthorn (berries) can also be found in woodland edges.
Foraging Winter
Winter foraging requires knowledge and patience, but can be rewarding in many climates.
Open Fields and Edges of Woods: Dried seed heads of plants like Goldenrod and Queen Anne’s Lace may still be accessible and useful for teas.
Woodlands: Tree barks such as Birch and Pine can be harvested for teas and medicinal use. Look for dried berries and fruits still clinging to branches.
About the Author
Lisa M. Rose is an ethnobotanist, wild foods chef, and author with a profound dedication to exploring the symbiotic relationship between humans and plants. With an academic background in anthropology and community health, her culinary journey has been rich and varied, including stints with notable establishments and figures such as Stags Leap in Napa Valley, Alice Waters’ The Edible Schoolyard, and organic farmers in Northern Michigan. Rose’s work is celebrated in her bestselling books, Midwest Foraging and Midwest Medicinal Plants, among others, and her expertise is frequently sought by major media outlets, including the Chicago Tribune, PBS, NPR, Martha Stewart and CNN.
In Michigan and across much of the Midwest it’s a SNOW DAY! The snow out my window already blankets the ground with drifts in some areas over 2 feet deep!
This makes me glad for the season’s harvests that already are packed away in my pantry for hearty winter meals — the acorn flour, the fruit jams, the herbal simple syrups and the dried herbs for cooking and for tea. As I plan my holiday meals, I turn to the rich flavors of my autumn harvest to add wild flavors to my table.
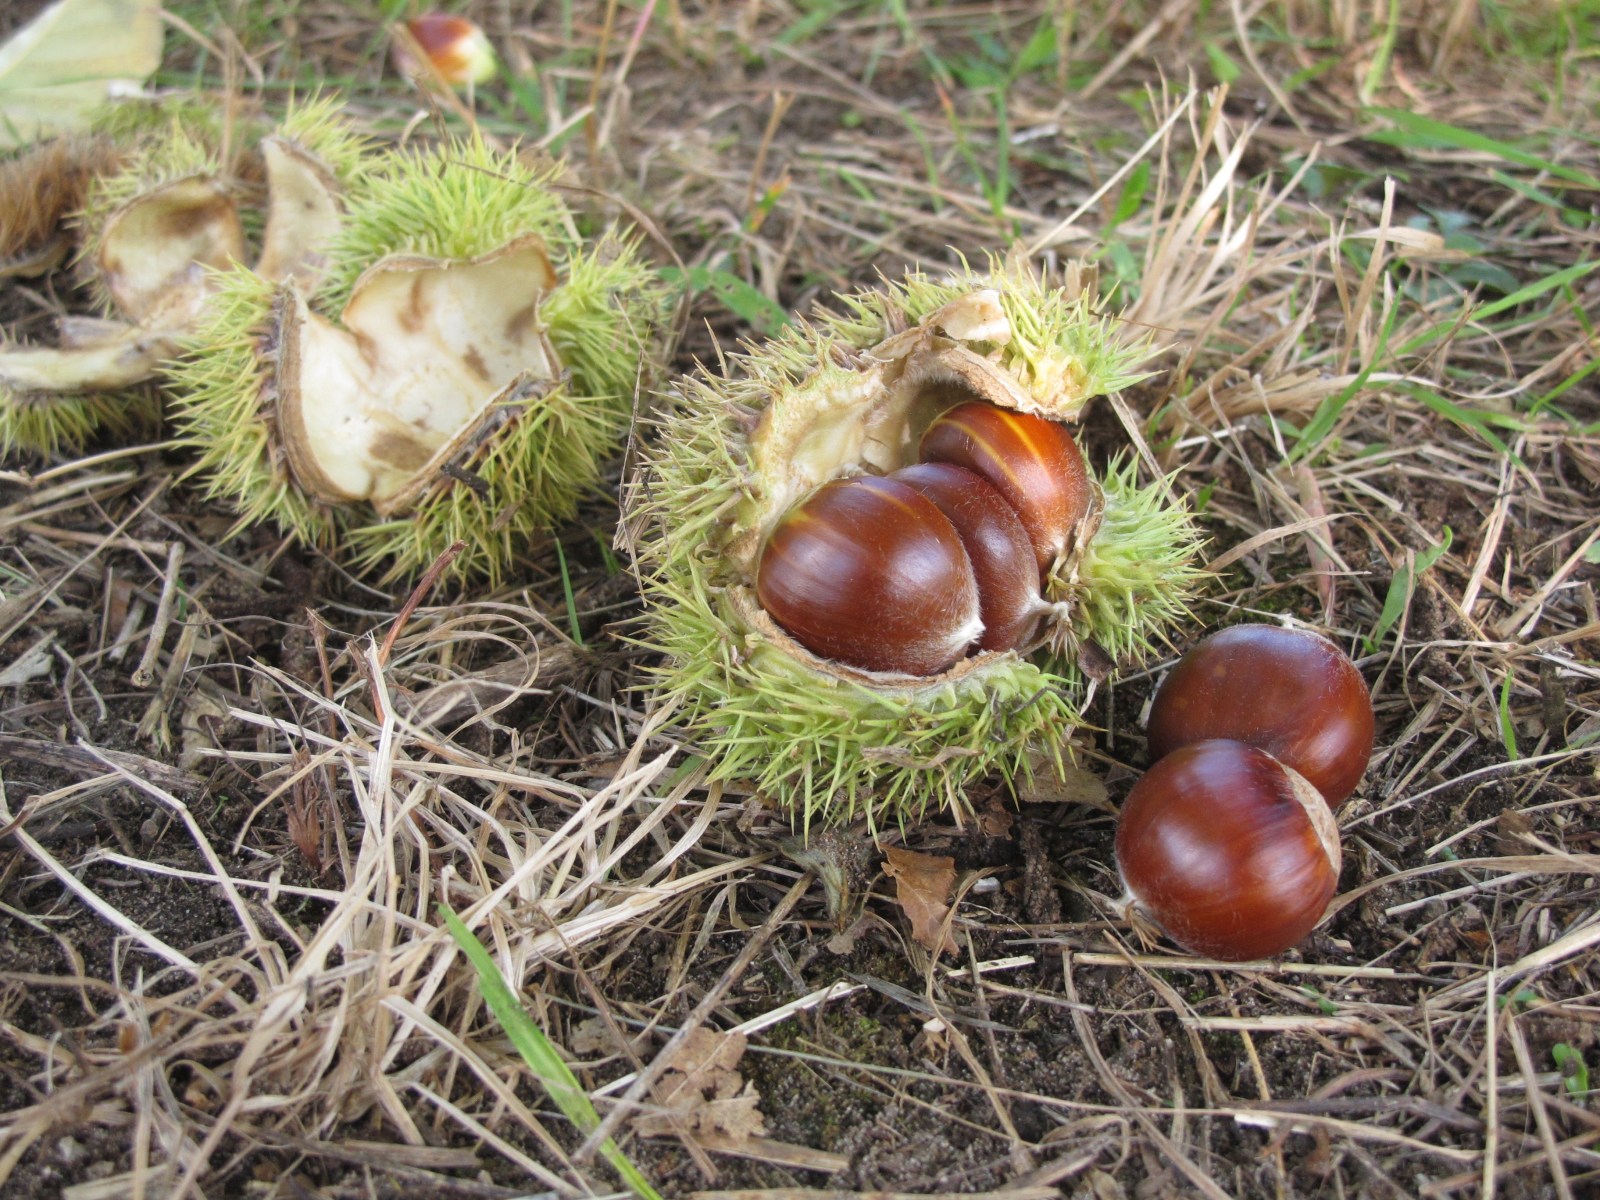
One of my favorite flavors from the fall harvest for a forager’s Thanksgiving’s feast is the chestnut. The chestnut (Castanea spp.) is a delicious and nutritious edible, whose spiny shell can be found on the ground when the nuts ripen in late September. Chestnut trees can be found growing along the edges of the mixed hardwood forests, in areas with well-drained soil and sunshine. Chestnuts are also a specialty crop for tree farmers. Check your local food guide for a chestnut grower who may have u-pick or who sells chestnuts at the farmers markets if you’d like to try this delicious fall wild edible.
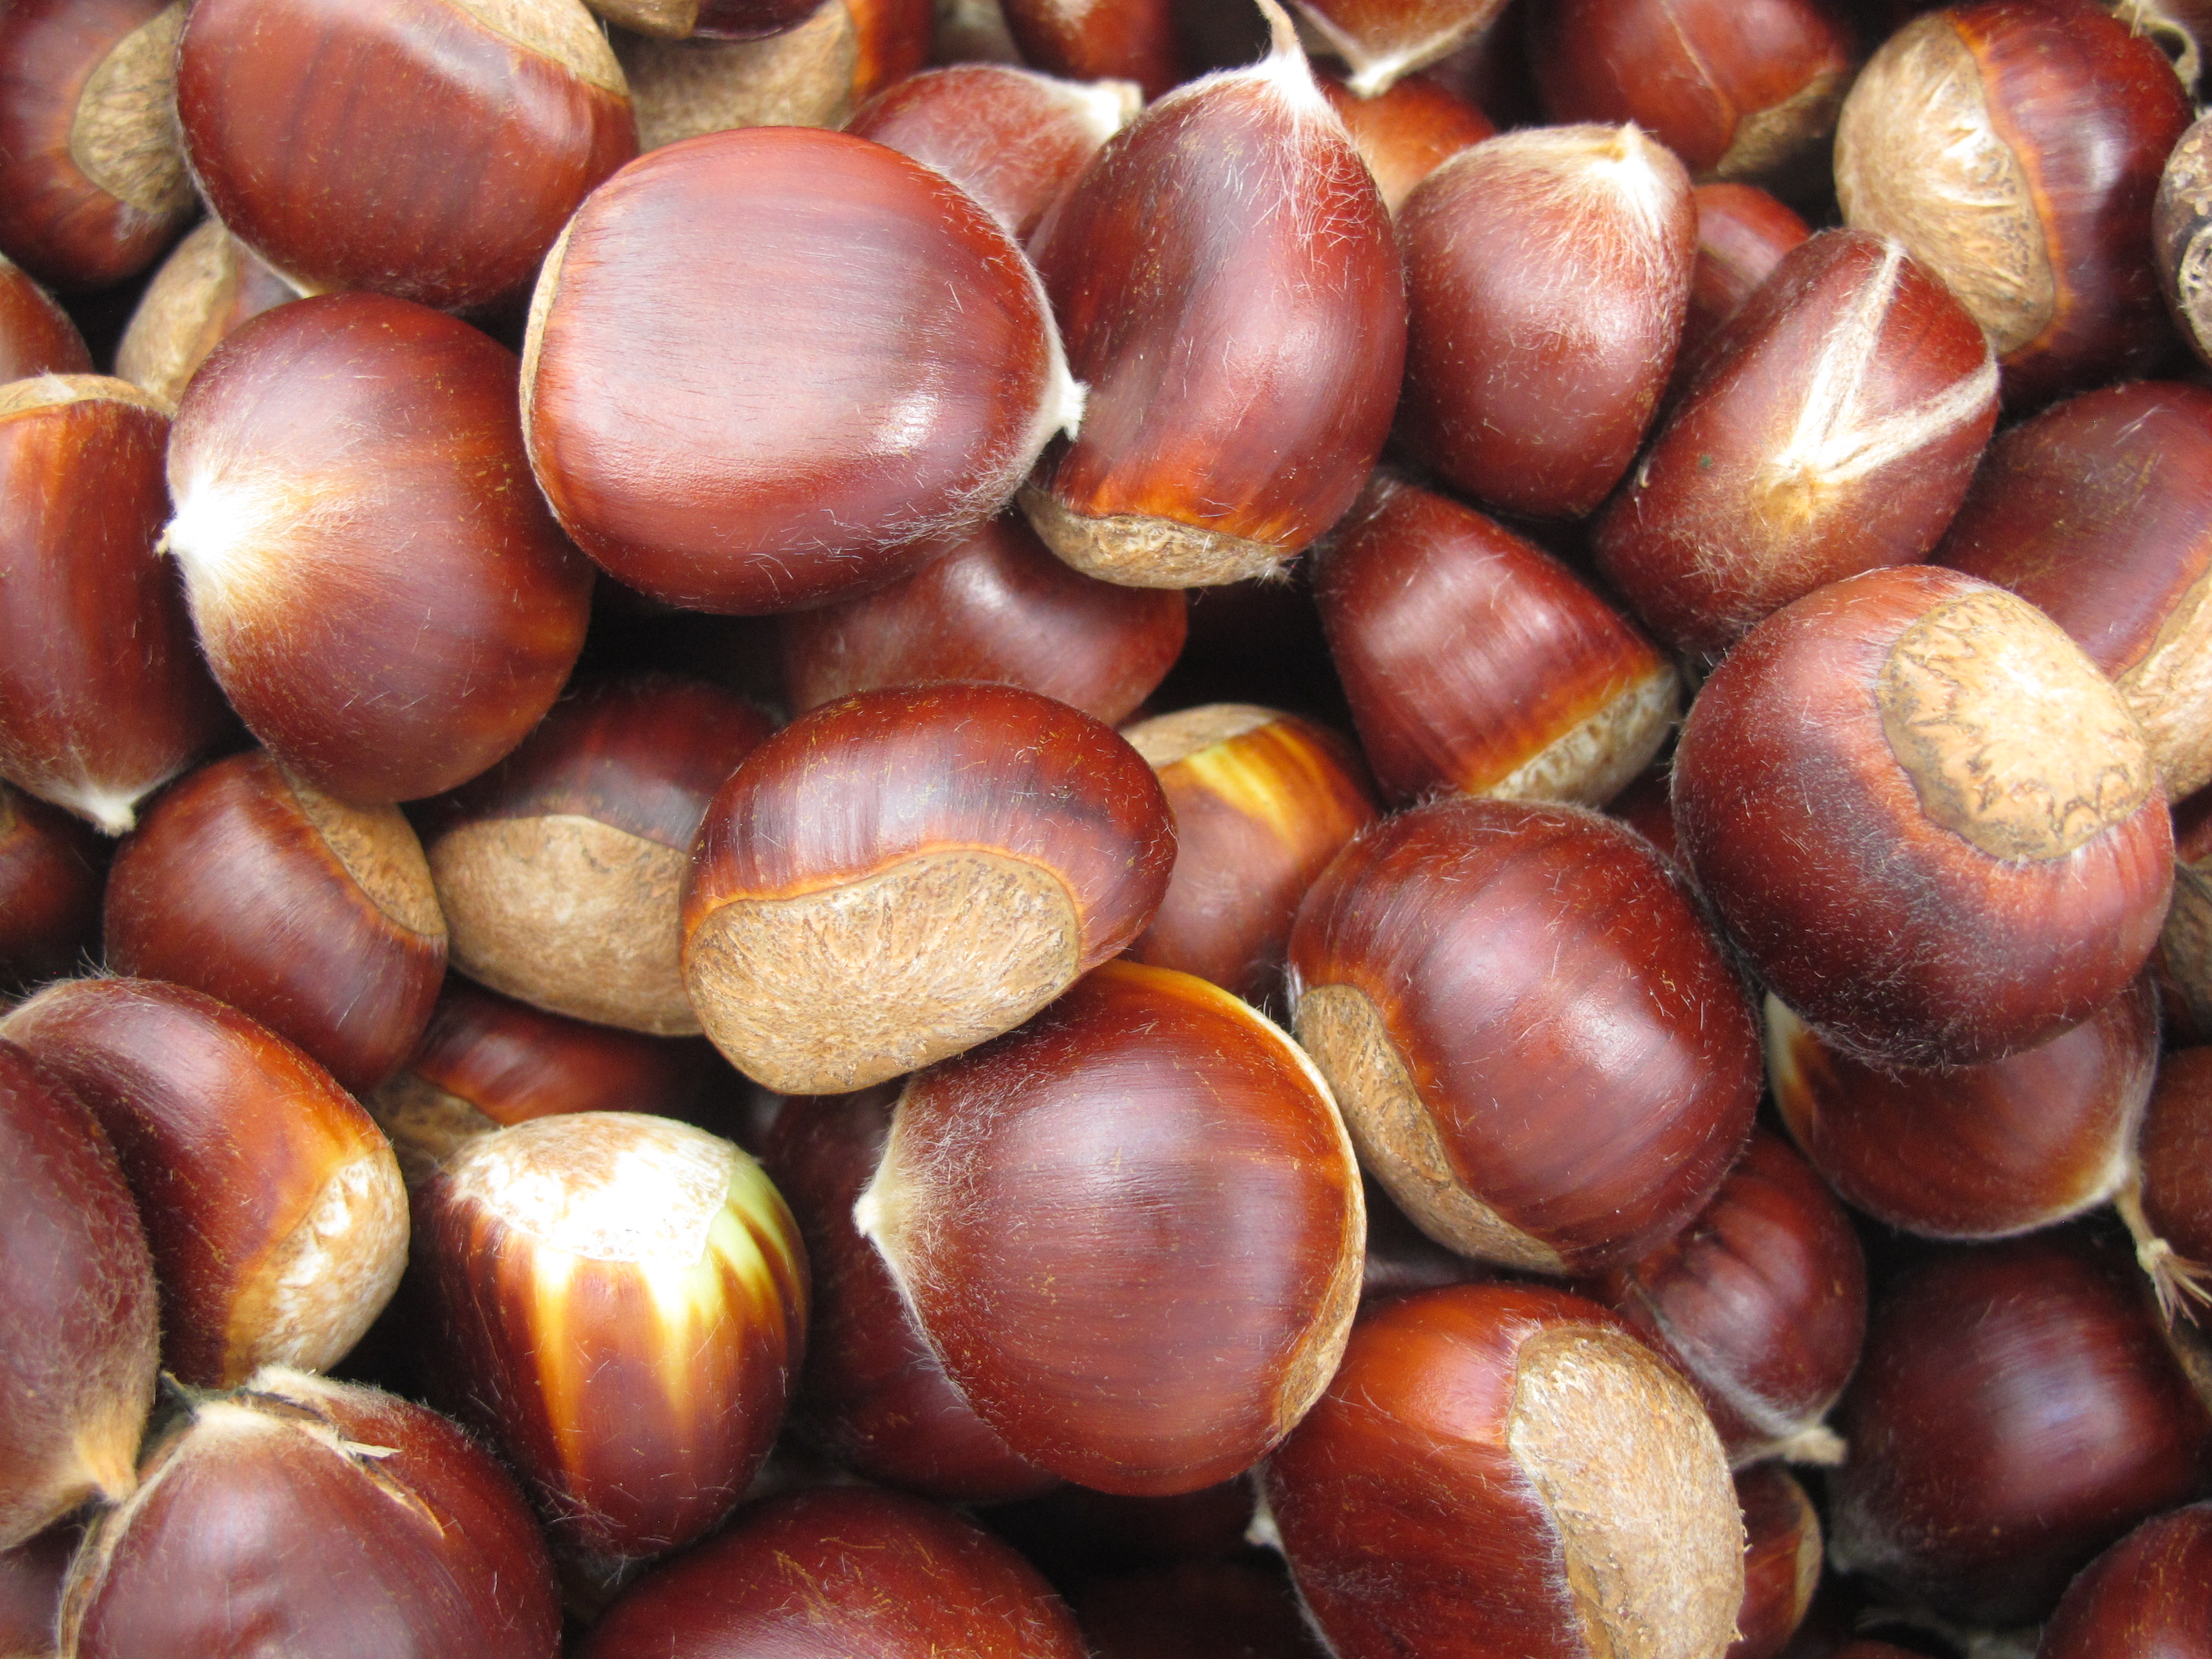
With a neutral, buttery flavor, the chestnut is very versatile in cooking. It can be dried and made into chestnut flour, cooked and pureed into a creamy soup. For me, I can’t do Thanksgiving, Chanukkah or Christmas without preparing simple, but classic roasted chestnuts. These delicious morsels can be savored steaming, right out of the pan or integrated into Thanksgiving’s stuffing.
Roasted chestnuts are a quintessential holiday dish (cue Nat King Cole) and is an easy appetizer that even the kids will enjoy. I like to roast the chestnuts in a heavy iron skillet on the stovetop (first score a slit with a sharp knife in the bottom of the shell to allow the moisture to escape). Once roasted, they can be easily peeled and enjoyed warm from the shell.
With an abundance of gratitude, other wild foods that will find their place on my holiday table — nettles, serviceberries, acorns, autumn olive, wild apples, linden cocktail syrups and the needles of conifers to flavor my roasted meats. What foraged flavors will be on your table this season?


